Build Your Own
Retro Calculator
Calculator using Pic16f877 microcontroller
Calculator with Pic 16f877 microcontroller is a comprehensive project. Comprehensive in the way that Code is lengthy and logical. It covers all the aspects of programming and interfacing of 16x2 lcd and 4x4 keypad with pic Microcontrollers. So you should be good in programming, if you are going to look at the code and you should also be in good know how about how to interface 16x2 lcd and 4x4 keypad with microcontrollers.
Calculator is a 2-Digit calculator. Four functions Addition, Subtraction, Multiplication and Division(+,-,/,*) can be perfomed on single digit numbers using this calculator. User Inputs the numbers using 4x4 keypad. Result is displayed on the 16x2 lcd.
When you turn on the system. A message will be displayed on the lcd "Enter First No = ". You enter the number. Then a second message will be displayed asking you to "Enter Operator = ". You entered the operator. Then a third message will prompt up saying "Enter Second No= ". You entered the second number. As soon as you entered the second number. Fourth message will be displayed on lcd showing result of you inputs.
Project Requirements
- Pic 16f877 Microcontroller
- 16x2 lcd
- 4x4 keypad
- Crystal 20MHz
- Potentiometer (For setting Lcd Contrast)
- Bread board or PCB for Circuit Designing
- Power Supply
Lcd data pins are connected to Port-B of PIC 16f877 Microcontroller. Lcd Controlling pins RS(Register Select) and EN(Enable) are connecte to Port-D Pin# 6 & 7. Keypad is interfaced with Port-C of Microcontroller. Rows of Keypad are connected to Lower Nibble of Port-C. Coloumbs are connected to upper Nibble of Port-C. Apply 5 volts at VDD & VCC Pins of microcontroller and lcd. Ground VSS Pins of microcontroller and Lcd. Crystal is connected to Pin# 13 & 14 of PIC 16f877 microcontroller. Circuit Diagram of the project is given below.
Code portion is little bit difficult. But if you are familiar with syntax of C++ Language and did some good work in c++ then the code below is easy for you to understand and to modify. First htc.h header file is included in the project. This header file must be included in every project that is using HIGH-TECH C compiler for compiling the code. Since i am using HIGH-TECH C compiler so i included it. Then the statement _XTAL_FREQ 20e6 is defining our Crystal frequency. Which is 20MHz. Next i defined Port-C & D Pins for lcd and keypad. Each port pin is also given a meaning-ful name. After that some functions are defined. Then some strings are defined. These strings are displyed on lcd. They ask the user for input and show results.
Functions
void main()
Main Function the heart of the software. Main function executes first. All other functions executes after it.
void lcdcmd (unsigned char)
This function sends commands and controls lcds registers to execute the command properly.
void lcddata (unsigned char)
This function sends data to lcd and controls lcds registers to display data on lcd.
void disp_num(float num)
This function displays calculated value on lcd efficently.
int get_num (char ch)
This function converts character value to integer.
void lcdinit ()
This function initializes the lcd. 16x2 lcd, Font-size 7x5, Cursor Blinking.
char scan_key(void)
This functions checks which keypad key is pressed by the user.
| |

 Build Your Own Floating Point LCD/VFD Handheld Calculator

 Introduction In last month's article I explained how to build a basic LED fixed-point calculator. This month I will expand upon the basic four function fixed-point design, upgrading the calculator to include an alpha-numeric LCD or VFD display, floating-point decimal feature and a nice smooth surface tactile keyboard. Adding decimal functions makes the calculator much more useful and allows for the addition of more advanced math functions. However, adding the decimal is no simple task, at least not in the software. The upgrade to the LCD/VFD display module greatly simplifies the display section and makes it so that the entire project can be easily fit into a small handheld form. By using surface-mount components the design can also be miniaturized. To keep the project from becoming too difficult for the beginner experimenter, I have built the project around a PCB a bit over 3" x 5" in size, but the overall design can be reduced to a much smaller footprint with a bit of re-drafting of the PCB. Since the size of the calculator has been drastically reduced, it would make sense to build this model portable and battery-powered. But since most PIC microcontrollers as well as LCD and VFD display modules operate at 5 volts, this poses a problem with batteries. It is easy enough to get 5 volts from four size "AAA" batteries by simply connecting them to the circuit through a series diode to drop the voltage by 1 volt or so, but then you would have to provide for the space for four batteries. This problem has been solved by using a step-up regulator. With the step-up regulator the entire calculator can be powered from a single "AAA" cell. This project provides for using two "AAA" cells for longevity but you could use only one.
 Engineering a Floating-Point Calculator
 Last month I discussed how to design the basic four-function calculator. The only differences in the engineering design between this month's project and last month's project are the upgrades to the display, math functions and power source.
 LCD and VFD Display Modules Although this month's project was originally designed around an LCD display module, there are other types of display modules that will work in place of the LCD. One type of module that makes an excellent display for a calculator is a VFD or "Vacuum Fluorescent Display." VFD modules communicate with the microcontroller exactly the same way as do the LCD modules so there is no software difference. The advantage VFD has over LCD is viewing angle and legibility in dark environments. The bright white-blue display can also be filtered to appear just about any color you wish using a colored piece of filter plastic (you can use theactrical lighting "gel" strips as an inexpensive filter to color VFD displays).
Display Modules. On the left, a typical LCD module. On the right, a typical VFD module.
Most LCD display modules are transflective, meaning that they require an external light source shining on them in order to read the display. There are some however that are "transmissive", which require a "backlight". Others are a mixture of both, where you can use a backlight when it is dark and use ambient light when available. This project does not provide for powering a backlit display but if the display you choose is LED backlit then you can pick up the 3v you need for the LED backlight from the 3v source on the PC board using two short jumper wires.
VFD displays are already lit up, so there is no need for backlight. But VFD displays cannot operate without a high voltage source (the high voltage in this case is only 60 volts or so, depending on the display size). Again, most VFD displays have a small "inverter" built-on to the control PCB so you do not need to provide this voltage; the display "creates" it's own from the 5 volt supply. But beware, there are some that require external sourcing of the display voltage as well as the 1.5v filament voltage. If you choose to use a VFD module, be sure it has all of the power supplies built-in. This will save you a lot of frustration in the end.
 Building the Floating-Point Calculator Fig. 1 shows a block diagram of the Floating-Point Calculator. Just like the LED version, all functions are performed by the microcontroller. Last month's LED calculator used a PIC16C62A and could add, subtract, multiply and divide in FIXED POINT. The addition of the decimal point requires a device with more memory so this time a PIC16C63A is used. (You can also use a FLASH PIC like the PIC16F878).
Fig. 1 -- LCD Floating-Point Calculator Block Diagram
Click Image to Enlarge
Making your own PC board can be fun and can save you a lot of money. But it will take time. By experimenter's standards, this is a small board -- not too difficult to manage. Since this project uses surface-mount components for the main items, there are not that many holes to drill(including via holes), most of them are .031" in size (that's thirty-one THOUSANDTHS). Many of these holes are occupied by part leads that must be soldered on both sides because there is no practical way to do the thru-hole plating in a home-brew environment. So be prepared to spend some time on the project and stay away from anything that will give you the "jitters" (like too much coffee...).
The board layout files are part of the Project Package, which includes all of the PC board layouts in both Gerber file format and in EasyTrax format. I highly recommend that you read about and then install EasyTrax before you begin construction. Having EasyTrax on your shop PC will greatly aid you in locating components, tracking down traces and of course, modifying the layout in the event you wish to make changes to the design.
You will also need an inkjet or laser printer to print out the PC board graphic files. The files can be printed directly from EasyPLOT (part of EasyTrax) or as Gerber files using GCPrevue. The Ever-Muse PC board material is very forgiving -- so much so you'll forget it is a form of photography! But the better your PC board artwork is to start with the better the outcome of the board will be. You can also print out two copies of each side of the layout and carefully overlap them to darken the artwork. If you do this, be careful to align each layer as exact as possible and add an additional 5 seconds (30 seconds if you use a regular fluorescent lamp) to the exposure time.
All components used in this project except for ONE are available from Mouser Electronics. You can also purchase some of the parts at Radio Shack, Jameco Electronics, Newark Electronics, or Circuit Specialists. If purchased new, the total cost of this project will be less than $35 at the time this article is published. You can save some money by using parts purchased from surplus dealers and by salvaging parts from your parts junk box. In any event, the entire project is well affordable for most experimenters and students.
This project is presented to you by Lupine Systems for educational purposes only and is not intended to be used as a base design for manufacture, and is not intended to implicate a complete and total solution suitable for all needs. All designs remain property of Lupine Systems at all times. Although this is an experimenter's project capable of producing excellent results, there remains room for improvements. This project is basic and provides all of the systems necessary to perform the desired task but is left open for you, the experimenter, to modify it to your own personal needs. Feel free to experiment with display types, keyboard types and review the processor source code. Enjoy the project, and learn how microcontrollers and microprocessors do math in the process.
 How It Works
Fig. 2 shows the Schematic Diagram for the Floating-Point LCD Calculator. All math functions along with keyboard scan is handled by the single PIC microcontroller. A 12MHz 3-pin ceramic resonator is used as the PIC clock source and does not require external capacitors. Display functions are handled in their entirety by the LCD display module using the Hitachi 44780 LCD controller chip. 5 volts is obtained from the two 1.5v "AAA" cells by using an up-converter. The MAX856 is such an up-converter. 3 volts is applied to the MAX856 chip, which uses "Buck" conversion technique to pulsing coil L1 at a high frequency. The flyback from the magnetic rise/fall across the inductor is captured and rectified by fast-recovery Schottky diode D8 and stored in capacitor C2. Capacitor C1 acts as a current "pump" making sure enough current is available to the Buck converter to produce a useful output. You may use any Schottky diode in place of D8. If you do not have a Schottky diode you can use most fast-recovery diodes, but you cannot use a regular rectifier like a 1N4001. Standard rectifiers do not have a fast enough recovery time to process the high frequency flyback from the Buck conversion and therefore no up-conversion will take place. If the calculator does not function once built and the power supply output measures 3v or so, then diode D8 is most likely the culprit.

Fig. 2 -- Floating-Point Calculator Schematic Diagram
Click Image to Enlarge
 Assembling the Floating-Point Calculator
Since this project uses surface-mount components, assembly on perforated or pad-per-hole board is not recommended. Begin assembly by installing all of the vias first. Be sure to identify ONLY the via holes and not component holes! Insert a short piece of AWG#24 wire through each via hole and solder on the TOP layer first, then flip the board and solder on the BOTTOM layer. Trim only after soldering BOTH SIDES.
 Basic LCD Floating-Point Calculator PC Board Parts Placement Diagram
Click Image to Enlarge
After installing the vias, begin by installing the 28 surface-mount tactile switches. To align the switches so that they are perfectly in a row, use a metal ruler or metal straight edge. Align the edge along the bottom edge of the bottom row of pads for each row of switches. Once aligned, tape the straight edge in place using masking tape. Then when you place the switch on the pads, work it into alignment using the straight edge as a guide for the lower legs of the switch, then solder one of the upper legs in place. Do this for each switch in the row. Then come back and solder the remaining upper leg. Finally, remove the straight edge and solder both legs on the bottom row. Repeat for each of the remaining three rows.
Next, install the two surface-mount chips. Begin by installing the tiny 8-pin MAX856 chip. Be extremely careful soldering this chip in place! Once the MAX856 is soldered in place, install the PIC16C63A (be sure to program this chip first because the project does not provide connections for In-Circuit Programming!). Again, use extreme caution when soldering this chip in place! Be sure not to overheat these chips when soldering! Solder ONE side at a time, let it cool off, then come back and solder the other side. Once soldered in place, triple check your work to be sure there are no shorts or pins that did not solder well. Touch up all errors before continuing.
Install the .1uF capacitor C1 and all five 1K resistors R1-R5. All of the passive components are formed on .300" forms. Trim excess lead wires close to the board.
Install the seven 1N914 diodes. Observe polarity. Next, install the 12MHz ceramic resonator X1. Be sure to trim any excess lead wires.
Install the two 100uF 16v low-profile capacitors C2 and C3. Observe polarity! Next, install the 47uH coil L1 (this coil looks like a 1/4 watt resistor and has the exact same color codes so be careful not to confuse it with a 47-ohm resistor!!!). You can use either set of mounting holes, whichever fits your coil.
Install the Schottky diode D8. Be sure to observe polarity!
Install the 5K trimmer potentiometer. Trim any excess lead lengths.
Install the DPDT power switch. Mount this switch so that only enough of the solder tabs poke through the PCB to solder them in place. This maximizes the height of the switch, which will be advantageous later on.
Install the 14-pin MALE Molex Series KK .100" header in place of DISPLAY on the main PCB. Then solder the 14-pin FEMALE Series KK .100" header to the LCD or VFD display module.
You may choose which type of RESET circuit you wish to use.
The inexpensive way is to use an R/C reset. The better way is to use a "RESET" device. The PCB is laid out for either/or but NOT both at the same time!
If you choose to use the R/C method, install a 1K resistor in place of R6 and a 100uF 16v low-profile capacitor in place of C4.
If you choose to use a "reset device", install the 3-pin reset chip at U3.
Install a double-"AAA" cell battery holder just above the Molex header and solder the RED (+) wire to the bottom most pad to the left side of the holder and the BLACK (-) wire to the upper pad. You can mount the holder to the PCB using double-sided mounting tape or you can drill two small mounting holes in the PCB and use two #2x52 x 1/4" screws.
Install four #2x52 x 1" screws in the display module mounting holes from the BACK (SOLDER) side of the PCB and secure them to the PCB using nuts and washers. Thread an extra nut on each screw approx. 1/4" down each screw. Make sure these extra nuts are even between the four screws (same height from PCB).
Mount the LCD/VFD display module on the four #2x52 screws. Align the Molex headers together as you mount the display so that the male plugs into the female properly. You may have to slightly "bend" the pins if you accidently mount the female header "backwards" on the display module. This is OK but don't bend too hard or you may damage the traces on the PCB.
Fasten the display module in place using four #2x52 screws and washers.
The electronics part of the calculator is now assembled and is ready for testing.
Switch ON the calculator. You should see "Lupine Systems" on the first line, and "0" on the second line. If you do not see this display, or the display appears really dark or all of the digits are "black", then adjust the 5K trimmer potentiometer. This adjustment sets the display contrast. If you still do not get a display, check the voltage across capacitor C2. It should read 5.0 to 5.1 volts. If you do not have any power at all, recheck the batteries to be sure they are good and be sure coil L1 is not open or that you have any open traces on the PCB. If you read 3v, then the most likely problem is diode D8. The diode MUST be a FAST RECOVERY or Schottky diode. A regular 1N4001 will NOT work!
Floating-Point LCD/VFD Calculator
| Designator | Quantity | Description | Vendor | Part Number |
| C1 | 1 | .1uF (104) Axial Conformal Capacitor | Mouser | 80-C410C104M5U |
| C2,C3 (C4) | 2 (3) | 100uF 16v 6mm Capacitor (see text) | Mouser | 140-L10V100-RC |
| R1-R5 (R6) | 6 (7) | 1K Ohms 1/8 Watt Metal Film Resistor (see text) | Mouser | 299-1K-RC |
| R7 | 1 | 5K Ohms Trim Potentiometer | Mouser | 652-3306P-1-502 |
| D1-D7 | 7 | 1N914 Switching Diode | Mouser | 610-1N914 |
| D8 | 1 | Schottky Diode 1N5817 | Mouser | 621-1N5817 |
| L1 | 1 | 47uH Coil | Mouser | 434-23-470J |
| X1 | 1 | 12MHz Ceramic Resonator | Mouser | 520-ZTT1200MT |
| U1 | 1 | PIC16C63A Microcontroller (see text) | Mouser | 579-PIC16C63A-10/P |
| U2 | 1 | MAX856 3.3v/5v Up-Converter IC | Newark | 67K6793 |
| U3 | 1 | MCP130-450DI/TO Reset Chip (see text) | Mouser | 579-MCP130-450DI/TO |
| U4 | 1 | 2-Line x 16 Character LCD Module | Mouser | HDM16216H-B-S00S |
| J1-A | 2 | 14-Pin Molex Series KK .100" Header MALE Use (2) 7-Pin Headers | Mouser | 538-2203-2071 |
| J1-B | 2 | 14-Pin Molex Series KK .100" Header FEMALE Use (2) 7-Pin Headers | Mouser | 538-22-02-2075 |
| S1 | 1 | Slide Switch, DPDT | Mouser | 629-GF1263011 |
| S2-S29 | 28 | Tactile Data Entry Key | Mouser | 101-0164-EV |
| -- | 4 | Screw, #2x52 1" | -- | -- |
| -- | 8 | Screw, #6x32 1" | -- | -- |
| -- | 12 | Nut, #2x52 Hex | -- | -- |
| -- | 2 | Nut, #6x32 Hex | -- | -- |
| -- | 8 | Washer, #2x52, 1/4" | -- | -- |
| -- | 4 | Washer, #6x32 Hole Size, 3/16" | -- | -- |
| -- | 4 | Standoff, #6x32, 1/4" | -- | -- |
| -- | 1 | Bare PC Board (See Text) | Lupine Systems | 22-904-6B |
The panel overlay assembly is held to the main PCB using #6x32 screws. Two of these screws will attach with nuts and two will thread into 1/4" standoffs. #6x32 screws are extremely common, so about any #6x32 screw that you can cut to length using a screw cutter (usually there is a screw cutter as part of a terminal crimping tool).
First print out the overlay on a sheet of Avery Sticker paper using EasyTrax or GCPrevue. There are two copies of the sticker in the draft. One will be used as the actual overlay. The other one will be used as a "guide" to tool the plastic riser piece.
Cut the two overlay prints apart along the marked cutting line. Set one overlay aside for now.
Carefully remove the starting edge of the backing paper on one sheet of Avery Self-Adhesive Laminating film. Apply the laminating film to the overlay starting BELOW the area where the starting edge piece was peeled off. If you use the area of the laminating sheet where the starter backing paper was peeled off, there will be a hideous "line" across the overlay and will degrade the appearance. Use only enough of the laminating film to cover the overlay. Cut the excess off along the same cutting line as you used to cut out the overlay. Once you have completed laminating the overlay, place this piece to the side for now.
In this step you will tool out the riser piece of the keyboard overlay. You will need a Dremel tool and a sharp miniature rasp file, some #100 grit sandpaper on a block of wood or sanding block, a sabre saw (jigsaw), band saw or reciprocating saw -- AND a lot of patience. This is a SKILL THING so be CAREFUL using power tools and TAKE YOUR TIME. If you break the plastic during this step you will have to start all over again.
Begin tooling the plastic by first sticking the remaining overlay printed out in the first step on the plastic surface. If the plastic sheet you are using has a protective paper coating, leave this paper in place. It will help prevent the plastic from shattering during tooling.
Using a sabre saw, band saw or reciprocating saw, cut the plastic along the outer edge of the draft as shown. Unless you are an expert at using these tools, it is a good practice to cut a bit outside the line, then use a piece of #100 sandpaper on a sanding block to slowly hone the edge down to the line. When complete, the plastic rectangle will be 2.35" x 3.75".
Next, drill the four corner holes in the plastic as marked. Drill these holes 1/8" but no larger than 5/32". Take caution if you are using acrylic plastic--drilling is the easiest way to shatter the plastic so be slow and if possible use a drill press.
Drill a hole in the center of the plastic, straight through the center of where the keyboard should be. Drill out the hole back and forth large enough to fit the blade of a sabre saw through. Then using a sabre saw, carefully cut out the inside of the keyboard area along the inside marks. Use of a fine-toothed blade helps trememdously (a "metal-cutting" blade works best). Smooth out the cut using a small rasp file. This cut is not critical but it needs to be within one blade's width of the cutting line for best performance.
Clean off the plastic and remove all paper items including the overlay sticker, protective papers or tape you may have placed on the overlay during tooling. Thoroughly clean the plastic with Windex and avoid touching the surface with your fingers afterwards.
Finally, carefully remove the backing paper from the laminated overlay you did earlier. Now center up the overlay on the plastic riser. Use the drill holes and edge guide to help align the overlay exactly to the edge with the plastic. Next, use a small screwdriver to punch out the drill holes from the front side to the back side.
Carefully wrap the overlay around the edges of the riser and adhese to the underside of the plastic. Use a razor knife to trim off any excess that extends into the keyboard area. Use angle cuts at the corners to remove any overlay that overlaps other parts you have folded under. Punch out the drill holes once again, this time from back to front using a small screwdriver.
The areas of this overlay that you wrapped around may peel up slightly. This is OK because you can stick it back in place before you mount it to the PCB.
Cut a piece of Avery Self-Adhesive Laminating film to the size of the key area (the inside of the overlay area). Peel off the protective backing and adhese this film to the UNDERSIDE of the keyboard area. You will be sticking GLUE TO GLUE in this step so be careful!
Mount the keyboard overlay assembly to the PCB using four #6x32 screws, two nuts and two 1/4" standoffs. Cut the screws to 7/16" in length (this is not accurate but if you get the screws too long they will extend into the standoffs too far and prevent the bottom mounting screws from threading into the standoff). Place a #6-32 3/16" washer on each screw and carefully push each screw through the overlay mounting holes. When pushing the screws through, be careful not to disturb the wrap-around part of the overlay.
Center up the overlay with the overlay mounting holes and install the overlay onto the PCB. Use the two #6x32 nuts to fasten the top two screws and two #6x32 x 1/4" standoffs for the bottom two.
Hint: When tightening these screws, use a Philips screwdriver to hold the screw head. Then use a pair of pliers to tighten the nut from the SOLDER SIDE of the PCB. Do NOT "screw" the screw into the nut. Doing so will grab the plastic sticker on the overlay and twist it, destroying it in the process.
Now the keyboard is complete and should resemble the prototype photograph below.
 Closeup of Keyboard Overlay Assembly
Complete the calculator assembly by first installing two #6x32 1/4" standoffs at the two remaining mounting holes at the top of the PCB (above the display and to the right an left of the battery pack). Then cut a piece of material to use as the "back" of the calculator. You can use a piece of PCB material, or you can use a piece of plastic just like you used to make the keyboard riser piece. Drill the four corner mounting holes in the exact same places on the back piece as are on the PCB. Then mount the back piece to the calculator using four #6-32 screws. You may have to cut these screws shorter so they do not thread into the standoffs so far as to bottom-out against the screws used to hold the standoffs to the main PCB.
The final step is to install two size "AAA" cells in the battery holder. The calculator is now complete and ready for use!
 Using the Floating-Point Calculator
 Floating-point arithmetic is much more complex in software than fixed-point, therefore, the software has limitations when it comes to certain functions. Addition, subtraction and multiplication are fairly straightforward and have no accuracy issues. But division is a whole 'nother ball game. Since this project was designed to be an introduction to microcontroller arithmetic, I have chosen to limit the accuracy of the division routine to three cycles of 8-digit division. (There will be much more on this and how to add more cycles to the division routine in the section to follow, "Software for the Floating-Point Calculator"). Although the division routine is limited, it will divide two floating-point numbers accurately each and every time. The limitation is realized in the decimal and how many places the machine will calculate the quotient out to. For most calculations, the machine will carry out the entire display, but there are a few instances where the final answer has not been fully computed. This is because of the limited number of division cycles performed, and if you wish to improve accuracy, it is possible to have the machine perform as many division cycles as necessary to give the accuracy you desire. But for most human beings, accuracy to at least 5 decimal places is more than adequate and in most cases you'll actually get all of the available decimal places. So don't sweat it too much unless you plan to use this project to calculate the circumference of the universe! I still think that by this time in history most people already know how to use a calculator, so I will only provide a quick overview of each key and its function. (actually the first part is the same as this section for the LED Fixed-Point Calculator).
- 15 + (25% of 15) = 18.75 --> (1) (5) (+) (2) (5) (%) (=) --> 18.75
- 45% of 93 --> (9) (3) (x<>y) (4) (5) (%) [no equals required]
Adds a cumulative sum to the caculator's memory (Epsilon +). Each time (M+) is pressed the number on the display is added to memory. The MEAN counter is incremented each time this key is pressed. The display (X) and the (Y) register remain unchanged.
Format: Add 29.3 to Memory --> [Display]29.3 (M+) --> [Memory + 29.3]
Displays the value currently saved in memory on the display. The (Y) register remains unchanged.
Format: (MR) --> [Memory Value] --> [Display]
Clears the memory. Also resets the MEAN counter.
Format: (MC) --> [Memory] = 0
Calculates the statistical MEAN of the numbers entered into memory and places the answer in the display and (X). Up to 255 entries can be made. This key has no affect on the (Y) register.
Format: Enter each number you wish to average, or you can use the result of a calculation. Press (M+) after each entry. Once all numbers have been entered, press (MEAN). The statistical MEAN will be displayed.
Displays the number of entries into memory that have been made. This is the number that will be used as the divisor during the MEAN calculation. Cleared by pressing the (MC) key. The (Y) register remains unchanged.
Format: (DMC) --> [Mean Counter] --> [Display] and (X)
The display represents the (X) register and is 8 digits long, or 9 spaces long if the decimal point display is included, and occupies the right-most spaces on the display module. To the left of the main display area, the SIGN display (-) shows for negative numbers. This area can also display "ERROR" in the event of overflow, underflow or division by zero. An "M" will appear in the display when viewing the fractional modulus value of the division operation.
 There's More to Come! Since most math functions are derivatives of the basic four functions, just about any math function can be added to the calculator. This project leaves one PIC port unused (PORTA,0), and this port could be used to add another row or column to the keyboard. One more row would give you an additional 7 keys, or one more column would give you an additional 4 keys. You could also re-assign one of the current keys on the keyboard to be a "2nd" function key and "re-use" the existing keys to add more functions. Much like the x2 function, advanced math functions can easily be added. You can also add features such as "English-to-Metric/Metric-to-English" conversions, d-m-s to decimal degree conversion, LOG, xy, and many others. The only restriction you will have is lower memory allocation (more on this in the next section on software) and RAM. Use of a larger PIC would greatly facilitate the addition of these features. Also, you could port the code from PIC16xxx code to PIC17xxx or PIC18xxx code and use a MUCH MORE POWERFUL and FASTER processor with HUGE amounts of RAM and ROM. Running this code on an 18F4582 at 40MHz would allow for the creation of a full-blown scientific calculator with 20-digit display and three-digit exponent (capable of working with numbers as large as [449!], with USB support and capable of graphing three-dimentional space and plotting those graphs by driving a color laser or inkjet printer directly! In the next section I will discuss the PIC microcontroller software that makes this calculator work. I will go in to detail and give lengthy explinations on the processes necessary to complete each operation. I will outline the registers used, RAM and ROM allocation, processor loads and the time it takes to complete each operation. This section is VERY VERY VERY LONG and detailed but for those who have never done math with a microprocessor it will be a dive into code that will remain with you for a lifetime.
Now you know. Experimenters classically write code that manipulates displays one at a time. So the math routines used in this project manupulate the numbers ONE AT A TIME, making the routines useable in many projects without having to do binary/hex or pack/unpack conversions.
I know this is the long way around this ride but necessary to facilitate easy integration into other projects, designs or concepts. Personally I know of many projects I've passed up because of one reason or another, and one of those reasons has been the lack of the ability to calculate basic numbers. Well, now YOU don't have to pass up any of these projects because you will soon know how this is done!
If you are clever, you "could" pack the digits, compress the code some and save some RAM...but that would take a lot of time...!! X . II
Build an Advanced Floating-Point Nixie Tube
Desk Calculator


Introduction
we explained how to build a basic LCD floating-point pocket calculator. The most important addition to the calculator software has been square roots. Square roots are difficult to do using a microcontroller but once I got into the code I found it to be not as complex as once I thought it to be. Although the 8-digit floating-point square rooter would be too slow for use in complex embedded-control applications, it works very well for the calculator application, being able to find a square root of about any number in less than 250ms! Also the use of Nixie tubes makes this version old-fashioned in appearance as well as easy to read. Although the Nixie tubes are difficult to work with the appearance makes it worthwhile.
THINK SAFETY! and always wear your SAFETY GLASSES!
| Putting It All Together | Testing for the First Time | User Guide |
 Engineering a Nixie Tube Desk Calculator Last month I discussed how to design the basic floating-point calculator using a simple LCD display module which made the display portion of the project quick, easy and inexpensive. But this month, the display type chosen are Nixie display tubes which are much more difficult to work with. First off, Nixie tubes use HIGH VOLTAGE (about 180v DC) and are much more cumbersome to handle and install. An array of data latches along with high voltage drivers are required for each tube. Thus a PC board with considerable size is necessary to house all of the display support components. Also, a high voltage power supply is necessary and to maintain smooth brightness a voltage regulator capable of regulating +180v DC is necessary. Why not just multiplex the display and do away with all of those drivers? This is a legitimate argument. Although some of the old calculators, such as the Facit 1123 used a multiplexed scheme to reduce components, multiplexing the display requires a display update routine in the processor that "scans" the displays rapidly, resulting in a readout that appears to be all ON at once. This scanning works extremely well with LEDs and VFD displays but with Nixie tubes the scan has to be just right or the tubes won't always light up well. Although it was commonly pulled-off in the old days, I chose not to use multiplexing because...
 Nixie Tube Displays This month's calculator project uses Nixie display tubes. The tubes used are similar to those used on the Lupine Systems project, Nixie Tube Clock. Since these tubes are somewhat difficult to obtain, Russian tubes, left over from the former Soviet Union were chosen. These tubes are in abondance and easy to get from a number of sellers on Ebay.
Nixie Tube Display. Motion graphic shows the appearance of each of the 10 separate digit segments.

IN-16 "Soviet" Russian Display Tube
 Building the Nixie Tube Advanced Floating-Point Desk Calculator Fig. 1 shows a block diagram of the Nixie Tube Advanced Floating-Point Desk Calculator. Just like previous versions, all functions are performed by the microcontroller. Last month's LCD calculator used a PIC16C63A or PIC16F73 and could add, subtract, multiply and divide in FLOATING-POINT. The addition of the decimal point required the use of a device with more memory so a PIC16C63A or PIC16F73 was used.
Fig. 1
Nixie Tube Advanced Floating-Point Desk Calculator Block Diagram
Click Image to Enlarge
Due to complexity, this project has been broken up into three separate PC boards: (1) the Display Board; (2) the Power Supply Board; and (3) the I/O-CPU Board.
The Display Board is the largest of the three boards and forms the foundation for the other two boards to mount. The Power Supply board mounts to the rear and on top the Display Board and the I/O-CPU Board mounts in the front and has all of the keys and the PIC processor. The Nixie tubes are mounted in the center of the Display Board and poke up between the Power Supply and the I/O-CPU.
The Display Board is 10.5" x 11.5" in size and is double-sided. The other two boards, the Power Supply and the I/O-CPU are each 10.5" x 5.1" and are also double-sided.

Picture of Professionally Made Board Set for the Nixie Tube Calculator Project
From left to right: Power Supply Board, Display Board, I/O-CPU Board
Click Image to Enlarge
Note: IT IS HIGHLY RECOMMENDED TO PURCHASE THE PROFESSIONALLY MANUFACTURED PC BOARDS FOR THIS PROJECT! THE BOARDS USED ARE COMPLEX AND DIFFICULT TO MAKE ON YOUR OWN.
Making your own PC board can be fun and can save you a lot of money. But it will take time. By experimenter's standards, this is a HUGE board -- and very difficult to manage. Since this project has a large number of components on the Display Board, there are literally HUNDREDS of holes to drill(including via holes), most of them are .031" in size (that's thirty-one THOUSANDTHS). Many of these holes are occupied by part leads that must be soldered on both sides because there is no practical way to do the thru-hole plating in a home-brew environment. So if you dare to make the Display Board be prepared to spend some time on the project and stay away from anything that will give you the "jitters" (like too much coffee...).
Although it is recommended to purchase and use the professionally manufactured PC boards it will still be necessary to download the PC board layout files from the Lupine Systems Download site. You will need these layouts to help you locate and install the components and the software file to program the PIC microcontroller.
The board layout files are part of the Project Package, which includes all of the PC board layouts in Gerber file format Since this project was not drafted in EasyTrax the project does not offer EasyTrax format files.
Note: This project was drafted using AutoTrax, a more advanced version of EasyTrax. AutoTrax is very similar to EasyTrax but the PCB files are not compatable. If you are interested in the master AutoTrax files for this project, send an E-mail to WOOFY and he'll send you those files.
You will also need an inkjet or laser printer to print out the PC board graphic files. The files can be printed directly from the Gerber files using GCPrevue. The Ever-Muse PC board material is very forgiving -- so much so you'll forget it is a form of photography! But the better your PC board artwork is to start with the better the outcome of the board will be. You can also print out two copies of each side of the layout and carefully overlap them to darken the artwork. If you do this, be careful to align each layer as exact as possible and add an additional 5 seconds (30 seconds if you use a regular fluorescent lamp) to the exposure time.
Most of the components used in this project are available from Mouser Electronics. You can also purchase some of the parts at Radio Shack, Jameco Electronics, Newark Electronics, or Circuit Specialists. You can also find the Nixie Tubes on Ebay. You can save some money by using parts purchased from surplus dealers and by salvaging parts from your parts junk box. In any event, the entire project is well affordable for most experimenters and students.
This project is presented to you by Lupine Systems for educational purposes only and is not intended to be used as a base design for manufacture, and is not intended to implicate a complete and total solution suitable for all needs. All designs remain property of Lupine Systems at all times. Although this is an experimenter's project capable of producing excellent results, there remains room for improvements. This project is basic and provides all of the systems necessary to perform the desired task but is left open for you, the experimenter, to modify it to your own personal needs. Feel free to experiment with display types, keyboard types and review the processor source code. Enjoy the project, and learn how microcontrollers and microprocessors do math in the process.
 How It Works
Due to the complexity of the circuit, the Schematic Diagram is broken up into three sections. A detailed explination is provided for each board and subsection on each board.Power Supply Board Fig. 2 shows the Schematic Diagram for the Power Supply Board for the Nixie Tube Advanced Floating-Point Desk Calculator. 5 volts is obtained from transformer T2, bridge rectifier BR2, capacitors C49,C50 and C52, switching regulator chip U35 and toroid coil L1. This simple switching power supply is capable of delivering up to 2A of current to all of the logic devices. Transformer T1 acts as a mains isolation transformer with an input of 125v AC and an output of 125v AC. The isolated AC voltage is then rectified by bridge rectifier BR1. Capacitor C53 smooths out the AC ripple and in conjunction with the bridge acts as a single stage voltage multiplier. Resistor R183, a 100K 1W power resistor acts as a bleed-down current sink to discharge the capacitor when the power is turned off. The voltage that appears across capacitor C53 can be as high as 280 volts so it is CRITICAL that (1) you PAY CLOSE ATTENTION to this capacitor and be ABSOLUTELY SURE that it is installed properly, and (2) you KEEP YOUR HANDS AWAY FROM ANY PART OF THE CAPACITOR AND THE ASSOCIATED CIRCUITRY! This circuit produces LETHAL VOLTAGES so BE CAREFUL in and/or around this capacitor and the high voltage regulator circuit. The smoothed-out high voltage is regulated by transistor Q155. Transistors Q156 and Q157 are assembled as a feedback regulator providing the base bias for the pass regulator Q155. Rectifier diode D13 provides reverse current protection to the junction of the pass regulator transistor. Zener diode D14 sets a reference to transistor Q157 while potentiometer R187 is used to vary the reference thus adjusting the output voltage. The range of adjustment varies from +160v to over +230v. Proper adjustment is set for +180v +/- 4 volts.

Fig. 2
Nixie Tube Advanced Floating-Point Desk Calculator Power Supply Board Schematic Diagram
Click Image to Enlarge
Fig. 3 shows the Schematic Diagram for the I/O-CPU board for the Nixie Tube Advanced Floating-Point Desk Calculator. All keyboard scan functions are performed by the single PIC17C44 processor U32 as well as all math functions. Clock is provided by a 20MHz clock oscillator module U33. Clock can be as high as 33MHz (for PIC17C44-33 parts) but the higher clock does not produce a visually noticable improvement in performance when clocked over 20MHz. Supervisor device U31 issues the system RESET at power up and will generate a RESET condition if the +5v power source falters. Blocking diodes D1-D11 prevent key scan errors and resistor network RP1 pulls up the four keyboard row receive lines.
Data from the I/O-CPU board is sent to the Display Board via connector CN1. Data consists of three sets of signals. First the data containing the segment ON information appears on lines D0-D5. The address for the desired latch appears on lines A0-A3. Clock to latch the data is split into two signals G1 and G2 and are active on the HIGH to LOW edge transition.

Fig. 3
Nixie Tube Advanced Floating-Point Desk Calculator I/O-CPU Board Schematic Diagram
Click Image to Enlarge
Fig. 4 shows the Schematic Diagram for the Nixie Tube Advanced Floating-Point Desk Calculator Display Board. Data from the I/O-CPU board is latched by octal latch devices U1-U28 (in this project, chips U1,U2,U10,U11,U22,U23,U26,U27 and U28 are not used). Each data bit represents one segment; a logic "0" is OFF and a logic "1" is ON. Latches are broken up into two sets - the G1 set, or UPPER set, and the G2 set, or LOWER set. The G1 UPPER set uses chips U1-U9 and U24-U28 and the G2 LOWER set uses chips U10-U23. Latch selection is done by the two 74LS154 1-of-16 decoder chips U29 for the UPPER set and U30 for the LOWER set. Latch clock G1 latches data onto the UPPER set of latches and G2 latches data onto the LOWER set.
Once the data is latched, logic "1"s represent an "ON" segment. Data is then coupled to the base of an MPS-A42 transistor via a 1K base current limiting resistor. The high voltage driver transistor then switches ON or OFF the segments in each of the nine Russian IN-16 Nixie tubes. A 33K current limiting resistor is connected from the cathode of each tube to the +180v source to power each tube.
Symbols for the negative sign (-) and OVERFLOW/ERROR are derived from unused tube location V12. Standard NE-1A bulbs strategically placed make a nice (-) sign display and overflow indicator to the right of the display.

Fig. 4
Nixie Tube Advanced Floating-Point Desk Calculator Display Board Schematic Diagram
Click Image to Enlarge
 Assembling the Nixie Tube Advanced Floating-Point Desk Calculator
Since this project uses a complex driver scheme for the Nixie tubes and a critical high-voltage power supply, the use of perforated boards or pad-per-hole boards are NOT recommended. It is HIGHLY RECOMMENDED to use the professionally manufactured PC boards available for this project. More about this at the end of the article. Since each of the three boards can be a project of their own, a separate Parts List and Assembly Guide is provided for each of the three boards. Once all three boards have been assembled and the Power Supply Board has been tested, all three boards will be combined into a single unit. Final testing will be done before the hardware construction of the encasement begins.
 Fig. 5
Nixie Tube Advanced Floating-Point Desk Calculator Power Supply PC Board Parts Placement Diagram
Click Image to Enlarge
Advanced Nixie Tube Calculator
Power Supply Board
| Designator | Quantity | Description | Vendor | Part Number |
| BR1,BR2 | 2 | Bridge Rectifier, 1A 400V | Mouser | 833-RB154-BP |
| C49,C50 | 2 | 4700uF 25v Axial Aluminum Electrolytic Capacitor | Mouser | 140-XAL25V4700-RC |
| C51 | 1 | .0033uF Conformal Axial Capacitor | Mouser | 581-SA101C332KAR |
| C52 | 1 | 470uF 16v Axial Aluminum Electrolytic Capacitor | Mouser | 647-TVX1C471MAD |
| C53 | 1 | 330uF 400v Snap Radial Aluminum Electrolytic Capacitor | Mouser | 5985-381-400V330 |
| C54,C55 | 2 | .01uF 500v Ceramic Disc Capacitor | Mouser | 140-500P9-103K-RC |
| CN2 | 1 | 6-pin Molex Series KK .100" Fem Header | Mouser | 538-22-02-2265 |
| CN3 | 1 | AC Power Connector | Mouser | 161-0714-7-E |
| --- | 1 | AC Power Cord | Mouser | 562-312008-01 |
| D12 | 1 | Schottky Diode 1N5817 | Mouser | 512-1N5817 |
| D13 | 1 | 1N4004 Rectifier | Mouser | 512-1N4004 |
| D14 | 1 | NTE5054A 140v 1/2 Watt Zener Diode | Mouser | 526-NTE5054A |
| F1 | 1 | AGC 1/2 Fuse | Mouser | 504-AGC-1/2 |
| F2 | 1 | AGC 1 Fuse | Mouser | 504-AGC-1 |
| F3 | 1 | AGC 2 Fuse | Mouser | 504-AGC-2 |
| L1 | 1 | 33uH Toroid Coil | Jameco | 371080 |
| Q155 | 1 | 2N3584 NPN Power Transistor | Mouser | 610-2N3584 |
| Q156,Q157 | 2 | 2N3440 NPN Transistor | Mouser | 511-2N3440 |
| R183 | 1 | 100K Ohms 1 Watt Metal Film Resistor | Mouser | 594-5073NW100K0J |
| R184 | 1 | 390 Ohms 1/4W Resistor | Mouser | 291-390-RC |
| R185 | 1 | 22K 2W Metal Film Resistor | Mouser | 282-22K-RC |
| R186 | 1 | 1.2K 1/4W Resistor | Mouser | 291-1.2K-RC |
| R187 | 1 | 25K Trimmer Potentiometer | Mouser | 652-3306F-1-253 |
| R188 | 1 | 82K 1/2W Resistor | Mouser | 293-82K-RC |
| R189 | 1 | 8.2K 1/4W Resistor | Mouser | 291-8.2K-RC |
| R190 | 1 | 1 Ohm, 1/4W Resistor | Mouser | 291-1-RC |
| R191 | 1 | 1K 1/4W Resistor | Mouser | 291-1K-RC |
| U35 | 1 | LM2596S-5.0 Voltage Regulator IC | Jameco | 310391 |
| T1 | 1 | Hammond 115v Transformer | Mouser | 546-229A230 |
| T2 | 1 | Hammond 6.3v Transformer | Mouser | 546-229B12 |
| -- | 2 | Screw, #6-32 1/2" | Mouser | 534-9409 |
| -- | 2 | Nut, #6-32 Hex | Mouser | 534-9602 |
| -- | 2 | Screw, #4-40 1" | Mouser | 534-9405 |
| -- | 4 | Nut, #4-40 Hex | Mouser | 534-9600 |
| -- | 6 | Fuse Clips for F1,F2,F3 | Mouser | 534-3529 |
| -- | 1 | Heatsink for Q155 | Mouser | 532-569006B00 |
| -- | 1 | Heatsink Mounting Pad for Q155 | Mouser | 880-108T1-5193-08 |
| -- | 1 tube | Heatsink Mounting Compound for Q155 | Mouser | 590-860-150G |
| -- | 1 ft. | 20 gauge Twisted Wire Pair or Zip Cord | -- | -- |
| -- | 1 | Bare PC Board (See Text) | Lupine Systems | 22-920A-1A |
Use your digital voltmeter to measure the voltage at connector CN1. Make these measurements from the PARTS SIDE of the board. For safety purposes, pick up GROUND by connecting the BLACK meter lead to the NEGATIVE lead of capacitor C49 or C50. Then measure the voltage by touching the RED meter lead to pin 6 (closest to the heatsink) of CN1. Measure the voltage. This voltage should be somewhere between +160v and +230v. If you get any other reading, go back and re-check your work. Wait at least 3 minutes for capacitor C53 to completely bleed down before touching any part of the high voltage circuit. Use the adjustment tool to set potentiometer R187 so that the voltage at Pin 6 of CN1 reads +180v, give or take about 4 volts. This adjustment is very stable so setting it precisely to +180 is farily easy to do. If the voltage does not adjust, or is "stuck" at a high level (such as +230v) then you have trouble with the regulator or have diode D14 installed backwards. Recheck your work, which in this case may involve removing and testing the three regulator transistors for opens and shorts. Repair/replace and retest before continuing. Be sure to always wait about 3 minutes after removing AC power so capacitor C53 fully bleeds down before handling the high voltage circuit. Once you have the +180v regulator tested and adjusted, check the integrity of the +5v source. Reset your meter (if necessary) to 30v range and check the voltage at Pin 1 of CN1. This voltage should read between 4.9v and 5.2v. If you do not have this voltage, recheck the solder work on the regulator chip U35. Look for fine hairline shorts between the pins. Be sure diode D12 is properly installed and that it is the proper value (a 1N4001 or 1N5401 will NOT work! This diode MUST be a Schottky or fast recovery diode). Remember to bleed down C53 before you work on any part of the circuit. Once you have the power supply up and running you can set it aside and continue assembly of the project by assembling the I/O-CPU board.
 Fig. 6
Nixie Tube Advanced Floating-Point Desk Calculator I/O-CPU PC Board Parts Placement Diagram
Click Image to Enlarge
Advanced Nixie Tube Calculator
I/O-CPU Board
| Designator | Quantity | Description | Vendor | Part Number |
| C47,C48 | 2 | .1uF Conformal Axial Capacitor | Mouser | 581-SA105E104MAR |
| C57 | 1 | 470uF 16v Axial Aluminum Electrolytic Capacitor | Mouser | 647-TVX1C471MAD |
| CN1 | 2 | 9-pin Molex Series KK .100" Fem Header (see text) | Mouser | 538-22-02-2095 |
| D1-D11 | 11 | Switching Diode 1N914 | Mouser | 512-1N914 |
| RP1 | 1 | 10K x 5 Bussed Resistor Network | Mouser | 264-10K-RC |
| S1-S44 | 44 | Data Entry Switch | Mouser | 540-MX1A-C1NW |
| U31 | 1 | Processor Supervisory Reset IC | Mouser | 579-MCP130-450DI/TO |
| U32 | 1 | PIC17C44 Microcontroller (see text) | Jameco | 247919 |
| U33 | 1 | 20MHz Clock Oscillator Module | Mouser | 774-MXO45-3C-20.0 |
| -- | 1 | 40-Pin Socket for U32 | Mouser | 571-1-390262-5 |
| -- | 44 | Keycap, Customizable | DataCAL Enterprises | 628-7750K |
| -- | 44 | Clear Cover for Keycap | DataCAL Enterprises | 628-7379K |
| -- | 1 | Bare PC Board (See Text) | Lupine Systems | 22-920B-1A |
Next, install the eleven 1N914 switching diodes D1-D11. Be sure to observe polarity.
Next, install the socket for processor chip U32. Be sure to align the notch on the socket with the outline for the notch on the silk screen legend layer on the PC board.
Install resistor network RP1. Be sure to align the dot or bar on the resistor network with the Pin 1 dot on the PC board legend.
Install processor supervisor U31. Then install clock oscillator module U33.
Install capacitor C57. Be sure to observe polarity.
Flip the board over so you can access the SOLDER SIDE. Fill all of the via holes with solder. Do not leave any of the via holes unfilled. Be sure not to fill any of the holes that are NOT via holes!
Install the 44 data entry switches. This is easier done by installing them one "bank" at a time (the switches are divided up into three sections, two sections of 16 and one section of 12). Be sure you align the pins so they do not fold up under the switch, then press the switch firmly into the mounting holes. Once a full bank is mounted, flip the board over and solder them into place. Repeat for each bank until all 44 are installed. Do not install the keycaps at this time.
Finally, install the two Molex 9-pin headers in place of CN1. Two of these connectors have to be used because an 18-pin connector is not readily available. Mount the two connectors on the SOLDER SIDE of the board. Install the pins to the INSIDE ROW of holes so that the holes on the connectors that accept pins are aligned over the OUTSIDE row of holes. Be sure not to get any solder in any of the OUTSIDE row holes. If you do you will need to clean out the holes. Otherwise the connector will not be able to accept the pins from the Display Board connector later.
Remove any solder flux from the board or if you used water soluble flux solder wash the board for about 1 minute on BOTH SIDES and allow the board 5 hours to dry in the sun or in front of a fan.
Finalize the assembly by programming the PIC17C44 microcontroller with the assembled code NIXCALC.ASM, part of the Project Package. The file, NIXCALC.ASM must first be assembled before you can program the PIC. Use MPLAB from Microchip to do the assembly. If you cannot do this, you can order a pre-programmed device from Lupine Systems. Once you have a programmed PIC, install it in the socket U32. Program the device with the clock set for EC, the Watchdog set for TMR and the mode set for Microcontroller (you can choose Prot. Microcontroller as well if you wish to code-protect the device).
The I/O-CPU board is now complete. There is no good way to test this board as a stand-alone, so for the time being, inspect your work carefully and set this board aside.
 Fig. 7
Nixie Tube Advanced Floating-Point Desk Calculator Display PC Board Parts Placement Diagram
Click Image to Enlarge
Advanced Nixie Tube Calculator
Display Board
| Designator | Quantity | Description | Vendor | Part Number |
| C3-C10,C13-C20,C34,C35,C39,C44,C45 | 21 | .1uF Conformal Axial Capacitor | Mouser | 581-SA105E104MAR |
| C23-C32 | 10 | .047uF 400v Polyester Film Capacitor | Mouser | 5989-400V.047-F |
| C56 | 1 | 470uF 16v Axial Aluminum Electrolytic Capacitor | Mouser | 647-TVX1C471MAD |
| CN1,CN2 | 1 | .100" Male Header, Long Pins (see text) | Mouser | 517-834-07-36 |
| NE1,NE2 | 1 | Neon Indicator Bulb, NE2 | Jameco | 210260 |
| Q23-Q121,Q128-Q132 | 104 | MPSA42 Transistor | Jameco | 178546 |
| R13-R54,R65-R111,R130-R144 | 104 | 1K 1/8 Watt Resistor | Mouser | 299-1K-RC |
| R157-R166 | 10 | 33K 1/4 Watt Resistor | Mouser | 291-33K-RC |
| U3-U9,U12-U21,U24,U25 | 19 | 74HC374N Octal D Flip-Flop | Jameco | 45858 |
| U29,U30 | 2 | 74LS154N 1-of-16 Decoder IC | Jameco | 46738 |
| V3-V11 | 9 | Russian Soviet IN-16 Nixie Tube Display | Ebay (see text) | ----- |
| -- | 23 | Brass Standoff, M-F #6-32 1" | Mouser | 534-1644 |
| -- | 18 | Hex Nut for Standoff,#6-32 | Mouser | 534-9602 |
| -- | 10 | Screw for Standoff, #6-32 1/4" | Mouser | 534-9407 |
| -- | 1 roll | PVC Insulation Sleeving, .027" | Mouser | PVC-105-22 |
| -- | 1 | Bare PC Board (See Text) | Lupine Systems | 22-924A-1A |
Pre-form the 21 .1uF conformal capacitors to .400" spacing and set aside.
Next, cut 117 pieces of the insulation sleeving 1 1/4" long. Place these in a container and save them for a later step.
Carefully examine each of the nine Nixie tube displays. Locate the tube CATHODE pin. This is Pin 1 of the tube. The cathode pin is the backmost pin. If you hold the tube so you are facing the front of the tube (you can see the screen wire and some of the digit wire segments, there will be no "printing" visible) then this pin is in the CENTER REAR and can be identified by a white coating on the pin INSIDE the tube itself. Once you have located this pin, CAREFULLY bend it out so that it is at a near 90 degree angle to the tube. Next, separate the remaining leads into two groups of six counting from (but NOT including) the cathode wire. There should be exactly two groups of lead wires with six to the left and six to the right. Slightly bend out each group so that they form two rows of "pins" with the cathode straight out the back. Repeat this process for each of the 9 tubes.
Place a piece of sleeving that you cut in a previous step on each of the Nixie tube lead wires. If the sleeving was cut correctly there should be about 1/8" of lead wire left exposed. If there is not, or there is more than 1/8", either cut the sleeving so that there is the proper length or replace it with a fresh piece. Make sure EVERY TUBE LEAD has the same amount of space left over at the end once the sleeving is placed on the lead. THIS IS IMPORTANT -- otherwise you will not be able to line up the tubes later. Once you have sleeving on every tube lead set the tubes aside in a safe place.
Install resistors R13-R54 and R100-R113. Insert ALL of these resistors into the board but DO NOT SOLDER yet. For a more professional look, insert the resistors so that the gold bands are all at the same end - usually this is done with the gold band DOWN for easy reading (since resistors are not polarized you do not have to do this - it just looks a lot better if you do). Once all of these resistors are inserted, rub your finger across the entire row to make sure all of them are fitted tight against the PC board, then place a piece of masking tape across the entire row. Rub down the tape well, then flip the board over and solder each row of lead wires one row at a time, then trim. Doing it this way will save a lot of time and will produce more professional results.
Next, install resistors R65-R99 and R130-R144. Repeat the process done in the last step to finalize installation of these resistors.
Install capacitors C3-C10 and C39. Using the masking tape procedure complete installation of these capacitors.
Install capacitors C13-C20 and C34-C36. Using the masking tape procedure complete installation of these capacitors.
Install capacitors C44 and C45 (near decoder chips).
Install the two 1-of-16 decoder chips U29 and U30.
Install 74HC374 latch chips U3-U21 and U24 and U25. It is best to solder one row of pins at a time then go back and solder the other row. This way the chip does not overheat during installation. Be sure you are GROUNDED before handling the chips!
In this step you will be installing the MPSA42 transistors. Notice that the board is divided in half by the Nixie tubes V1-V14. Install transistors on the UPPER half of the board first, then do the ones on the LOWER half. Install the transistors ONE ROW OF SIX AT A TIME beginning with Q23-Q28. Use masking tape to hold the devices in place as you flip the board over to solder. Solder the lead wires beginning with the TOPMOST lead wire, then count to the 4th lead then the 7th, skipping 2 each time. This way no single transistor gets too hot during soldering. Then go back and do lead 2, 5, 8....until all 18 of the lead wires are soldered. Trim excess lead lenghts and repeat for the next section of transistors up to Q116. Once all of these are done, start with the LOWER section with only five devices per row. Complete installation with the installation of Q132.
Important Note: When properly assembled there will be a row of transistors in the LOWER section below tube V12 but NOT in the row in the UPPER section. This is the way it is supposed to be. See the RED sections of the Parts Placement Diagram Fig. 7.
Install the 10 .047uF polyester film capacitors C23-C32.
Install capacitor C56. Be sure to observe polarity.
Install 33K resistors R157-R166. These devices pre-form to .500" spacing.
Break off 6 pins from the .100" header specified in the Parts List and install these pins at location CN2. This connector installs on the PARTS SIDE. Break off 18 pins from the remaining header and install these pins at location CN2. This connector also installs on the PARTS SIDE. Be sure these pins are STRAIGHT and perpendicular to the PC board. Trim off any part of the pin left over on the SOLDER SIDE so that the trimmed leads are as flat as any of the other trimmed leads on the board.
The most difficult task in the assembly of this board is the installation of the Nixie tubes. This task is tedious, tiresome and delicate. Take a break, have a cigarette, drink or whatever relaxes you, or just stop for the night before moving on to the next step. Because it can get to you really quick. Take your time, relax and concentrate and you can get through it!
Install the nine Nixie tubes in locations V3-V11. The best way to do this is to first make sure there are two separate sets of SIX lead wires, one on the left, one on the right with the CATHODE pin straight out the back. BE SURE THE LEAD WIRES DO NOT GET CROSSED UP -- the lead wires go lead-for-lead from the tube to the PC board.
Grab the RIGHT side lead wire group and line up the lead wires in a single row. Space them out to match the .100" spacing of the PC board. Insert these six wires through the right-hand row of holes. Gently hold the tube, then flip the board over while holding the tube and bend the two outermost lead wires so that they are *near* flat against the board. Next, do the same thing for the LEFT side row of leads but this time add in the center CATHODE wire. Bend the outermost two leads once again.
Look carefully at the installation of the tube and make sure none of the lead wires have crossed up or that any of the leads have slipped out of the holes. Then CAREFULLY flip the board and solder the 2nd, 3rd, 4th and 5th lead wires on each side, then solder the CATHODE lead. Next, bend back straight the first and last leads on each row and solder them. Be sure to trim any excess lead wires.
If the tube seems a bit crooked don't worry -- the tubes will be straightened up and aligned later.
Repeat these steps for each of the nine Nixie tubes.
Finalize assembly by installing 1" brass standoffs in each of the 18 white bordered mounting holes. Mount the standoff by inserting the male end through the PC board and fastening the standoff using a #6-32 hex nut.
Remove any flux from the board or if you used water soluble flux solder wash the board on BOTH SIDES for 1 minute then let dry in the sun for at least 5 hours, or use a fan to dry the board.
Note: The Parts List includes two neon indicator bulbs. These will be installed to the Display Board in a later step. Hold on to them in a safe place.
The display board is now complete. Since there is no good way to test this board stand-alone the final testing will be done when the complete project is assembled.
 Using the Floating-Point Calculator
 Floating-point arithmetic is much more complex in software than fixed-point, therefore, the software has limitations when it comes to certain functions. Addition, subtraction and multiplication are fairly straightforward and have no accuracy issues. But division is a whole 'nother ball game. The division routine used by the software for this project is an update to the original method used by previous projects. The division routine can cycle as many times as necessary to complete a division to the accuracy of the available decimal places. This is a great improvement over the older, limited 8 cycle routine used on the earlier projects. I still think that by this time in history most people already know how to use a calculator, so I will only provide a quick overview of each key and its function. (actually the first part is the same as this section for the LED Fixed-Point Calculator).
- 15 + (25% of 15) = 18.75 --> (1) (5) (+) (2) (5) (%) (=) --> 18.75
- 45% of 93 --> (9) (3) (x<>y) (4) (5) (%) [no equals required]
Calculates the percentage of change between two numbers.
Format: If 48 changes to 96 then how much change in percentage has occurred?
(4) (8) (D%) (9) (6) (=) 100 the value has increased by 100%.
A positive result means an increase, a negative result means a decrease.
Adds a cumulative sum to the caculator's memory (Epsilon +). Each time (M+) is pressed the number on the display is added to memory. The MEAN counter is incremented each time this key is pressed. The display (X) and the (Y) register remain unchanged.
Format: Add 29.3 to Memory --> [Display]29.3 (M+) --> [Memory + 29.3]
Displays the value currently saved in memory on the display. The (Y) register remains unchanged.
Format: (MR) --> [Memory Value] --> [Display]
Clears the memory. Also resets the MEAN counter.
Format: (MC) --> [Memory] = 0
Calculates the statistical MEAN of the numbers entered into memory and places the answer in the display and (X). Up to 255 entries can be made. This key has no affect on the (Y) register.
Format: Enter each number you wish to average, or you can use the result of a calculation. Press (M+) after each entry. Once all numbers have been entered, press (MEAN). The statistical MEAN will be displayed.
Displays the number of entries into memory that have been made. This is the number that will be used as the divisor during the MEAN calculation. Cleared by pressing the (MC) key. The (Y) register remains unchanged.
Format: (DMC) --> [Mean Counter] --> [Display] and (X)
Enters automatically the mathematical proportional constant pi rounded to 7 decimal places -- 3.1415927
Pressing (pi) will erase the current contents of the (x) register.
Format: (pi) --> (X)
Converts the value in the (x) register from English to Metric values.
INV (Invert) Key
Pressing (INV) will swap the direction of the conversion making it a Metric to English conversion instead.
The eight most commonly used conversions are provided. Below is a list of all of the Metric-to-English, English-to-Metric conversions included in the software:
|
|
|
|
|
|
|
|
|
|
|
|
Format: {[English](x)} (any conversion key)--> {[Metric](x)}
{[Metric](x) (INV)} (any conversion key)--> {[English](x)}
The display represents the (X) register and is 8 digits long. A 9th tube has been added to provide for the farthest most decimal point and may also be used in future versions of the software. The display can handle any 8-digit integer and any decimal value up to 8 full digits. Unlike most calculators with 8 digits, the 8th digit is not sacrificed for the leading "0" which is blanked on our model.
Overflow occurs when the calculation exceeds the numerical value of 99999999., less than -99999999. or is a fraction smaller than 0.00000001 or -0.00000001. Error occurs when an attempt is made at division by zero, reciprocal of zero or if the calculator encounters a malfunction. A warning is given for taking the square root of a negative number (since this is actually done in theoretical mathematics) and is cleared with the next function.
Overflow and errors are indicated by all nine Nixie tubes lighting their "0" and "." segments along with the WARNING neon indicator. Negative sign is indicated by the illumination of the SIGN neon bulb to the RIGHT side of the display. Initiating any new operation or pressing the (C) key will remove the calculator from the ERROR state.
This project incorporates a technique to process unpacked BCD numbers. Most programmers would have used packed BCD numbers, mainly because packed BCD uses less RAM space and can manipulate two digits simultaneously. So the question is, why unpacked BCD?
Here's why...Most of the time, out here in the real world, experimenters and hobbyist (and often times engineers facing a daunting challenge) run into numbers in one of two forms:
Now you know. Experimenters classically write code that manipulates displays one at a time. So the math routines used in this project manipulate the numbers ONE AT A TIME, making the routines useable in many projects without having to do binary/hex or pack/unpack conversions.
I know this is the long way around this ride but necessary to facilitate easy integration into other projects, designs or concepts. Personally I know of many projects I've passed up because of one reason or another, and one of those reasons has been the lack of the ability to calculate basic numbers. Well, now YOU don't have to pass up any of these projects because you will soon know how this is done!
If you are clever, you "could" pack the digits, compress the code some and save some RAM ... but that would take a lot of time...!!


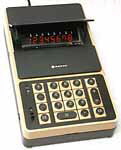
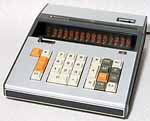
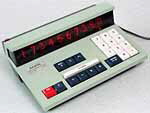
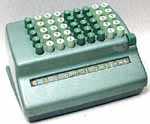
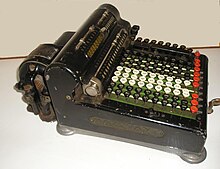
Featured Portable Electronic Calculators:
For a short period in the early 1970s several models of electronic calculators were produced that were hybrids and contained both a transformer for working from an AC supply and also batteries so that they could be used away from the AC. These calculators are too large and heavy to be called hand-held calculators and so are featured here as portable calculators.
Very rapidly, developments in electronics drastically reduced the number of components in calculators, together with the power consumption, and caused a reduction in size and weight and so allowed small hand-held calculators to be produced.
X . III
Xplain calculator to object lander :
The task force started work when a convoy of four ships sailed from Pearl Harbour. Eventually, some 9,800 people were to be involved in the project. A total of 50,000 tons of material were shipped to Eniwetok. One million feet of submarine cable was laid.
Forty three nuclear tests were conducted at Enewetak between 1948 and 1958. The first hydrogen bomb test, code-named Ivy Mike, was held in late 1952 as part of Operation Ivy, and it vaporized the islet of Elugelab.
Communications must always have been a problem. Multiple organisations were involved in locations which included Bikini, Eniwetok, Kwajalein, Hickam Field on Hawaii, Travis Air Force Base in California, Naval bases in Los Angeles and San Francisco, Washington and Los Alamos. Multiple time zones and an International Date Line complicated matters.
The Testing Time Conversion Computer was used to calculate, convert and coordinate the specific timing of important events between these locations.
It measures 4 5/8″ in diameter and is made of two white plastic disks held together by a metal grommet. One side performs time conversions, the other side has a map of some of the main locations and the distances between them.
From E=mc² to the atomic bomb

Ten seconds after the ignition of the first atomic bomb, New Mexico, July 16, 1945
[Image: Los Alamos National Laboratory]

When Einstein's most famous formula E=mc2 is mentioned, the atomic bomb is usually not far behind. Indeed there is a connection between the two, but it is subtle, and sadly, some popular science texts get it wrong: they will tell you that a nuclear explosion is "caused by the transformation of matter and energy" according to Einstein's formula, and that the gigantic conversion factor c2 is responsible for the immense power of such weapons.

Ten seconds after the ignition of the first atomic bomb, New Mexico, July 16, 1945
[Image: Los Alamos National Laboratory]
But first things first. Let's have a look at what Einstein really did say about the relation between mass and energy.
Equivalence or transformation?
For Einstein, mass (more precisely: relativistic mass; the property that determines how difficult it is to change a body's speed or its direction of motion) and energy are simply two different names for one and the same physical quantity. Whenever a system has an energy E, it automatically has the relativistic mass m=E/c2; whenever a system has the mass m, you need to assign it an energy E=mc2. Once the mass is known, so is the energy, and vice versa. In that context, it makes no sense to talk about the "transformation of mass into energy" - where there's one, there's the other.
The context in which "transformation of mass into energy" does make sense is a bit different. It is intimately connected with the fact that there are different kinds of energy. Already in classical, pre-Einstein physics, the concept of "energy" comprises a plethora of sub-definitions for different sorts of energy, sub-definitions like those for the kinetic energy associated with any moving body, the energy of electromagnetic radiation, thermal energy or the binding energy that needs to be taken into account whenever there is a force holding together two objects to form a composite object. Yet all these different definitions can be viewed as facets of a single physical quantity, energy. The reason is the possibility of transformations between the different energy forms. For instance, you can increase a body's temperature (and thus its thermal energy) by letting it absorb electromagnetic radiation energy. In these transformations, the total sum of all the different kinds of energy - the total energy - is constant over time. Energy can be transformed from one variety into another, but it can neither vanish nor be created from nothing.
A new kind of energy
This conservation of energy holds not only in classical physics, but also in special relativity. However, in relativity, the definitions of the different species of energy are a bit different and, most importantly, there is a completely new type of energy: even if a particle is neither moving nor part of a bound system, it has an associated energy, simply because of its mass. This is called the particle's rest energy, and it is related to the particle's rest mass as
rest energy = (rest mass)· c2.
Compared with other types of energy, rest energy is very much concentrated. For example: If you use a television tube to accelerate an electron to 20,000 kilometers per second, the kinetic energy gained is still only about five hundred times smaller than the electron's rest energy. Also, this rest energy is about a hundred times larger than the radiation energy of a high-energy X-ray photon. This high concentration is important for processes where rest energy (or, equivalently, rest mass) is converted to more common forms of energy. For instance, when a particle and its antiparticle annihilate and vanish in a puff of electromagnetic radiation, comparatively little matter is transformed into rather a lot radiation.
Studying the masses of different types of atomic nuclei, you will find that in nuclear fission - the process that powers an ordinary atomic bomb -, some "nuclear rest energy" or "nuclear rest mass" is transformed into other forms of energy. For example, the rest mass of a nucleus of uranium-235 is slightly larger than the combined rest masses of the nuclear fragments into which it splits during nuclear fission. Here's where E=mc2 comes into play: This mass difference corresponds to the energy set free during nuclear fission. So is it, after all, true that Einstein's formula explains the power of the nuclear bomb - and that the large conversion factor c2 is responsible for the immense amounts of energy released?
Binding energies: nuclei vs. molecules
Not at all. Different process, same calculation: For chemical reactions, there are tiny mass differences as well. To pick an example: When hydrogen and oxygen explosively combine to make water, the sum of the rest masses of the initial hydrogen and oxygen atoms is just a little bit less than the sum of the rest masses of the resulting water molecules. The same is true for the chemical reactions involving spontaneous oxydation - in other words: burning. The same formula applies: The mass difference, multiplied by c2, gives the energy set free during the chemical reaction. Same formula, same conversion factor - yet chemical reactions are much less violent than nuclear explosions. This clearly shows that the difference between nuclear and chemical reactions must be due to something other than E=mc2.
To see where the difference lies, one must take a closer look. Atomic nuclei aren't elementary and indivisible. They have component parts, namely protons and neutrons. In order to understand nuclear fission (or fusion), it is necessary to examine the bonds between these components. First of all, there are the nuclear forces binding protons and neutrons together. Then, there are further forces, for instance the electric force with which all the protons repel each other due to the fact they all carry the same electric charge. Associated with all of these forces are what is called binding energies - the energies you need to supply to pry apart an assemblage of protons and neutrons, or to overcome the electric repulsion between two protons.
Only with the systematics of these forces and binding energies well understood were physicists able to uncover the laws behind nuclear fission and fusion: The strength of the nuclear bond depends on the number of neutrons and protons involved. It varies in such a way that binding energy is released both in splitting up a heavy nucleus into smaller parts and in fusing light nuclei into heavier ones. This, as well as the chain reaction phenomenon, explains the immense power of nuclear bombs.
Einstein's formula plays second fiddle in that derivation - it's all about different kinds of energy. Sure, there are some radioactive decay processes following nuclear fission, and, if so inclined, one can view the decay of a neutron decaying into a slightly lighter proton as a transformation of rest energy into other energy forms. But these additional processes contribute a mere 10 per cent of the total energy set free in nuclear fission. The main contribution is due to binding energy being converted to other forms of energy - a consequence not of Einstein's formula, but of the fact that nuclear forces are comparatively strong, and that certain lighter nuclei are much more strongly bound than certain more massive nuclei.
Still, E=mc2 had a supporting role in the story of nuclear fission research. Not as the mechanism behind nuclear power, but as a tool: Because energy and mass are equivalent, highly sensitive measurements of the masses of different atomic nuclei gave the researchers important clues about the strength of the nuclear bond. Einstein's formula does not tell us why the nuclear binding energies are as large as they are, but it opens up one way (among several) to measure these binding energies.
In fact, Einstein's politics played a more decisive role in the story of the atomic bomb than his physics. Following a request by the physicist Leo Szilard, Einstein wrote a letter to president Roosevelt, explaining about the potential power of nuclear weapons and the possibility of Nazi Germany developing such weapons, and urging the president to take action. Einstein's letter played its part in setting into motion the political process that culminated in the Manhattan project - the development, construction and testing of the first nuclear bombs.
The Mathematics of the Manhattan Project
This article discusses the mathematics of the Manhattan Project which developed the first nuclear reactors and atomic bombs and established high expectations for the effectiveness of mathematical modeling and computer simulations that continue to the present day. It argues that the mathematics used in the Manhattan Project was unusually easy compared to other major inventions and discoveries — which has led to unrealistic and often disappointed expectations for subsequent “New Manhattan Projects.”
The Manhattan Project is remarkable in the history of invention and discovery in the number of scientific and technological advances made in a short period of time (1939-1945) and in that the first full system test, the detonation of the first implosion plutonium bomb at the Trinity Test Site on July 16, 1945, was a success. It is a case in which theoretical calculations and simple numerical simulations using electromechanical devices such as Marchant Calculators and IBM punched-card machines with much less computing power than a 1980’s Apple II computer were seemingly able to correctly design extremely destructive weapons that worked right the first time.
The achievements of the Manhattan Project include the first nuclear reactors, the enrichment and production of the explosive Uranium-235 isotope in large quantities, the discovery of the element plutonium, the bulk production and chemical purification of the explosive Plutonium-239 isotope, and working atomic bomb designs for both uranium and plutonium, based on substantially different principles. All in seven years; most of the work took place between 1942 and July 1945. Comparable advances in rocketry, for example, took place between World War I (1914) and Sputnik (1957), a span of over forty years.
The remarkable, perhaps unprecedented, success of the Manhattan Project established high expectations for so-called “Big Science” and for the effectiveness of theoretical calculations, mathematical models, and computer simulations. Although most attempts to replicate the success of the Manhattan Project since World War II have failed, the Manhattan Project continues to exert a powerful influence over the expectations of the general public, policy makers, and scientists. For example, a Google search for the phrase “New Manhattan Project” on July 6, 2013 returned 188,000 hits. These include numerous big budget proposals to address the current high energy and gasoline prices.
This article argues that, despite their dramatic effects and public impact, the atomic bombs were probably quite simple devices with relatively few parts and a particularly simple geometry compared to most major inventions and discoveries which made mathematical modeling unusually effective compared to most inventions and discoveries before or since. In addition, the extremely hazardous sub-critical assembly tests performed made it possible to test and verify the mathematical models just short of an actual explosion, which helped avoid the many failed full system tests found in other inventions and discoveries. In part for this reason, the Manhattan Project is a poor guide for modern research and development programs, including those aimed at solving the current energy shortages.
Lies, Damned Lies, and National Security
A major difficulty in understanding and evaluating the unusual success of the Manhattan Project is that it remains a highly classified research and development program. To this day, many aspects of the program including the exact designs of the Little Boy uranium bomb used on Hiroshima and the Fat Man plutonium implosion bomb used on Nagasaki remain classified. It remains possible that some parts of the official story are false, whether for legitimate national security reasons or other reasons.
The US government and the leaders of the Manhattan Project appear to have prepared a public relations campaign months in advance of the bombings. A key aspect of this was the so-called Smyth Report released to the general public on August 12, 1945. The Smyth Report purported to be a history of the Manhattan Project and a discussion of those technical and scientific issues that could be safely revealed to the public. It included a brief foreword by General Leslie Groves, the leader of the Manhattan Project.
The Smyth Report became a bestseller in the fall of 1945 and early months of 1946. For some time, it was probably the only source of significant information on the Manhattan Project and atomic weapons in the United States.
Most significantly, from the point of view of this article, the Smyth Report established an official history that it was probably illegal for participants of the Manhattan Project to deviate from.
In particular, the foreword (signed by General Leslie Groves) to the version of the Smyth Report published by Princeton University Press contained the following warning:
All pertinent scientific information which can be released to the public at this time without violating the needs of national security is contained in this volume. No requests for additional information should be made to private persons or organizations associated directly or indirectly with the project. Persons disclosing or securing additional information by any means whatsoever without authorization are subject to severe penalties under the Espionage Act.
(Emphasis added)
The Smyth report emphasized theoretical nuclear physics and the basic theory of neutron scattering and fission chain reactions, something that was already in the published physics literature or could be easily duplicated by other nations such as the Soviet Union. The Smyth report probably made Einstein’s equation relating energy and mass
which appears on one of the first pages of the report famous. Even to the present day, most popular accounts of the Manhattan Project feature this equation prominently, even though it provides no practical information on how to build an atomic bomb. By design, metallurgy, chemistry, anything that was deemed difficult for a potential enemy to duplicate was either kept entirely out of the report or discussed in very general, vague terms. Again, it is not inconceivable that incorrect information was incorporated in the report.
Historically, all or almost all major physical inventions involve large amounts of physical trial and error, usually many full system tests before success is achieved. It is often this physical trial and error that is most costly and time consuming to duplicate. Hence, in the case of atomic bombs, the physical trial and error and its results would often have been among the most important aspects of the program to keep secret. Thus, the Smyth Report probably had the effect of emphasizing the role of theoretical calculations in nuclear physics and creating the impression of a rather straightforward development of the bombs from theoretical calculations to working prototypes, especially since there seem to have been no failed full system tests.
Are atomic bombs simple?
The open/published literature suggests that the atomic bombs were actually rather simple devices with either a simple spherical geometry (Fat Man) or a simple cylindrical geometry (Little Boy). At present many experts believe that the best unclassified reconstruction of the weapons is found in John Coster-Mullen’s Atom Bombs: The Top Secret Inside Story of Little Boy and Fat Man. Both his proposed designs for Little Boy and Fat Man are quite simple with Fat Man in particular having less than twenty major parts and spherical symmetry.
It is important to understand the significance of simplicity for mathematical modeling. A rocket engine, for example, has tens of thousands of complicated parts including valves and pumps. Consequently simulating a rocket engine is difficult even with modern super-computers let alone the primitive tools available to the Manhattan Project. Even the internal combustion engines of the 1940’s may have been far beyond the atomic bombs in complexity and difficulty to simulate, both because of a larger part count and more complex geometries.
One may ask if atomic bombs are so simple, why don’t more nations and groups have them? It is likely that the hard part of building an atomic bomb is producing bulk quantities of the explosive enriched Uranium-235 and Plutonium-239 radioactive isotopes used in the bombs. This is likely the reason for Israel’s June 7, 1981 attack on the Osirak nuclear reactor in Iraq and the alleged recent joint US-Israeli cyberattack on Iran’s uranium enrichment centrifuges.
Assume a spherical cow
There is a family of jokes about physicists known as “spherical cow” jokes. In a typical spherical cow joke, a biologist or other non-physicist, an engineer, and a physicist are asked some question about a cow or herd of cows, such as how much milk will they produce. The biologist gives some sort of verbal, airy-fairy biology type answer. The engineer gives a practical, hard-headed engineer answer. Finally, the physicist gives his answer and starts with “First, we assume a spherical cow…”.
These jokes have a serious point — about oversimplification of the real world by physicists. In particular, in their formal training, physicists are frequently taught to solve a range of theoretical equations such as Maxwell’s Equations for electromagnetism for very simple and often unrealistic geometries, especially spheres but also sometimes cylinders and other simple geometric forms.
The implosion bomb design used for the plutonium bombs appears to have consisted of a series of nested nearly perfect concentric spherical shells of materials, forming a solid sphere. The outer shell consisted of high explosives used to compress the spherical charge of plutonium to the critical density at which an atomic explosion would occur. The pictures of Gadget (the Trinity Bomb) and Fat Man (the Nagasaki bomb) above probably show the outermost casing of the spherical implosion bombs.
It is important to understand that many mathematical systems are much easier to solve if they have spherical symmetry and are converted to spherical coordinates. In many cases, these problems can be reduced from three dimensions to a much simpler one-dimensional problem. This is one of the reasons that physicists are notorious for trying to treat cows as perfect spheres. But, in the case of the implosion bombs, the spherical assumption was likely valid.
Assume a Cylindrical Cow
According to John Coster-Mullen’s reconstruction, Little Boy consisted of a cylindrical “gun barrel” with two matching cylindrical charges of Uranium-235 which were slammed together by explosives.
In many cases, mathematical systems with cylindrical symmetry are much easier to solve than general systems after converting to cylindrical coordinates. In many cases, these problems can be reduced from three dimensions to two dimensions, or even one dimension which is generally much easier to solve. This is why, after spheres, physicists are trained to solve mathematical problems with cylindrical symmetry, e.g. cylinders such as pipes, in cylindrical coordinates.
Although Little Boy was probably not as easy to model as Fat Man, it was still a very simple, mathematically tractable geometry. Far simpler than many mechanical inventions such as the nautical chronometers used to measure longitude or rocket engines, for example.
The Suicide Club
A major problem with mathematical modeling is knowing that the model is correct. In the case of physics, the underlying theory may be wrong. In addition, the actual implementation of the model, today as a computer program, may be incorrect. In practice, both problems may be present. How did the scientists and engineers at the Manhattan Project know they had the right predictions for the Trinity bomb? Actually, they weren’t sure. In most cases, it is necessary to compare the model with actual physical tests or experiments, often full system tests of some kind.
In the case of the atomic bomb, the first full system test worked, which is unusual although not unheard of in the history of invention and discovery. In the particular case of the atomic bombs, it was possible to test the accuracy of the theoretical models of neutron scattering and the fission chain reaction by assembling almost critical (a critical mass is the amount of uranium 235 or plutonium 239 that will initiate a chain reaction and explode) amounts of the Uranium 235 or Plutonium 239 — by hand, just short of an explosion, an extremely dangerous procedure that killed at least two people.
It is actually an unusual situation in mathematical modeling where it is possible to test the mathematical model almost fully without a full system test. In many cases, that cannot be done. A full system test, often many full system tests, is required.
It is perhaps worth pausing for a moment to consider the personal courage and extreme fear of a German/Nazi victory that motivated people to perform such a risky procedure, especially with a new, poorly understood physical phenomenon like nuclear fission.
Conclusion
The Manhattan Project had and continues to have a powerful influence on expectations for science in general and specifically for the effectiveness of theoretical calculations and today computer simulations. It appears to be an example where scientists, theoretical physicists such as Hans Bethe and Richard Feynman, were able to make calculations and correctly design and predict the operation of extremely destructive devices that worked right the first time. This remains a powerful ideal not only in the minds of the general public and policy makers, but also in the minds of practicing scientists.
There have been many attempts to replicate the spectacular success of the Manhattan Project since World War II. Most of these “New Manhattan Projects” have failed. Probably the largest poster child for the failed New Manhattan Projects remains the War on Cancer which has consumed roughly ten times the budget of the Manhattan Project with very disappointing results. Many attempts by physicists to replicate the Manhattan Project in physics have also failed or produced disappointing results. Just recently, the fusion power project the National Ignition Facility at Lawrence Livermore National Laboratory has suffered massive cost and schedule overruns and disappointing results in the now decades old effort to achieve practical nuclear fusion power.
The historical record of the last sixty years suggests that the Manhattan Project was anomalous in comparison to other major inventions and discoveries, both before and since. On close examination, it appears likely that mathematical modeling was unusually successful in the Manhattan Project due to the relative simplicity (low part count) and simple geometry of the first atomic bombs. In addition, the sub-critical assembly tests made it possible to validate the mathematical models without failed full-system tests, which is unusual and created high expectations for mathematical modeling in the future.
Marchant calculator
The Marchant Calculating Machine Co. was founded in 1911 by Rodney and Alfred Marchant in Oakland, California.
The company built mechanical, and then electromechanical calculators which had a reputation for reliability. First models were similar to the Odhner arithmometer. In 1918, employee Carl Friden designed a new model in response to patent challenges. It was a great success, and Friden became the chief designer until he left in 1934 to found his own company. In 1958 the company was acquired by the Smith Corona typewriter company in a diversification move that proved unsound; the company, which was now known as SCM, tried to stay competitive by introducing the SCM Cogito 240SR electronic calculator (designed by Manhattan Project veteran Stan Frankel) in 1965. Within a few years a tidal wave of cheaper electronic calculators had devastated their business, and by the mid-1980s, SCM's typewriter business, too, had been ruined by the advent of inexpensive personal computers used as word processors.
Calculator design
The first Marchant calculators differed greatly from their later Silent Speed Proportional Gears machines, which were by far the fastest of their type, running at 1,300 cycles per minute. These machines are of considerable technical interest, and are far better known than the earliest ones. Their mechanical design was very unusual in that their result dials (sums, differences, and products) moved at speeds proportional to the digit in the corresponding column of the keyboard. A '1' in the keyboard caused its dial to move the slowest, while a '9', the fastest. Probably the only other such machine was the European Mercedes Euklid, which had a very different (and apparently much simpler) design.
Carrying to the next higher order was done (effectively) by a 10:1 gear ratio, rather like traditional watthour-meter dials. This was probably unique in a calculator. While running consecutive 'add' cycles to develop a product in multiplication, much of the mechanism was running at constant speeds. All other mechanical calculators had result dials that moved only at one speed, but for different amounts of time, naturally for longer times when larger digits were to be entered. They started quickly, ran at one speed, and stopped quickly. (They also had mechanisms to prevent overshoot (known as coasting) when they stopped.)
In the Marchant, each column had its own mechanism that might be described as a nine-speed pre-selector transmission. Once engaged, that was what made the dials move at speeds proportional to the digit in that column. This meant that the machine contained, in all, several hundred individual gears.
Carries from lower-order digits came in via one planetary differential per dial. If one held down the + bar, in neighboring columns to the left (with zeros for them in the keyboard), one could see two or maybe three higher-order dials moving at the speeds one would expect.
Watthour meter dials, like the hour hand of a clock, make no attempt to point to the correct digit, if the dial to the right is between, for example, 3 and 7, or so. Such misalignment would be intolerable in a calculator's dials, so each of the Marchant's dials had a constant-lead ("snail") cam attached. Omitting important details, this cam determined the amount of movement needed to realign the result dials. That correction was applied by a second spur-gear differential, again, one per dial.
Some calculators that had been serviced had dials that were mispositioned by (probably) 3.6 degrees; the gears weren't quite meshed correctly when reassembled.
The calculator was very complicated compared to, for example the Friden STW, a machine notable for its relative internal simplicity. Much of the Marchant's control mechanism was beneath the keys, and had about 25 "layers" of levers, linkages, latches, and such. It had three driveshafts, extending across the mechanism. Most other calculators had only one.
Most mechanical calculators capable of fully automatic division (and there were many), subtracted until the accumulator went into overdraft ("subtracted one time too many"), then added once to restore the value in the accumulator. The Marchant, however, contained a chain of analog comparators to anticipate the overdraft, and prepare for the next quotient digit.
The Marchant mechanism, internally, differed profoundly in many respects from other makes of calculators of the same general variety. By virtue of sophistication (and complexity), it gained a considerable speed advantage, compared to other designs.
The Marchant Figurematic uses a complex and unusual mechanism based on proportional and differential gearing. Some of its distinguishing features include:
This page gives an overview of the layout and construction, and the basic sequence of operation.
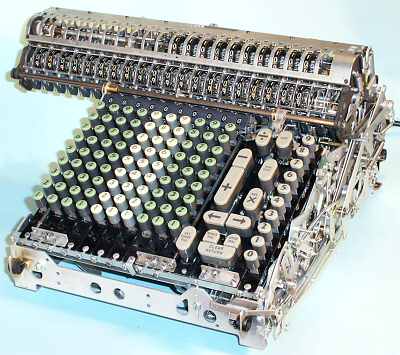 Removing the covers.
The Figurematic covers are held in place by an ingenious system of overlapping flanges with no visible screws.
To remove the covers, roll the machine onto its back and remove the four screws in the corners of the base plate. Catch the front panel as it flies off, and slide the base sideways to disengage it from the back cover. Loosen the screws in the three small brackets under the front of the keyboard escutcheon, lift the front of the escutcheon and pull on the rods at either side to release the rear. Lower the machine, lift off the back panel, and pull the sides straight off. Remove the carriage cover from the back with two screws at each end.
Although the space under the numeric keyboard is empty, the rest of the machine is very densely packed. A few things can be seen to move as the machine cycles, but on the whole the mechanism reveals very few clues as to its operation.
 The frame.
With the mechanism removed, we see that the machine is built upon a substantial pressed-metal frame of 0.078" steel. The frame plates are held together by interlocking tabs and a generous quantity of 3/16" bolts. A rear base plate (not shown) supports the drive motor. There are four smaller sub-frame plates in the control unit area on the right of the machine.
The frame sits on a light pressed-metal base plate with an absorbent lining. The side covers are substantial aluminium die castings which are located by the rubber grommets at each corner of the frame.
The calculating mechanism is built up from a number of separate modules which are supported by the frame. Although the mechanism looks impenetrable on first aquaintance, there is actually very little holding it together. The major modules can be removed and replaced relatively easily, once you know how they are connected.
 The main modules.
The mechanism consists of four main modules:
Basic sequence of operation.
At its most basic level, the mechanism operates on a four-stage cycle:
The actuator unit contains the proportional gearing mechanism which drives the main accumulator register in the carriage. Each of the ten identical sections contains a ten-speed gearbox with eleven ratio gears, fourteen transfer gears, and five two-way selector arms. The unit is mounted between the main side plates at the upper rear of the machine, immediately below the carriage.
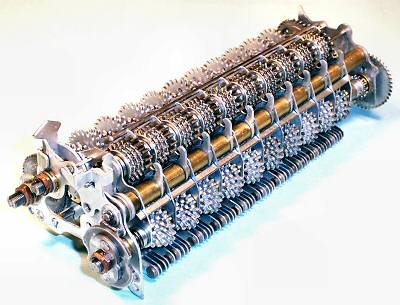 The drive shafts.
The actuator unit has three drive shafts in the lower section which carry the ratio gears, and a single output shaft at the top. The three drive shafts carry a total of 110 gears, which are driven simultaneously from the main clutch via the single large gear at the right-hand end. The output shaft carries ten compound gear assemblies which transfer the rotation of the selected ratio gears to the main register in the carriage.
The main clutch rotates the front ratio shaft exactly half a turn for each addition. The upper rear shaft is driven from the half-turn shaft via a 2:1 reduction gear at the right-hand end. This in turn drives the lower rear shaft via a 3:1 reduction at the left-hand end. The three drive shafts thus rotate 1/2, 1/4, and 1/12th of a turn for each addition cycle. The "centraliser cam" at the left-hand end has a double spring-loaded detent to hold the shaft securely in its home position at the end of each cycle. A "hold-off" mechanism disables the centraliser during repeated cycles.
The drive shafts and gears can be adjusted laterally by springs and nuts at the left-hand end. The actuator unit on its own is not particularly rigid, and relies on the frame plates for accurate positioning and alignment. The "arrow head" at the upper left-hand end is not related to the gear mechanism, but serves to align the carriage laterally as it is pulled down ito engagement with the actuator.
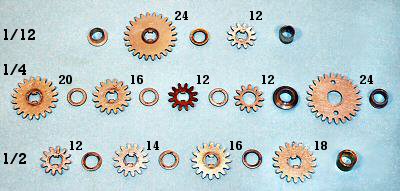 The ratio gears.
This view shows the ratio gears for one section of the actuator, arranged in order as they are assembled on the three drive shafts.
Rather than thinking of ratios, it is easier to consider the distance that each gear advances during an addition cycle. The rightmost gear on the front shaft has 18 teeth, and so will advance by 9 positions for each half-turn cycle. This movement can be "picked up" and transferred to the output gear to advance the register by 9 digits. Likewise for the 16, 14, and 12-tooth gears.
The three leftmost gears on the quarter-turn shaft have 20, 16, and 12 teeth, and deal with digits 5, 4, and 3 in the same manner. The sequence can not be continued for digits 2 and 1, as it is impractical to make an 8 or 4-tooth gear. Rather, 24 and 12-tooth gears are provided on the twelfth-turn shaft. Their movements are copied back onto the quarter-turn shaft through 12 and 24-tooth idlers, to be picked up by the transfer mechanism.
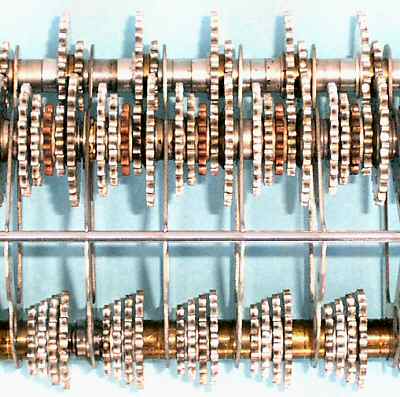 The ratio gears assembled.
This top view of the actuator unit shows the alignment of the ratio gears on the three drive shafts. The output is picked up from the pairs of gears on the half and quarter-turn shafts as shown:
(There is no gear for the Zero position on the half-turn shaft).
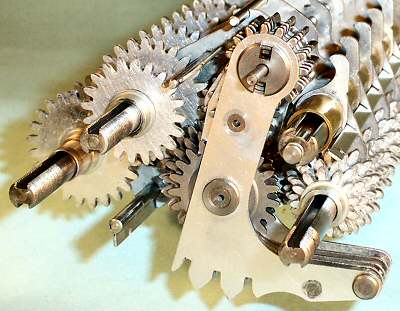 The pick-up arms.
This view shows the actuator unit partially assembled, as seen from the left-hand end. The pick-up arms hang from the output gear assembly at the top of the unit. The flanged pins at the bottom front of the arms engage with forked yokes on corresponding arms on the selector unit.
As the setting line operates, one of the five arms will be swung forward or back by the selector forks. The other four arms will remain in "neutral". The selection will be locked by a bail that rises into the slots at the bottom of the arms.
The large "pick-up" gear on the active arm will engage with the corresponding ratio gear on either the half or quarter-turn shaft. As the shafts rotate, the pick-up gear drives through an intermediate gear (hidden) to the output gear at the top, and thence to the carriage register.
The output gear is normally locked in known positions by the detent arm on the large keyed shaft at the centre right, thus ensuring that the pick-up gears and the register will always engage cleanly.
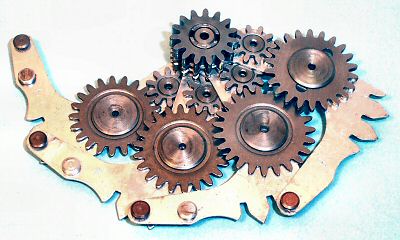 The pick-up gear assembly.
In this view the pick-up gear assembly has been spread open to show the internal construction.
Four of the five selector arms are permanently assembled with their pick-up gears, idler gears, and output gears. The fifth arm is mounted face-down on the top (to the right, as installed), and shares the double-width output gear, which also drives the register.
All of the output gears are keyed together, so that all of the transfer gears will rotate in unison. As the active selector drives "up" the gear train, the four neutral selectors drive back down, spinning their pick-up gears in mid-air.
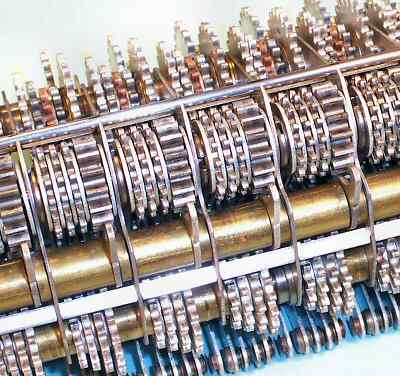 The output gears.
This view from the top front shows how the four sections of the output gears are interleaved with the tops of the five pick-up arms. The centre-to-centre distance of the columns is 5/8", so each pick-up arm with its gears and rivetted hubs has to fit into only 0.090".
In order to transfer the motion from the actuator to the display, the accumulator register is pulled downwards (or "dipped") to engage with the output gears. At the same time, the detents in the register are released as they are pulled down against the rod mounted at the top of the actuator (just behind the output gears). The continuous gear train from the main clutch to the register dial ensures that the numeral wheels are precisely controlled for the whole of the addition cycle, allowing the detents to be disengaged to reduce friction and noise. The gear train rotates in a positive, smooth, and silent operation with no possibility of overrun.
If Zero is selected, the right-hand pick-up arm moves forward and holds the actuator detent arm against the output gear, keeping it locked as the other columns are released. The broad keyway in the detent shaft (see photo 4 above) provides about 10° free movement to allow the detents to move independently.
Ergonomics was rarely a strong point with mechanical calculators. Although the keyboard is the primary "user interface" to the machine, it was common for buttons, knobs, and levers (frequently un-labelled) to sprout from any available location, with little regard for the convenience (or accuracy) of the operator.
In contrast, the Marchant Figurematic has a very clean and simple keyboard layout, which successfully hides all of the complexities within. Apart from the numeric keys there are only 12 operator controls, which are arranged and labelled in a clear and logical fashion in a single panel along the right-hand side. (The training manuals suggest that the machine should be operated with the left hand).
In spite of the apparent simplicity of the keyboard, the Figurematic is a very capable machine which is a pleasure to use.
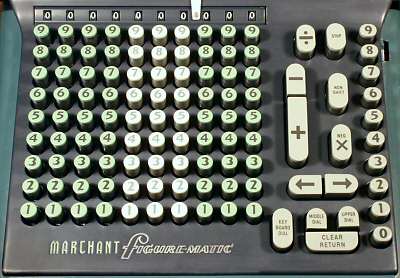 The Figurematic keyboard.
The numeric keys are colour-coded in thousands, with a sliding decimal point indicator above the check dial. The multiplier keys are arranged in a single column at the far right.
The control keys are arranged in two columns between the numeric keys and the multiplier. At the bottom are the clearing keys for the keyboard and the two carriage registers. The "Clear/Return" key clears both registers and returns the carriage to a (selectable) starting position.
Above the clearing keys are the right and left carriage shift keys, and above these on the left are the Plus and Minus keys. Plus and Minus only ever perform a single machine cycle, even if held down. To the right of these are two function keys which modify the action of the multiplier - "Non-Shift" supresses the automatic carriage shift between digits, and "Neg Mult" subtracts the product from a previous total in the main register.
At the top of the control columns are the "Division" key which clears the counter and commences the process of division, and a "Stop" key which clears most machine functions and terminates a division. Pressing the Stop key once requests the machine to stop in an orderly fashion at the end of the curent cycle, while pressing twice stops the division immediately. A small tab control to the right of the multiplier "8" key reverses the direction of the counter register if it is required to display complements.
During addition and subtraction, the keyboard is cleared automatically as soon as the setting phase has been completed. This allows the operator to start entering the next number while the add and restore phases are still in progress. This overlapping of operations (which computer folk now call "pipelining") allows a significant increase in speed for a skilled operator.
Notice that there is no "repeat" key to retain the keyboard setting for repeated addition. Although it is not obvious from the keyboard, the same effect can be obtained more quickly by pressing the Add key and a multiplier key simultaneously. The multiplier key performs the required number of additions, while the Add key supresses the carriage shift and enables clearing of the keyboard. A similar effect can be obtained by using the multiplier with the Non-Shift key. (See the Multiplier section for further details).
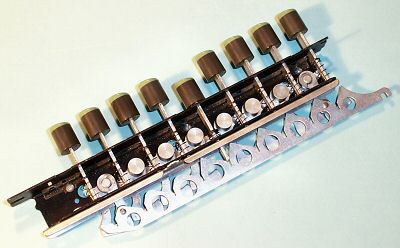 The keyboard modules.
The numeric keyboard is constructed from a series of independent single-column modules which are screwed to supporting bars at the upper and lower ends.
The nine identical key stems press downwards on the ramps on the sawtooth parallel bar, pushing it rearwards in proportion to the digit selected. There is a sliding lock plate to hold the key down, and a buffer strip under the top plate to reduce impact noise when the key is released.
To the right of the number keys is a different removable module supporting the Plus/Minus keys and the keyboard clearing key, while another at the far right supports the multiplier keys. The two columns of function keys are assembled as part of the control unit and are not easily removable.
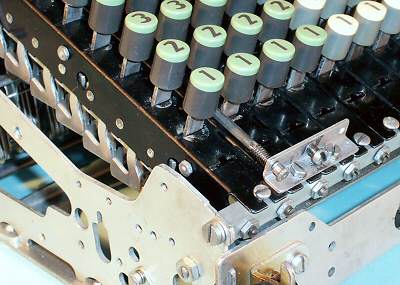 The keyboard modules installed.
Each module has a separate adjusting screw and lock nut to set its fore-and-aft position relative to the selector unit, so as to ensure that the check dial numerals are properly centred in their viewing windows. It may be necessary to bend the keystems slightly to adjust individual digits.
The "walking feet" on the left of the key modules are part of an elaborate interlocking system which ensures that only a single key can be pressed at once. The inertia of the bars contributes to the "feel" of the keyboard.
There are three small right-angle brackets across the front of the machine to secure the front of the keyboard escutcheon. The rear end of the escutcheon is clipped in place by the spring-loaded rods on the brackets at each side of the numeric columns.
Each column of the selector unit takes a single input from the keyboard, and positions a set of five selector forks which control the pick-up arms in the actuator unit.
During the "manual setting" phase, the operator input from the keyboard rotates a small "selection cam" at the bottom of the unit and a numeric "check dial" at the top. During the "powered setting", the setting line presses a set of feelers against the cam to position the selector forks forward or back. The selector forks then position the pick-up gears in the actuator unit.
The selector unit also houses the division trip mechanism, which uses the keyboard setting as one input to the magnitude comparator. The trip mechanism is described separately in the "Division" section.
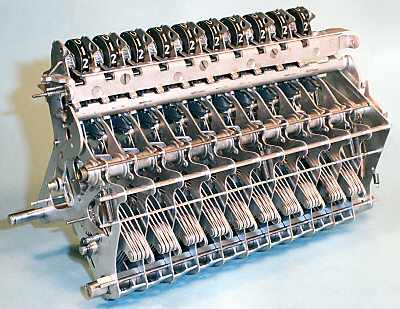 Overview.
This overall view shows the selector unit fully assembled and ready for installation. There are ten identical sections on 5/8" centres. The assembly is about 5-1/2" high.
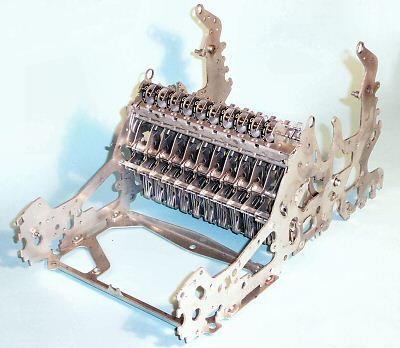 The selector unit installed.
This view shows the selector unit installed between the main frame side plates in the centre of the machine. The selector unit is the first item to be installed in the frame, and the last to be removed.
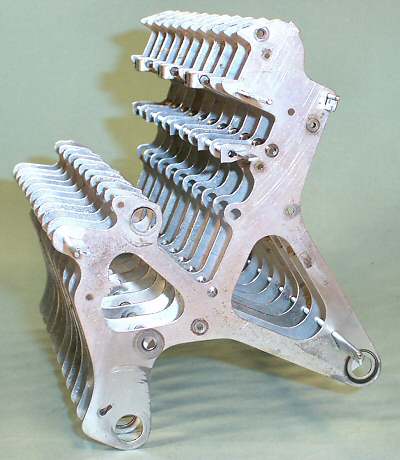 The selector frame.
The selector mechanism is supported on a light frame built from plates of 0.032" steel. The plates are held in alignment by six notched metal strips about 0.150" wide, located at most of the corners. The strips are inserted through slots and locked in position by a 1/16" rod or wire.
The frames for the actuator and the carriage are built on a similar principle.
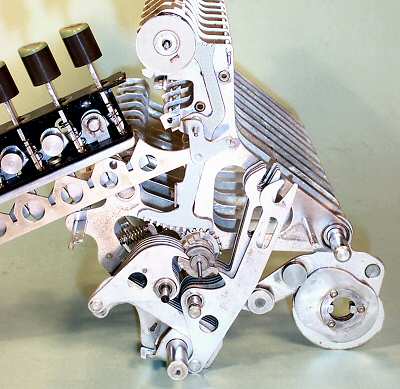 The selector mechanism.
This view from the right-hand side shows the selector mechanism for one column, assembled for illustration on the outside of the frame.
The central vertical lever is pivoted on a 1/16" shaft just above its centre, and carries a more-or-less horizontal gear sector on either end. The lower sector drives the selection cam, while the upper drives the keyboard check dial. A torsion spring adjacent to the check dial provides a restoring force.
The sawtooth bar under the keyboard module hooks over a pin on the vertical arm, just below the pivot. The keystems push the bar rearward, rotating the arm according to the digit pressed. The total movement at the connection point is only about 3/16" - the movement from one key to the next is less than 1/32".
The selector linkage consists of three interconnected links which are pivoted on the three shafts at the bottom centre. The linkage is operated by a double cam on the setting shaft, via a follower which pivots on the shaft at the far right. (There are actually three cams spaced across the width of the machine). Marchant used several of these double or opposing cams to both advance and retract a mechanism, although in other places they used conventional single cams and spring-loaded followers.
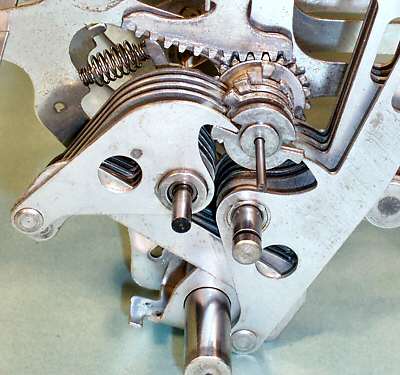 The selector feelers.
The front selector arms pivot on the smaller shaft to the left, which is fixed to the frame. The rear arms pivot on the larger shaft to the right, which itself swings on short links from the large-diameter fixed shaft at the bottom. The moving pivot shaft is pushed forward and back horizontally by the links from the setting shaft cam followers.
The selection cam assembly consists of a driving gear and five pressed-metal discs, each of which handles two digit positions. Each position has a raised tooth on one side and a notch on the opposite side. The cam is shown in the position for digit 1, which requires the rightmost (ie, closest) selector fork to be pushed rearward.
At the start of the manual setting cycle, the upper (yoke) ends of the selector arms are still locked in place by the bail raised under the actuator pick-up arms. The moving pivot shaft is pulled well to the right, so that the feelers are wide apart and the selection cam is free to rotate in response to the keys.
When a control key is pressed, the setting line will begin to rotate. During the forward stroke (the first 90°) the selector locking bail will be released and the moving pivot shaft will be pushed to the left. The right-hand feeler will be blocked by the projection on the cam, causing the selector fork to rotate clockwise. As the moving pivot continues forward, the cross-link at the bottom causes the left-hand link to also rotate clockwise, forcing the left-hand feeler into the conveniently-located notch.
Had the cam been in the zero position, the situation would have been opposite and the selector fork would have rotated anti-clockwise. The other four sections of the cam present neither teeth nor notches at this time, so their selector arms are forced into the central position.
 The selection cam detent.
This view from the left-hand side shows the spring-loaded detent which engages with the drive gear on the selection cam.
The detent is engaged as the moving pivot shaft moves forward, holding the selection cam firmly in position as the setting is transferred to the feelers and the actuator pick-up arms. The selection is then locked by the bail which rises into the slots in the lower edges of the pick-up arms.
With the selection now firmly locked into the actuator, the moving pivot shaft commences its return stroke. The selector feelers are pulled back clear of the cams, the detent is released, and the keyboard is cleared. Finally, the main clutch is engaged as the setting line comes to a stop at 180°.
The actuator pickup arms remain locked in position until the start of the next powered setting cycle. However, the keyboard and selection cams are free to move, allowing the operator to start entering the next number into the selector while the add and restore cycles are still proceeding.
The control unit contains all of the mechanical logic which controls the operation of the machine, and the drive train which supplies the motive power. The drive train is described in the next section.
The control unit is essentially a self-contained module, which has remarkably little connection to the rest of the machine. It takes inputs from the function keys in its forward section, and generates outputs to drive the setting line, the actuator and registers, the division sensing levers, and the carriage shift and clear mechanisms at the rear. It receives three feedback signals from the carriage dip arm, the carriage end-of-travel sensor, and the division trip mechanism. There is extensive interlocking between the functions to prevent mis-operation.
The control unit is an extremely complex mechanism containing over two hundred separate links and levers, all different, and well over one thousand manufactured parts. The individual components will not be described in detail, although some of their functions will be discussed further in the sections following.
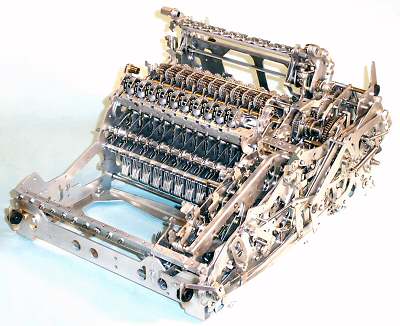 Overview.
This view shows the control unit fully assembled and mounted in position along the right-hand side of the machine. The function keys and control linkages occupy the forward section, with the drive train at the rear.
The unit is held in place by a number of long screws between the outer and inner right-hand side plates. The screws also carry spacers and pivot bushings for parts of the mechanism, and act as attachment points for a multitude of springs.
Although it is not a trivial operation, the whole assembly can be removed in one piece after removing the setting shaft and part of the carriage shift and clear mechanisms.
 The control and logic unit.
The control and logic unit starts out as two blank sub-frame plates, roughly 6" x 4" and an inch apart, which support the two rows of function keys at the right-hand front of the machine.
Several layers of links and levers are assembled on the insides of each of these plates. The two are then brought together, and more linkages are added on the outer sides.
This view from the lower left-hand side shows the "mechanical brain" at the stage where most of the logic has been assembled, prior to fitting to the outer right-hand frame plate. There are many loose ends at this stage, but very few external connections once the assembly is completed.
 The control unit assembled.
This much tidier view shows the control unit ready to be attached to the rest of the machine.
There are over 200 different links and levers in the assembly to this stage, and still more to be added after installation.
The drive train provides the motive power for the selector unit, the actuator, the counter register, and the carriage shift and clear mechanisms.
It contains 28 gears on 15 shafts, six dog clutches, and three reversing mechanisms. The drive mechanism is mounted at the rear of the control unit on the right-hand side of the machine.
The drive train is powered by a series-wound universal motor governed at 3000RPM.
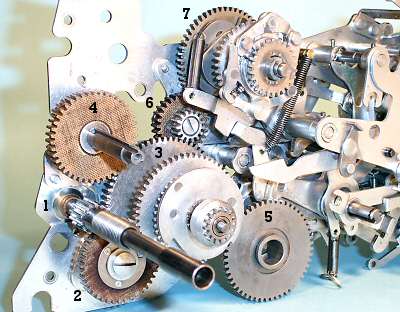 The main gears.
This view shows the main drive gears, partially assembled on the inside of the outer right-hand side plate. A separate sub-frame plate is installed later to support the inner ends of the shafts.
1. The motor shaft and primary drive gear. The gear is driven through a safety clutch (removed for clarity) on the threaded section of the shaft.
2. A pair of fibre and steel reduction gears. The mounting provides for adjustment relative to the motor shaft.
3. Number 3 shaft carries two large drive gears, the carriage shift clutch and drive gear, and two small shift reversing gears.
4. A fibre gear which drives three carriage clearing clutches on the keyed shaft.
5. Number 5 gear is the final drive to the setting clutch. It is mounted on the setting shaft in the bottom of the machine, and driven from the second gear on the number 3 shaft.
6. A pair of steel and fibre intermediate gears.
7. The final drive to the main clutch and actuator unit.
The motor, number 3 shaft, and the main clutch rotate clockwise when viewed from the outer right-hand side of the machine. The setting line and the clearing clutches rotate anti-clockwise.
 The main clutch components.
The bottom row shows the main clutch drive gear and splines, the driving pawls, and the driven plate. The top row shows the bushings and retainers, the pawl springs, and the locking cam.
The drive pawls are spring-loaded so that their inward-facing teeth engage with the splines on the hub of the drive gear. The clutch is normally held disengaged by a release dog which drops into one of the notches in the outside of the driven plate. This forces the tail of the drive pawl inwards, raising its inner end clear of the splines. The tail of each pawl presses and slides against the head of the other, so that the two pawls always move in and out together.
There are two notches in the driven plate, so the clutch will advance half a turn at each operation.
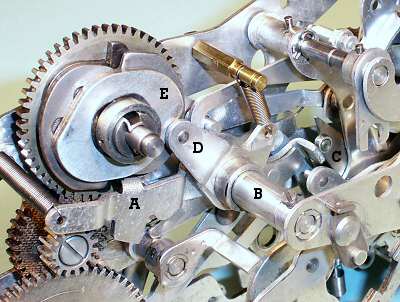 The main clutch installed.
This view shows the main clutch installed with its shaft and bushing on the right-hand side plate.
The main clutch release dog A is pivoted on shaft B and held upwards by the spring at its left-hand (rear) end. The forward end of the release dog rests on a small but very important "roller latch" C (centre right).
The release dog is flicked downwards via a cam on the setting shaft at the end of the setting phase, and is caught and held by the roller latch as the clutch rotates. When the latch is released (by the control mechanism after the required number of cycles, or immediately for a single addition), the release dog rides on the outside of the driven plate until it drops into the notch, lifting the pawls and removing the drive. A roller on spring-loaded arm D presses inwards on the locking cam E and wedges the driven plate firmly into its home position.
All of the driving clutches work on the same principle, although they differ in their internal details and their operating and locking mechanisms.
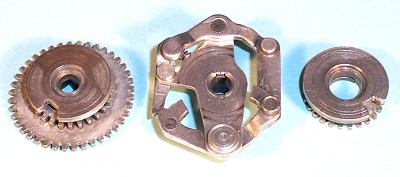 The reverse clutch.
Subtraction and division are accomplished by reversing the main drive to the actuator unit. The reversing mechanism, or "reverse clutch", is mounted inboard of the main clutch on the same shaft.
The central plate is driven directly by the main clutch. The surrounding 4-bar linkage can be rocked left or right to engage one or other of the dogs on the lower link with the gears on either side of the plate.
If the left-hand gear is engaged, the drive proceeds immediately to the large output gear and thence to the actuator unit. If the right-hand gear is selected, the drive proceeds via a large double idler assembly and a reversing idler to drive the left-hand gears in the opposite direction.
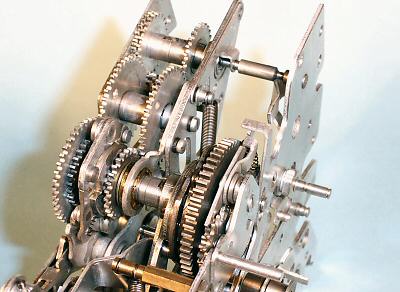 The reverse clutch installed.
This view shows the main and reverse clutches (front) and the double idler gear (centre) at the rear of the control unit. The reversing idler is hidden under the central support bracket. The gears behind the double idler provide another reversible drive mechanism, which operates the counter register whenever the main clutch rotates.
The reverse clutch dogs are operated by a rocking lever mounted below the clutch. The control unit selects addition or subtraction by positioning an interposer under one side or other of the rocking arm. During the setting cycle, a "reverse cam" on the setting shaft raises the interposer and pushes the arm and the clutch dogs into the required position.
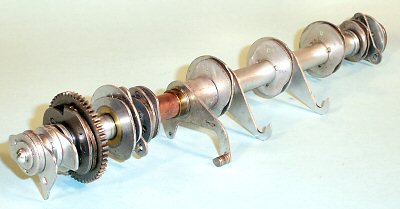 The setting line.
The setting shaft is a double-keyed steel shaft 0.405" diameter and just over 10" long (the full width of the machine). It is driven from the No.3 shaft via a drive gear and half-turn clutch which are the same as those in the main clutch. The shaft carries eight single cams, six double or opposing cams, and about twenty spacers, shims, and other components. The complete assembly can be removed and replaced as a unit (after a certain amount of practice).
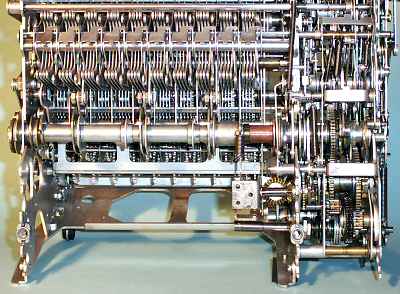 The setting line installed.
In this view the machine is standing on its back to show the underneath. The motor base plate is not yet installed. The setting line is in the centre, with the selector mechanism above and the selection locking bail below.
The setting line makes a full revolution, in two stages, for every machine cycle. The first stage is triggered by the operator pressing a function key. The setting clutch is released, and the shaft rotates half a turn to perform the setting phase. Just before it stops, it trips the main clutch release dog. The machine then performs addition cycles until the control unit releases the roller latch. As the main clutch release dog rises and stops the main clutch, it trips the setting clutch again to commence the second half-turn for the restore cycle.
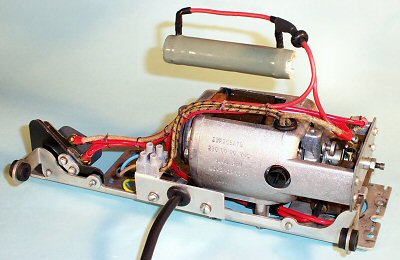 The motor assembly.
The motor and electrical equipment form another self-contained module which is mounted on a base plate at the rear of the machine. The drive motor is a General Electric universal motor which is governed at 3000RPM. The power switch is at the left, and the suppression capacitor is under the motor. The governor resistor is wound on a ceramic tube and covered with vitreous enamel, and can get very hot after sustained use. It is mounted above the motor, on the inside of the rear frame plate.
In the interests of electrical safety, the original cloth and rubber wiring has been replaced with high-temperature plastic, and the custom 2-pin power connector has been replaced with a fixed lead and a secure earth connection. There are still exposed live terminals on the motor and the power switch. Extreme care must be taken if power is applied with the covers removed, as the machine does not meet modern safety standards. Speed of operation.
The motor speed of 3000RPM is reduced about 14:1 for the setting line and 6:1 for the main clutch. The setting cycle requires 6 turns of the motor shaft and takes 120 milliseconds (120mS). Each half-turn of the main clutch takes only 3 turns of the motor (60mS), and the restore cycle takes about 7 turns (140mS). The setting cycle appears shorter than the restore because the main clutch starts slightly before the setting cycle has finished.
A complete addition operation (set, add, restore) takes 120 + 60 + 140 = 320mS, while a multiplication by 9 takes 120 + (9x60) + 140 = 800mS. The repeated additions during multiplication and division proceed at a peak rate of about one thousand additions per minute, or seventeen cycles per second.
The Marchant Figurematic does not have a separate multiplier storage register, but performs the multiplication "on the fly" as each digit is entered on a separate keyboard at the far right of the machine.
The first factor is set on the main keyboard, then the digits of the second factor are entered one at a time on the multiplier keyboard. After each keypress the machine makes the required number of additions, and moves the carriage one place to the left.
The multiplier digits are entered in left-to-right or "as written" order, starting with the most significant. The process must begin with the carriage a sufficient distance to the right, rather than (the more usual) fully to the left. The "Clear/Return" key and tabulator are used to set the starting position.
The "count-back" mechanism which controls the number of additions is in two parts - a setting mechanism driven by the multiplier keyboard and the setting shaft, and a count-and-trip mechanism driven by the main clutch.
The multiplication cycle takes from 320mS for 1, up to 800mS for 9. Successive digits can be entered as soon as the setting cycle is complete (140mS), giving the impression of continuous operation.
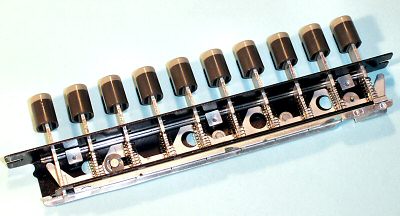 The multiplier keyboard.
The multiplier keyboard is a single row of ten keys at the far right of the machine. The "sawtooth" link prevents adjacent keys being pressed down together. A sliding locking plate locks and releases the keyboard at appropriate times as the cycle progresses.
The keystems act as stops for a sliding link which sets the count-back mechanism, and also press down on a "parallel bar" linkage which controls the motor and interlocks. (Except for the Zero key, which simply initiates a carriage shift into the next column).
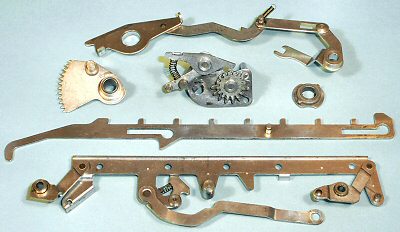 Multiplier component overview.
This view shows the main components of the multiplier mechanism.
Pressing any multiplier key (except zero) operates the parallel bar (bottom) and related linkages. This starts the motor and engages the setting clutch via a ratchet or "kick" mechanism on the outside of the No. 3 gear.
While the normal actuator setting process is taking place, a multiplier setting arm (not shown) pulls the sliding link forward until one of the tabs on its upper surface strikes against the lowered keystem. The long hook at the end of the sliding link pulls on the pin on the gear sector, rotating the count-back gear (centre) to the corresponding position.
The two-tooth return gear (centre right) is attached to the main clutch, and drives the sector backwards by one tooth for each addition cycle. When the sector returns to its home position it pushes on the trip linkage (top) to release the roller latch and stop the cycle.
There is extensive interlocking to prevent mis-operation, and a "single-cycle" mechanism to ensure that the multiplication will not be repeated if the key is held down.
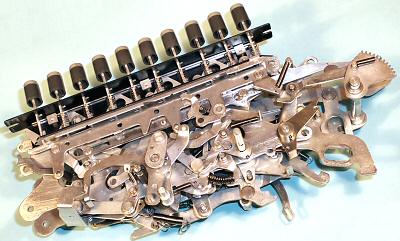 The multiplier setting linkage.
This view shows the inner sub-assembly of the control unit with part of the multiplier linkage assembled on the nearer side. The parallel bar, sliding link, and gear sector are readily visible.
More multiplier control links, levers, and interlocks are assembled on the inside of the outer right-hand side plate, and then the two sides are brought together. Very little of the multiplier mechanism is visible when the machine is fully assembled.
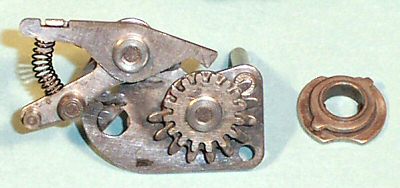 The count-back gear.
The count-back gear is mounted on the outer right-hand side plate, just forward of the main clutch. (The half-round hole secures the end of the main clutch shaft).
The gear is driven backwards by the cam-and-tooth assembly on the right. The notched cam allows the detent to rise momentarily as the single tooth passes, rotating the mechanism by one position for each addition cycle.
The mechanism is driven "off the end" of the 10-tooth partial gear as it reaches its home position, and so has no effect when the main clutch rotates in subsequent calculations.
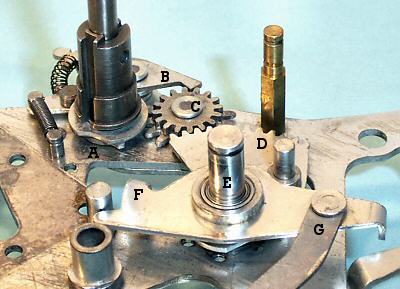 The trip mechanism.
This "underneath" view shows the trip mechanism assembled on the inside of the outer right-hand side plate.
The gear sector D pivots on shaft E, and is pulled forward (right) during the setting cycle by the pin on its right-hand side. The setting is held by the detent B. The cam A on the main clutch shaft raises the detent as the single tooth drives the count-back gear C one tooth per addition cycle.
As the sector is driven into its home position, its left-hand edge presses downwards on the tab F on the horizontal trip lever. This pulls upwards on the connecting link G, releasing the roller latch and stopping the main clutch. The machine then performs a restore cycle, shifts the carriage, and comes to rest.
The Figurematic carriage is built in two sections. The upper section contains the supporting framework and the counter register, while the lower section contains the main accumulator register.
The present machine has a 20-digit accumulator (the "main register" or "middle dial"), a 10-digit counter register (the "upper dial"), and a simple tabulator mechanism.
This page describes the layout and construction of the carriage. The registers and auxilliary mechanisms are described in the sections following.
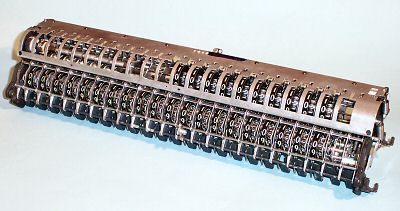 Overview.
This view shows the completed carriage with the cover removed.
The assembly is about 15" long, 4" deep, 3-1/2"high, and weighs about 5 pounds. The main register alone contains well over one thousand manufactured parts.
 The carriage upper section.
The top plate which forms the "backbone" of the carriage frame is a reinforced pressing of 0.045" steel. The heavy end plates which support the carriage mounting shafts are of 0.125" (1/8") steel.
The register mechanism is supported by a series of intermediate plates of 0.030" steel, which are held firmly in position by the top plate and the slotted locating strips and locking wires.
The locking wires and the mechanism pivot shafts are secured by two screwed retainer plates on the inside of each of the end plates. The mechanism can be disassembled without removing the top plate or the end plates.
 The carriage lower section.
The lower section of the carriage is built from a similar set of intermediate plates attached to a rigid U-shaped channel at the rear. Additional stiffness is provided by slotted strips and the sensing finger guards at the front.
The register consists of 20 identical mechanisms in the central region, and two abbreviated mechanisms at either end.
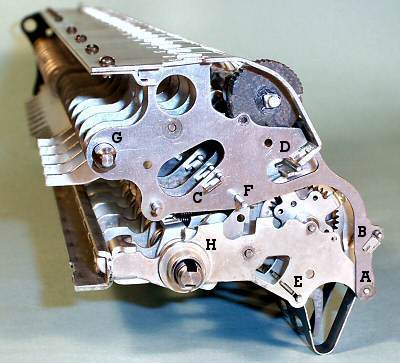 The sections assembled.
In this view, the carriage has been assembled without the left-hand end plate so as to show the internal arrangements.
The upper and lower sections of the carriage are joined by a 1/16" rod A at the lower front of the frame plates. The lower section can swing downwards about the pivot A to engage the register with the actuator unit below.
B and C are the slotted strips which reinforce the upper section, while strips D and E are for the lower. (Strip D actually passes through the oval clearance slots in the upper plates. Rod F also passes through both sections to operate part of the lower register mechanism). G and H are the clearing shafts for the upper and lower registers.
The five fingers extending to the rear of the carriage are part of a basic tabulator mechanism for the Clear/Return function. Rotating the thumbwheel (top right) extends one or other of the fingers, which operates the shift terminating mechanism at the corresponding position as the carriage returns to the right.
 Carriage rear view.
The upper section of the carriage is supported on a pair of 1/4" steel shafts through the holes in the upper and lower corners of the end plates. The lower section is normally held upwards and clear of the actuator by the springs at either end of the clearing shaft.
At the rear of the upper section are the drive gears and idlers for the counter register, and below these is the sawtooth rack for the carriage positioning mechanism. The fingers for the tabulator mechanism are visible at the far end.
The carriage shift and clearing operations are described further in the sections following.
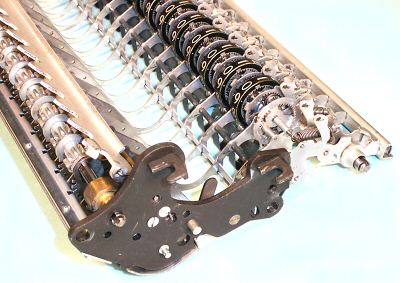 The carriage opened.
Although the carriage appears totally impenetrable when fully assembled, it can quite readily be opened to give full access for routine lubrication or maintenance.
The counter register or "upper dial" is in two parts. The register itself is mounted in the carriage at the top right-hand end, while the operating mechanism is mounted separately on an oscillating bar at the rear of the machine. The operating bar is driven from the main clutch through another reversing mechanism and a pair of eccentric shafts.
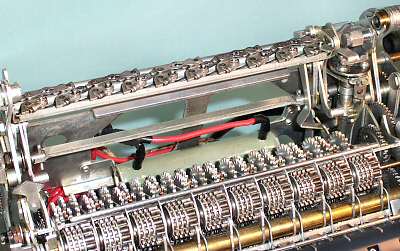 The counter operating bar.
The counter operating bar is mounted between the main frame plates at the top rear of the machine.
It carries a set of ten cascaded spring-loaded fingers which engage with the transfer gears at the rear of the carriage register.
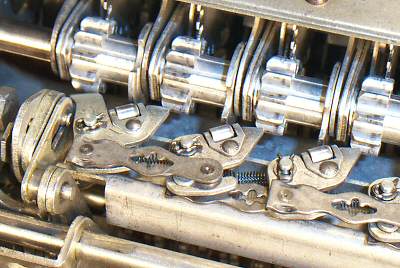 The counter drive mechanism.
This view shows the operating bar and the register gears from the rear of the machine.
The counter operating bar pivots on sliding links at each end, and is driven by the pin and arm near the bottom left. The fingers follow a roughly triangular path during every addition cycle, starting and ending at a point aligned with the tips of the gear teeth. The operating fingers first move downwards and forwards to engage below the tooth, then up to advance the gear and register, then back and down to the starting position. The vertical motion ceases before the fingers disengage, so that there is no possibility of overrun. A light detent holds the numeral wheel in position after the finger retracts. The oscillating motion is completed in 60mS, equivalent to 17 operations per second.
The first finger always engages with the register dial in the units column. The others are controlled by the rollers and notches in the gear flanges (and the cascaded connecting links) so that they only operate when a carry is required.
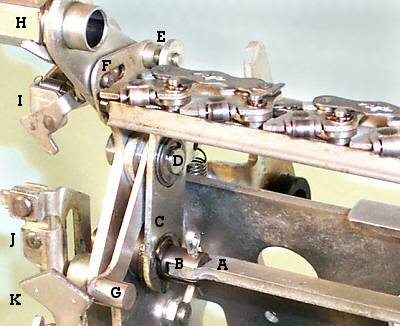 The operating bar drive mechanism.
The operating bar is driven at both ends by a set of eccentric shafts and links. This front view shows the arrangement at the left-hand end.
The rectangular drive bar A from the right-hand end rotates eccentric B, which is offset from its pivot in the frame plate. The lower end of link C moves in a circular path, which is converted by a curved slot at the fixed pivot D into a roughly triangular path at pin E. The counter bar slides and tilts on the (adjustable) pin F.
The operating bar is returned positively to its home position by a flattened cam and detent mechanism behind the spring-loaded lever G. The detent is released when lever G is pressed downwards as the carriage goes into the dip.
Also visible on the left of this view, but unrelated to the counter mechanism, are the carriage support bearing H, the shift terminating lever I operated by the tabulator fingers, the carriage dip arm J which pulls the main register down into engagement with the actuator, and the carriage centraliser K which rises between the main register frame plates at the start of the setting cycle.
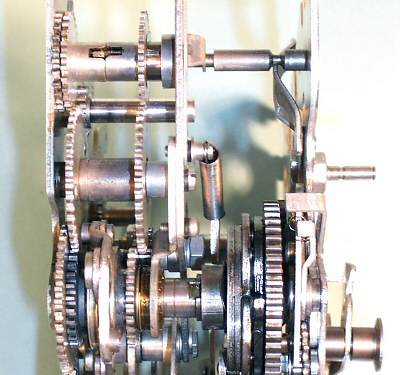 The counter reversing gear.
This view shows the alignment of the reversing gears and idlers at the top rear of the control unit.
The counter mechanism is driven from the leftmost gear on the rear shaft. The other two gears on this shaft are rotated in opposite directions by the double idler (centre) and the reversing idler (under the inner left-hand gear) whenever the main clutch rotates. An internal sliding pin engages with the slot in the hub of one or other of the contra-rotating gears, transfering the drive to the internal shaft and thence to the leftmost output gear.
The sliding pin is operated manually or automatically by the shaped arm attached to the right-hand side plate. The register can be set to count either forward or back (for complements) by a thumb tab at the right-hand side of the keyboard. The linkage allows the chosen direction to be reversed automatically if necessary during division.
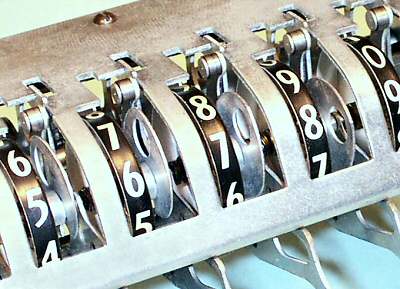 The counter clearing cams.
Rotating the counter clearing shaft through about 30° lifts the numeral wheel detents and pulls the roller arms downwards. The rollers act on the cardiod-shaped cams attached to the numeral wheels, driving them back to their zero positions. Numerals 0 to 5 rotate backwards towards zero, while 6 to 9 rotate forwards.
The main register, otherwise known as the "accumulator" or "middle dial", consists of 20 identical sections which "accumulate" the inputs from the actuator unit.
The carry mechanism differs from most others in that it operates continuously, rather than in discrete steps. If the units dial advances to 5, the tens dial will advance to 0.5 and the hundreds to 0.05. A "correction" mechanism temporarily hides these additional increments before the result is displayed.
The register mechanism uses two planetary or "epicyclic" gearsets in every column. One gearset adds the inputs from the actuator and the (partial) carries from the previous column, and the other subtracts the correction for display.
The register also includes a sensing mechanism which provides one of the inputs to the division trip comparator in the selector unit.
This page describes the components and the construction of the main register, and then explains the operation of the gearsets.
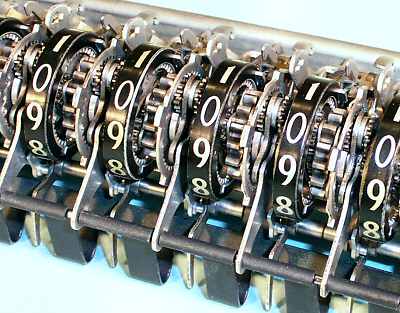 Overview.
This view of part of the assembled register shows something of the density and complexity, but (like most of the Marchant mechanism) it gives very few clues as to its operation.
The components are shown individually in the next illustration.
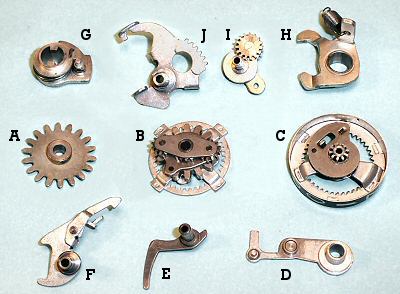 The main register components.
A. The idler gear, which receives the input from the actuator unit when the register is pulled down into engagement ("into the dip").
B. The main planetary gearset, driven by idler A and the input from the previous column.
C. The numeral wheel and snail cam. The numeral wheel is driven by gearset B, and drives the next column via the small central pinion.
D. The sensing arm. The roller near the centre of the arm rests on the snail cam, and rises proportional to the number displayed.
E. The sensing finger, operated by the pin on the end of D, which communicates the numeral wheel position to the division trip mechanism.
F. The backstop and latch, used only during the clearing of the register.
G. The clearing cam, double-keyed to the clearing shaft at the rear of the register.
H. The detent arm, which engages with the idler gear A. The detent is raised by the clearing cam G, or by the rod above the transfer gears on the actuator unit when the register is dipped.
I. The inter-stage gear and carrier, which also functions as the planet gear for the "correction" mechanism.
J. The correction quadrant, which rotates the inter-stage gear carrier to apply the correction to the display. The quadrant also provides the clearing function. The operation of the quadrant is controlled by the two tabs at the bottom which engage with the sensing arm Dand the detent arm H, and also by the "tail" at its upper left which engages with a fixed rod through the frame of the upper register.
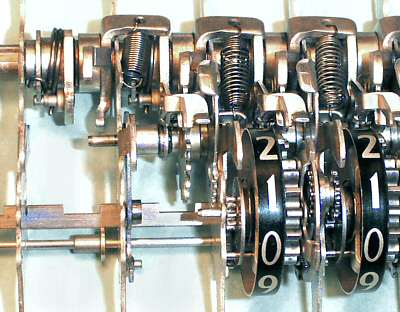 The register assembly.
The left-hand column shows the clearing cam and detent arm assembled on the 1/4" clearing shaft at the rear of the register.
In the next column there are four components assembled on the 5/64" (0.078") intermediate shaft. The sensing arm and backstop are installed on the left, and the idler gear and correction quadrant on the right.
In the third column, the register gearsets have been installed on the 1/16" pivot shaft at the front. A temporary locking rod (under the zero) keeps the gears in position until all the columns have been assembled.
 Epicyclic or planetary gearing.
An epicyclic or planetary gearset consists of one or more "planet" gears P, attached to some sort of frame or "carrier", which can revolve around a central "sun" gear S. The planets are surrounded by an "annulus" or "ring gear" R which has the gear teeth on its inner surface.
The planetary gearset can provide three fixed gear ratios if one or other of the three members is held stationary, or it can add or subtract inputs from any two members to drive the third.
Consider the planet carrier to be held stationary. If the sun gear rotates forward, the ring gear will rotate rearward in the ratio S/R (where S and R are the numbers of teeth on the sun gear and the ring gear). If the sun gear is held stationary and the planet carrier is rotated forward, the ring gear will rotate forward in the ratio (1 + S/R). If both sun and planets are driven independently, the movement of the ring gear will be the sum (or difference) of the individual contributions.
Similar ratios can be calculated if the ring gear is held stationary. The ratios and directions are not always intuitive, especially with more complex gearsets.
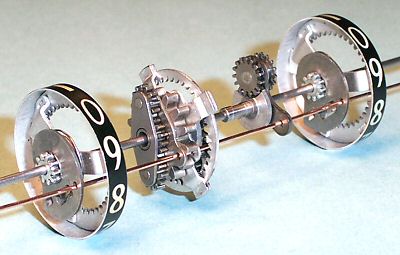 The gear train.
This exploded view shows the gear train components spread out along the shaft.
The small pinion on the right-hand numeral wheel forms the sun gear for the first planetary gearset. The inter-stage gear is the (single) planet, and the ring gear is attached to the main planetary gearset (centre).
The main gearset adds the inputs from the actuator (via the large-toothed input gear) and the previous column (via the ring gear) and sends the total via the double planet gears to the ring gear on the left-hand numeral wheel.
The locking wire (front) holds the numeral wheels, the central ring gear, and the two planet carriers in their home positions during assembly.
 Main register gearing.
This diagram shows the technical details of the two planetary gearsets that are illustrated above.
A is the numeral wheel of the first (or any) column, which is fixed to sun gear B of 10 teeth. B drives through the inter-stage planet gear C-E (15 teeth) and its carrier D to the central ring gear G (40 teeth). (The planet gear is split into two parts to pass over the frame plate F, but functions as one). With the planet carrier stationary, there is a 4:1 (40:10) reduction between the numeral wheel A and the ring gear G.
Ring gear G is fixed to the second sun gear H of 16 teeth. H drives through the planets I (12 teeth) and carrier J to the second numeral wheel L (40 teeth). With the planet carrier stationary, there is a 5:2 (40:16) reduction between the central ring gear G and the left-hand numeral wheel L. The overall ratio between the two numeral wheels is thus (4:1 x 5:2), which is 20:2 or 10:1 as required.
The input from the actuator is applied (via the idler gear) to the drive gear K of 14 teeth, which is fixed to the second planet carrier J. Recall that the actuator transfer gear advances by one tooth for each digit position. Thus it is required that a 10-tooth advance of 14-tooth gear K should advance the numeral wheel L by one full revolution (ie, an increased rotation). With the sun gear H held stationary, the ratio between the planet carrier and the numeral wheel ring gear is (1 + 16/40), which is 56:40 or 14:10 as required.
The resultant motion of the left-hand numeral wheel L is thus the sum of these two movements, ie, one digit position per actuator tooth in the current column, plus one-tenth of the rotation of the previous numeral wheel.
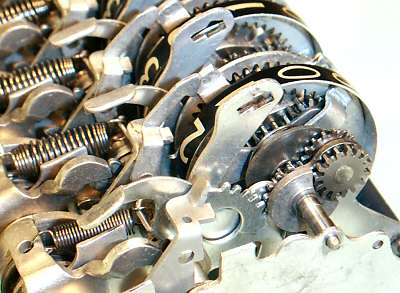 The "correction" mechanism.
The correction mechanism uses the inter-stage gear and quadrant to temporarily subtract the increment due to the previous column before presenting the display. The correction is applied as the register rises at the end of the addition, and is removed at the start of the next operation.
This view shows how the quadrant engages with a positioning gear on the back of the planet carrier, allowing the carrier to be rotated through a quarter of a turn.
The "tail" on the rear of the quadrant normally sits above a fixed rod in the upper section of the register assembly. As the main register is pulled down "into the dip" to commence an addition, the tail is held up by the rod. The relative motion lifts all the tails (relative to the rest of the register), and rotates all of the planet carriers to the fully rearward (vertical) position. The addition then proceeds as described above, with the planet carriers stationary.
When the register rises, the tail of the quadrant falls, allowing the planet carrier to rotate forward. The gearing is such that a rotation of one-quarter of a turn on the planet carrier will reduce the next numeral wheel display by one digit. The motion is limited by a tab on the bottom of the quadrant, which lifts the sensing arm until its roller strikes against the snail cam. The correction is thus proportional to the previous digit position.
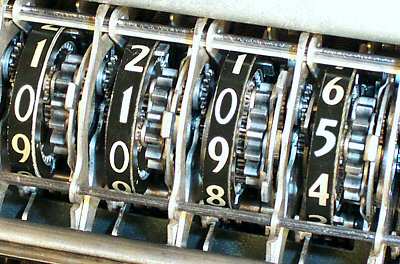 Addition stage 1.
This view shows the register displaying "0095" part-way through an addition cycle, before the register rises and applies the corrections. This state is never visible during normal operation.
The register is still dipped, and the inter-stage planets are all pulled back to their "home" positions with their carriers vertical (visible to the left of the uppermost numerals).
The units column stands at 5, as expected. The tens column has been advanced by 9 places by the actuator, plus a further 0.5 of a place carried in from the units column. The hundreds column has advanced to 0.95 of a place by the carry alone, and even the thousands column has moved by almost one-tenth (0.095) of a place.
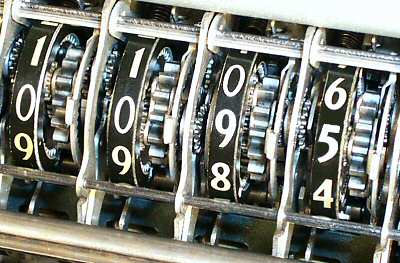 Addition stage 2.
As the register rises, the quadrants allow the planet carriers to move forward until stopped by the sensing arm and snail cam. A 90° rotation of the carrier will reduce the next numeral display by one place.
The units digit stands at 5, so its sensing arm rises half way. (The tip of the sensing arm is visible to the left of numeral 4). The planet carrier rotates 45° (to the left of numeral 5), subtracting 0.5 of a place from the tens digit.
The tens digit now stands at 9, so its sensing arm lifts further (visible to the left of numeral 8). The planet carrier moves further forward (to the left of numeral 9) and corrects the hundreds display. The process continues across the register, temporarily storing the "excess" corrections in the positions of the inter-stage planet gears.
Addition stage 3.
If we now add another 5, the carriage first goes back into dip and restores the situation shown in Stage 1. The units digit advances from 5 to 0, the tens from 0.95 to 0, the hundreds from 0.095 of a place to numeral 1, and the thousands from 0.095 of a place to 0.1 of a place.
As the register rises, the units and tens digits already stand at 0, so no corrections are applied to the tens and hundreds. The hundreds digit stands at 1, and applies a correction of one-tenth of a place to the thousands. The end result is a display of 0100, as expected.
Ripple carry.
If 1 is subtracted from a cleared register, the display must change to all-nines. The subtraction proceeds as normal, with the actuator driving the units digit back one place to 9, and the inter-stage gearing driving the tens backwards by 0.1 of a place.
As the register rises, most of the numeral wheels and snail cams still stand at 0 and prevent the sensing arms from rising. The units digit stands at 9, and so begins to subtract a correction of 0.9 of a place from the tens digit. In moving the tens back from 0 to 9, the high point of the snail cam moves out from under the sensing roller. The roller immediately rises, allowing the correction quadrant to move back and the planet carrier to move fully forwards, reducing the next digit by one place from 0 to 9. The process repeats as a ripple carry across the whole register, with the energy being provided by the correction quadrant springs.
If 1 is added to all-nines, the result must return to all-zeros. As the carriage dips, the correction quadrants pull the planet carriers back to their home position and restore the register to the state in the first paragraph. (The energy is provided by the carriage pull-down mechanism working against the quadrant springs). Adding 1 then returns the two right-hand digits to zero, so no corrections are needed as the register rises.
 Clearing the register.
This view from the rear of the register shows the components involved in the clearing operation.
Prior to clearing, the register is in a state similar to "Addition Stage 2" above, with the inter-stage planet gears some distance forward of their home positions.
As the clearing shaft (bottom) rotates about 15° it raises the idler gear detent (lower centre) and pushes the backstop (centre) forward against the central ring gear. As it moves another 15°, a lug on the bottom of the detent arm raises the rear of the correction quadrant, pulling the inter-stage gears back towards their home position.
The planet gear will initially tend to pull the central ring gear rearwards as well, but this movement is blocked by the backstop as soon as the ring gear reaches its home position.
With the ring gear held stationary, the 4:1 reduction ratio now operates in reverse, spinning the previous numeral wheel rapidly backwards. As the displayed numeral reaches 0, the tab between numerals 2 and 3 strikes the horizontal section of the backstop and is caught by the spring-loaded latch. Clearing of each column depends to some extent on its neighbours, and the whole operation relies on speed and inertia to throw the numeral wheels back under the latches.
As the clearing shaft is released, the quadrant and planet gear will be held in their home positions by the sensing arm resting against the high (zero) point of the snail cam. Finally, the backstop is released, and the detent arm re-engages to lock the input gear.
The carriage is shifted sideways by a toothed rack attached to the rear of the upper frame. The rack engages with a driving disc at the right-hand rear of the machine. The disc is driven from the number 3 shaft in the drive train via a dog clutch and reversing gear.
The carriage shift can be initiated manually via the control keys, or automatically during multiplication and division. There is extensive interlocking to prevent mis-operation.
 The carriage positioning rack.
This view shows the carriage positioning rack at the right-hand rear of the machine. The driving disc is just visible behind the vertical frame plate. The small sloping tab on the outer edge of the first (and last) tooth operates the shift terminating mechanism at the end of the travel.
The rack is not rigidly attached to the carriage, but is hinged from the upper frame spacer shaft. It is normally held flat against the driving disc by the stiff spring visible at the near end. The rack is profiled to give a constant linear velocity, so that the carriage will move in a smooth and continuous manner as it returns to its starting position. Buffer springs at each end of the rack absorb the impact of rapid movement.
 The driving disc.
The shifter disc has three drive rollers, and rotates one-third of a turn to move the carriage by one position (5/8") in either direction. When the carriage reaches the end of its travel, the chamfered edge of the active roller comes to rest against the sloping tab at the end of the rack. If a further shift is initiated, the roller will lift the rack and pass harmlessly underneath.
The carriage is not locked in position when at rest, but has a certain amount of movement due to the buffer springs and the free play in the drive train. Final positioning is not done until the start of the setting cyle, when the carriage centraliser (the broad arrowhead at the left-hand end of the actuator unit) rises between the frame plates of the main register to align the carriage and hold it in position.
The two "ears" above the shifter disc are part of the shift terminating mechanism (described below).
 The drive mechanism.
The shifter disc is driven via a 3:2 bevel gearset from a half-turn shaft extending horizontally from the lower rear of the control unit.
The far end of the horizontal shaft is driven from the number 3 shaft in the drive train via a dog clutch and a reversing mechanism, partly visible through the cut-out in the frame plates. The cam and detent roller hold the drive shaft in the two rest positions when the clutch is disengaged. The supporting bracket attaches to the motor base plate.
During automatic division, a two-lobe cam on the horizontal shaft (hidden) signals the completion of the carriage shift and re-starts the subtraction process in the new column.
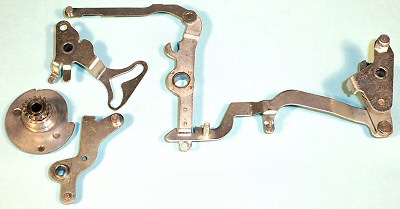 The shift clutch linkage.
The shift clutch linkage is located along the left-hand side of the control unit.
The lever arm at the right (front) is attached to a shaft operated by the manual shift keys. The lower horizontal link has a notch at its rear end, which engages with a shelf on the vertical shift control arm (centre). Several interlocks can press down on the horizontal link to disconnect it from the central lever and disable the manual control.
At the left of this view are the shift clutch operating arm, the clutch assembly with its driving gear (hidden) and reversing gears, and the clutch release dog.
The upper horizontal link swings the shift clutch operating arm fore and aft. The two short arms at its lower left operate a sliding collar which selects one or other of the reversing gears. The longer slotted arm operates the clutch release dog, which engages the clutch and starts the motor when the arm moves in either direction. A spring at the bottom of the release dog normally holds the operating pin in the centre of the "V" slot, with the dog preventing the clutch from turning. A non-return detent (not shown) drops into a small notch at the top of the clutch disc to hold it in position against the dog at the end of the cycle.
A mechanism driven from the carriage dip arm also operates on the central shift control lever to initiate automatic left shifts when the carriage rises during multiplication and division. This mechanism is disabled during normal addition cycles, or by the "Non-Shift" key in multiplication.
The shift terminating mechanism.
The shift terminating mechanism has two functions: to stop a manual shift when the carriage reaches the end of its travel, and to terminate the automatic right shifts initiated by the "Clear/Return" key.
When the carriage reaches the end of its travel, the small tab on the end of the positioning rack (first picture above) will sit just under the ear on the terminating lever above the shifter disc (second picture). If a further manual shift is requested (or the key is held down), the disc will rotate, the rollers will raise the rack and pass underneath, and the tab on the rack will raise the terminating lever. The terminating lever disconnects the lower horizontal link from the vertical shift control lever, disabling the manual request and allowing the clutch dog to spring back to its neutral or off position when the shift cycle is completed. The linkage resets when the manual shift key is released.
When the "Clear/Return" key is pressed, a mechanism at the rear of the control unit initiates and latches a manual right shift, as if the operator held down the key. The shift terminating lever is extended via a shaft to the left-hand side of the machine, and when this is raised by the tabulator finger it terminates the shift and releases the latch.
Clearing the upper and lower registers is accomplished by rotating the respective carriage support shafts through an angle of about 30°.
The motion is generated by a pair of cams and clutches at the rear of the control unit. The clutches are controlled by a linkage from the clearing keys at the front of the machine.
There is also a "Clear/Return" function which clears both registers and returns the carriage to the right, and an automatic counter clear function at the start of a division.
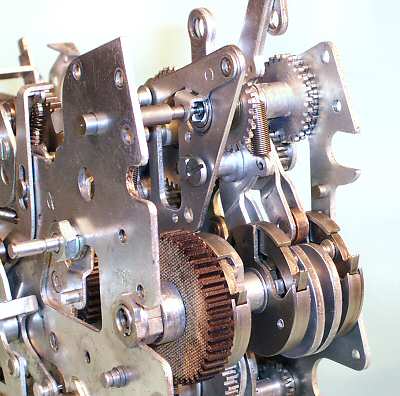 The clearing cams and clutches.
The clearing cams and clutches are mounted on the No.4 shaft at the rear of the control unit. The outer end of the shaft has an eccentric bearing to adjust the clearance on the fibre drive gear.
The two cams at the bottom right operate the clearing linkages via the two roller-equipped lever arms (top right).
The third cam (next to the drive gear) operates the Clear/Return function via a linkage which releases both the clearing cams and initiates a carriage shift.
The clutches are controlled by a linkage which starts the motor, releases the clutch pawls, and then disengages, allowing the cams and clutches to make only a single revolution.
The three dog clutches rely on a deliberate friction load from an internal wave washer to hold them in their rest positions against the release dogs at the end of their cycle. The friction load is present at all times, and helps to bring the gear train to a stop whenever the motor is switched off.
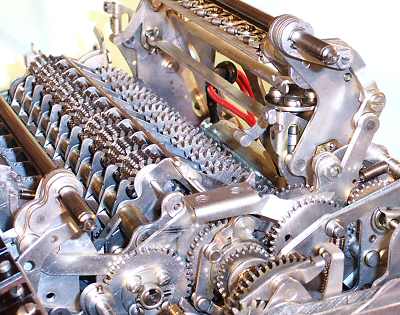 The clearing links.
This view shows the links which connect the two operating arms from the control unit to the carriage support shafts.
The bushings which rotate the shafts are attached to the brass support bushings in the frame plate. They are built up from seven layers of pressed steel so as to distribute the turning force along the double keyway. The counter mechanism is relatively light, but clearing the main register requires a force of about ten pounds on the horizontal connecting link.
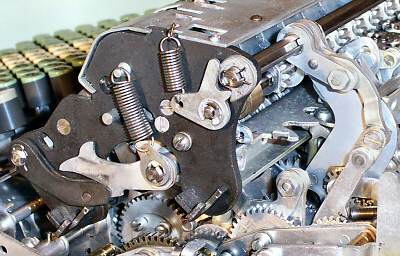 The carriage clearing arms.
The rear carriage support shaft has a simple lever arrangement at the right-hand to transfer the rotation to the counter register clearing shaft.
The main register clearing arms are much larger to cope with the higher loads. The front support shaft has a double arm and roller at each end of the carriage, which transfers the rotation to the main register clearing shaft. The linkage allows for the vertical movement of the register as it is pulled down into the dip.
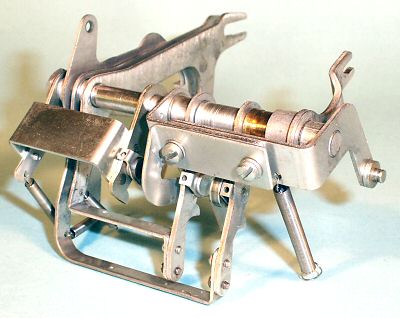 The clearing clutch operating linkage.
The clutch operating linkage can be installed as a complete sub-assembly after the control unit has been attached to the rest of the machine. The shaft is held in place by two retainer plates attached to the frame side plates.
The forward-pointing yoked arms on the left (in this rear view) connect to the clearing keys at the front of the control unit via three long links and levers on the outer right-hand side. They operate the three clutch release dogs on the lower vertical arms.
The yoked lever on the right of this assembly engages with a pin on the right-hand carriage pull-down lever, and relays the carriage position through the cross-shaft to a series of interlocks in the control unit.
The rightmost lever arm initiates the carriage return function via a long link to the shift mechanism at the front of the control unit.
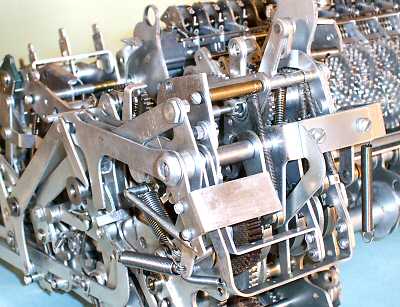 The clutch linkage installed.
This view shows the clutch operating linkage and the carriage dip interlocks installed on the right-hand rear corner of the machine.
- Every column of the machine incorporates a ten-speed gearbox with three drive shafts and five selectors, which drives the corresponding register dial at a speed proportional to the number selected.
- The tens-carry mechanism is contained entirely within the main register in the carriage, using an additive (ie, differential) gearing mechanism based on two planetary gearsets.
- Multiplier digits are entered on a separate keypad in left-to-right or as-written order (ie, starting with the most significant). The calculation is performed "on the fly" and is completed as soon as the last digit is entered.
- The division mechanism does not wait for overdraft, but uses a predictive trip mechanism based on an analog magnitude comparator to avoid unnecessary machine cycles.
- The drive train includes 28 gears on 15 shafts, six dog clutches, and three different reversing mechanisms. Overall, the machine contains about four thousand manufactured parts.
- The machine performs a complete addition cycle in less than one-third of a second, with a peak rate of over one thousand additions per minute.
This page gives an overview of the layout and construction, and the basic sequence of operation.
 Removing the covers.
 The Figurematic covers are held in place by an ingenious system of overlapping flanges with no visible screws.
To remove the covers, roll the machine onto its back and remove the four screws in the corners of the base plate. Catch the front panel as it flies off, and slide the base sideways to disengage it from the back cover. Loosen the screws in the three small brackets under the front of the keyboard escutcheon, lift the front of the escutcheon and pull on the rods at either side to release the rear. Lower the machine, lift off the back panel, and pull the sides straight off. Remove the carriage cover from the back with two screws at each end.
Although the space under the numeric keyboard is empty, the rest of the machine is very densely packed. A few things can be seen to move as the machine cycles, but on the whole the mechanism reveals very few clues as to its operation.
 The frame.
 With the mechanism removed, we see that the machine is built upon a substantial pressed-metal frame of 0.078" steel. The frame plates are held together by interlocking tabs and a generous quantity of 3/16" bolts. A rear base plate (not shown) supports the drive motor. There are four smaller sub-frame plates in the control unit area on the right of the machine.
The frame sits on a light pressed-metal base plate with an absorbent lining. The side covers are substantial aluminium die castings which are located by the rubber grommets at each corner of the frame.
The calculating mechanism is built up from a number of separate modules which are supported by the frame. Although the mechanism looks impenetrable on first aquaintance, there is actually very little holding it together. The major modules can be removed and replaced relatively easily, once you know how they are connected.
 The main modules.
 The mechanism consists of four main modules:
- the carriage (rear), which contains the counter register, the main accumulator register, and the carry mechanism.
- the control unit (right), which contains the drive train and the mechanical control logic.
- the selector unit (front left), which sets up the gear ratios in each column according to the input from the keyboard. (The selector unit also houses the division trip mechanism).
- the actuator unit (front centre), which contains the proportional gearing that drives the main register.
Basic sequence of operation.
At its most basic level, the mechanism operates on a four-stage cycle:
- Manual setting. Pressing a numeral key positions a "selection cam" near the bottom of the selector unit, and a check dial (the "keyboard dial") near the top.
- Powered setting. Pressing a function key releases the setting clutch and starts the motor. The setting clutch rotates the setting camshaft (the "setting line") exactly half a turn, and then disengages. The setting line operates the selector mechanism, which sets up and locks the gear ratio for each column according to the position of its selection cam, and "dips" the carriage to bring the main register into engagement with the actuator.
- Addition. As the setting line comes to a stop, it engages the main clutch to drive the actuator unit, which in turn drives the register columns via the selected gear ratios. The drive passes through a reversing mechanism for subtraction or division. The main clutch rotates either:
- half a turn for a single addition cycle
- a known number of half-turns for multiplication
- an (as-yet) unknown number of half-turns for division.
- Restore. On completion of the main clutch cycles, the setting clutch re-engages and completes another half-turn, raising the carriage and restoring the machine to its original state in readiness for a new operation
Marchant Figurematic - The Actuator Unit
The actuator unit contains the proportional gearing mechanism which drives the main accumulator register in the carriage. Each of the ten identical sections contains a ten-speed gearbox with eleven ratio gears, fourteen transfer gears, and five two-way selector arms. The unit is mounted between the main side plates at the upper rear of the machine, immediately below the carriage.
 The drive shafts.
 The actuator unit has three drive shafts in the lower section which carry the ratio gears, and a single output shaft at the top. The three drive shafts carry a total of 110 gears, which are driven simultaneously from the main clutch via the single large gear at the right-hand end. The output shaft carries ten compound gear assemblies which transfer the rotation of the selected ratio gears to the main register in the carriage.
The main clutch rotates the front ratio shaft exactly half a turn for each addition. The upper rear shaft is driven from the half-turn shaft via a 2:1 reduction gear at the right-hand end. This in turn drives the lower rear shaft via a 3:1 reduction at the left-hand end. The three drive shafts thus rotate 1/2, 1/4, and 1/12th of a turn for each addition cycle. The "centraliser cam" at the left-hand end has a double spring-loaded detent to hold the shaft securely in its home position at the end of each cycle. A "hold-off" mechanism disables the centraliser during repeated cycles.
The drive shafts and gears can be adjusted laterally by springs and nuts at the left-hand end. The actuator unit on its own is not particularly rigid, and relies on the frame plates for accurate positioning and alignment. The "arrow head" at the upper left-hand end is not related to the gear mechanism, but serves to align the carriage laterally as it is pulled down ito engagement with the actuator.
 The ratio gears.
 This view shows the ratio gears for one section of the actuator, arranged in order as they are assembled on the three drive shafts.
Rather than thinking of ratios, it is easier to consider the distance that each gear advances during an addition cycle. The rightmost gear on the front shaft has 18 teeth, and so will advance by 9 positions for each half-turn cycle. This movement can be "picked up" and transferred to the output gear to advance the register by 9 digits. Likewise for the 16, 14, and 12-tooth gears.
The three leftmost gears on the quarter-turn shaft have 20, 16, and 12 teeth, and deal with digits 5, 4, and 3 in the same manner. The sequence can not be continued for digits 2 and 1, as it is impractical to make an 8 or 4-tooth gear. Rather, 24 and 12-tooth gears are provided on the twelfth-turn shaft. Their movements are copied back onto the quarter-turn shaft through 12 and 24-tooth idlers, to be picked up by the transfer mechanism.
 The ratio gears assembled.
 This top view of the actuator unit shows the alignment of the ratio gears on the three drive shafts. The output is picked up from the pairs of gears on the half and quarter-turn shafts as shown:
| 1/4-turn | 5 | 4 | 3 | 2 | 1 |
| 1/2-turn | 6 | 7 | 8 | 9 | 0 |
 The pick-up arms.
 This view shows the actuator unit partially assembled, as seen from the left-hand end. The pick-up arms hang from the output gear assembly at the top of the unit. The flanged pins at the bottom front of the arms engage with forked yokes on corresponding arms on the selector unit.
As the setting line operates, one of the five arms will be swung forward or back by the selector forks. The other four arms will remain in "neutral". The selection will be locked by a bail that rises into the slots at the bottom of the arms.
The large "pick-up" gear on the active arm will engage with the corresponding ratio gear on either the half or quarter-turn shaft. As the shafts rotate, the pick-up gear drives through an intermediate gear (hidden) to the output gear at the top, and thence to the carriage register.
The output gear is normally locked in known positions by the detent arm on the large keyed shaft at the centre right, thus ensuring that the pick-up gears and the register will always engage cleanly.
 The pick-up gear assembly.
 In this view the pick-up gear assembly has been spread open to show the internal construction.
Four of the five selector arms are permanently assembled with their pick-up gears, idler gears, and output gears. The fifth arm is mounted face-down on the top (to the right, as installed), and shares the double-width output gear, which also drives the register.
All of the output gears are keyed together, so that all of the transfer gears will rotate in unison. As the active selector drives "up" the gear train, the four neutral selectors drive back down, spinning their pick-up gears in mid-air.
 The output gears.
 This view from the top front shows how the four sections of the output gears are interleaved with the tops of the five pick-up arms. The centre-to-centre distance of the columns is 5/8", so each pick-up arm with its gears and rivetted hubs has to fit into only 0.090".
In order to transfer the motion from the actuator to the display, the accumulator register is pulled downwards (or "dipped") to engage with the output gears. At the same time, the detents in the register are released as they are pulled down against the rod mounted at the top of the actuator (just behind the output gears). The continuous gear train from the main clutch to the register dial ensures that the numeral wheels are precisely controlled for the whole of the addition cycle, allowing the detents to be disengaged to reduce friction and noise. The gear train rotates in a positive, smooth, and silent operation with no possibility of overrun.
If Zero is selected, the right-hand pick-up arm moves forward and holds the actuator detent arm against the output gear, keeping it locked as the other columns are released. The broad keyway in the detent shaft (see photo 4 above) provides about 10° free movement to allow the detents to move independently.
Marchant Figurematic - Keyboard
Ergonomics was rarely a strong point with mechanical calculators. Although the keyboard is the primary "user interface" to the machine, it was common for buttons, knobs, and levers (frequently un-labelled) to sprout from any available location, with little regard for the convenience (or accuracy) of the operator.
In contrast, the Marchant Figurematic has a very clean and simple keyboard layout, which successfully hides all of the complexities within. Apart from the numeric keys there are only 12 operator controls, which are arranged and labelled in a clear and logical fashion in a single panel along the right-hand side. (The training manuals suggest that the machine should be operated with the left hand).
In spite of the apparent simplicity of the keyboard, the Figurematic is a very capable machine which is a pleasure to use.
 The Figurematic keyboard.
 The numeric keys are colour-coded in thousands, with a sliding decimal point indicator above the check dial. The multiplier keys are arranged in a single column at the far right.
The control keys are arranged in two columns between the numeric keys and the multiplier. At the bottom are the clearing keys for the keyboard and the two carriage registers. The "Clear/Return" key clears both registers and returns the carriage to a (selectable) starting position.
Above the clearing keys are the right and left carriage shift keys, and above these on the left are the Plus and Minus keys. Plus and Minus only ever perform a single machine cycle, even if held down. To the right of these are two function keys which modify the action of the multiplier - "Non-Shift" supresses the automatic carriage shift between digits, and "Neg Mult" subtracts the product from a previous total in the main register.
At the top of the control columns are the "Division" key which clears the counter and commences the process of division, and a "Stop" key which clears most machine functions and terminates a division. Pressing the Stop key once requests the machine to stop in an orderly fashion at the end of the curent cycle, while pressing twice stops the division immediately. A small tab control to the right of the multiplier "8" key reverses the direction of the counter register if it is required to display complements.
During addition and subtraction, the keyboard is cleared automatically as soon as the setting phase has been completed. This allows the operator to start entering the next number while the add and restore phases are still in progress. This overlapping of operations (which computer folk now call "pipelining") allows a significant increase in speed for a skilled operator.
Notice that there is no "repeat" key to retain the keyboard setting for repeated addition. Although it is not obvious from the keyboard, the same effect can be obtained more quickly by pressing the Add key and a multiplier key simultaneously. The multiplier key performs the required number of additions, while the Add key supresses the carriage shift and enables clearing of the keyboard. A similar effect can be obtained by using the multiplier with the Non-Shift key. (See the Multiplier section for further details).
 The keyboard modules.
 The numeric keyboard is constructed from a series of independent single-column modules which are screwed to supporting bars at the upper and lower ends.
The nine identical key stems press downwards on the ramps on the sawtooth parallel bar, pushing it rearwards in proportion to the digit selected. There is a sliding lock plate to hold the key down, and a buffer strip under the top plate to reduce impact noise when the key is released.
To the right of the number keys is a different removable module supporting the Plus/Minus keys and the keyboard clearing key, while another at the far right supports the multiplier keys. The two columns of function keys are assembled as part of the control unit and are not easily removable.
 The keyboard modules installed.
 Each module has a separate adjusting screw and lock nut to set its fore-and-aft position relative to the selector unit, so as to ensure that the check dial numerals are properly centred in their viewing windows. It may be necessary to bend the keystems slightly to adjust individual digits.
The "walking feet" on the left of the key modules are part of an elaborate interlocking system which ensures that only a single key can be pressed at once. The inertia of the bars contributes to the "feel" of the keyboard.
There are three small right-angle brackets across the front of the machine to secure the front of the keyboard escutcheon. The rear end of the escutcheon is clipped in place by the spring-loaded rods on the brackets at each side of the numeric columns.
Marchant Figurematic - The Selector Unit
Each column of the selector unit takes a single input from the keyboard, and positions a set of five selector forks which control the pick-up arms in the actuator unit.
During the "manual setting" phase, the operator input from the keyboard rotates a small "selection cam" at the bottom of the unit and a numeric "check dial" at the top. During the "powered setting", the setting line presses a set of feelers against the cam to position the selector forks forward or back. The selector forks then position the pick-up gears in the actuator unit.
The selector unit also houses the division trip mechanism, which uses the keyboard setting as one input to the magnitude comparator. The trip mechanism is described separately in the "Division" section.
 Overview.
 This overall view shows the selector unit fully assembled and ready for installation. There are ten identical sections on 5/8" centres. The assembly is about 5-1/2" high.
 The selector unit installed.
 This view shows the selector unit installed between the main frame side plates in the centre of the machine. The selector unit is the first item to be installed in the frame, and the last to be removed.
 The selector frame.
 The selector mechanism is supported on a light frame built from plates of 0.032" steel. The plates are held in alignment by six notched metal strips about 0.150" wide, located at most of the corners. The strips are inserted through slots and locked in position by a 1/16" rod or wire.
The frames for the actuator and the carriage are built on a similar principle.
 The selector mechanism.
 This view from the right-hand side shows the selector mechanism for one column, assembled for illustration on the outside of the frame.
The central vertical lever is pivoted on a 1/16" shaft just above its centre, and carries a more-or-less horizontal gear sector on either end. The lower sector drives the selection cam, while the upper drives the keyboard check dial. A torsion spring adjacent to the check dial provides a restoring force.
The sawtooth bar under the keyboard module hooks over a pin on the vertical arm, just below the pivot. The keystems push the bar rearward, rotating the arm according to the digit pressed. The total movement at the connection point is only about 3/16" - the movement from one key to the next is less than 1/32".
The selector linkage consists of three interconnected links which are pivoted on the three shafts at the bottom centre. The linkage is operated by a double cam on the setting shaft, via a follower which pivots on the shaft at the far right. (There are actually three cams spaced across the width of the machine). Marchant used several of these double or opposing cams to both advance and retract a mechanism, although in other places they used conventional single cams and spring-loaded followers.
 The selector feelers.
 The front selector arms pivot on the smaller shaft to the left, which is fixed to the frame. The rear arms pivot on the larger shaft to the right, which itself swings on short links from the large-diameter fixed shaft at the bottom. The moving pivot shaft is pushed forward and back horizontally by the links from the setting shaft cam followers.
The selection cam assembly consists of a driving gear and five pressed-metal discs, each of which handles two digit positions. Each position has a raised tooth on one side and a notch on the opposite side. The cam is shown in the position for digit 1, which requires the rightmost (ie, closest) selector fork to be pushed rearward.
At the start of the manual setting cycle, the upper (yoke) ends of the selector arms are still locked in place by the bail raised under the actuator pick-up arms. The moving pivot shaft is pulled well to the right, so that the feelers are wide apart and the selection cam is free to rotate in response to the keys.
When a control key is pressed, the setting line will begin to rotate. During the forward stroke (the first 90°) the selector locking bail will be released and the moving pivot shaft will be pushed to the left. The right-hand feeler will be blocked by the projection on the cam, causing the selector fork to rotate clockwise. As the moving pivot continues forward, the cross-link at the bottom causes the left-hand link to also rotate clockwise, forcing the left-hand feeler into the conveniently-located notch.
Had the cam been in the zero position, the situation would have been opposite and the selector fork would have rotated anti-clockwise. The other four sections of the cam present neither teeth nor notches at this time, so their selector arms are forced into the central position.
 The selection cam detent.
 This view from the left-hand side shows the spring-loaded detent which engages with the drive gear on the selection cam.
The detent is engaged as the moving pivot shaft moves forward, holding the selection cam firmly in position as the setting is transferred to the feelers and the actuator pick-up arms. The selection is then locked by the bail which rises into the slots in the lower edges of the pick-up arms.
With the selection now firmly locked into the actuator, the moving pivot shaft commences its return stroke. The selector feelers are pulled back clear of the cams, the detent is released, and the keyboard is cleared. Finally, the main clutch is engaged as the setting line comes to a stop at 180°.
The actuator pickup arms remain locked in position until the start of the next powered setting cycle. However, the keyboard and selection cams are free to move, allowing the operator to start entering the next number into the selector while the add and restore cycles are still proceeding.
Marchant Figurematic - The Control Unit
The control unit contains all of the mechanical logic which controls the operation of the machine, and the drive train which supplies the motive power. The drive train is described in the next section.
The control unit is essentially a self-contained module, which has remarkably little connection to the rest of the machine. It takes inputs from the function keys in its forward section, and generates outputs to drive the setting line, the actuator and registers, the division sensing levers, and the carriage shift and clear mechanisms at the rear. It receives three feedback signals from the carriage dip arm, the carriage end-of-travel sensor, and the division trip mechanism. There is extensive interlocking between the functions to prevent mis-operation.
The control unit is an extremely complex mechanism containing over two hundred separate links and levers, all different, and well over one thousand manufactured parts. The individual components will not be described in detail, although some of their functions will be discussed further in the sections following.
 Overview.
 This view shows the control unit fully assembled and mounted in position along the right-hand side of the machine. The function keys and control linkages occupy the forward section, with the drive train at the rear.
The unit is held in place by a number of long screws between the outer and inner right-hand side plates. The screws also carry spacers and pivot bushings for parts of the mechanism, and act as attachment points for a multitude of springs.
Although it is not a trivial operation, the whole assembly can be removed in one piece after removing the setting shaft and part of the carriage shift and clear mechanisms.
 The control and logic unit.
 The control and logic unit starts out as two blank sub-frame plates, roughly 6" x 4" and an inch apart, which support the two rows of function keys at the right-hand front of the machine.
Several layers of links and levers are assembled on the insides of each of these plates. The two are then brought together, and more linkages are added on the outer sides.
This view from the lower left-hand side shows the "mechanical brain" at the stage where most of the logic has been assembled, prior to fitting to the outer right-hand frame plate. There are many loose ends at this stage, but very few external connections once the assembly is completed.
 The control unit assembled.
 This much tidier view shows the control unit ready to be attached to the rest of the machine.
There are over 200 different links and levers in the assembly to this stage, and still more to be added after installation.
Marchant Figurematic - The Drive Train
The drive train provides the motive power for the selector unit, the actuator, the counter register, and the carriage shift and clear mechanisms.
It contains 28 gears on 15 shafts, six dog clutches, and three reversing mechanisms. The drive mechanism is mounted at the rear of the control unit on the right-hand side of the machine.
The drive train is powered by a series-wound universal motor governed at 3000RPM.
 The main gears.
 This view shows the main drive gears, partially assembled on the inside of the outer right-hand side plate. A separate sub-frame plate is installed later to support the inner ends of the shafts.
1. The motor shaft and primary drive gear. The gear is driven through a safety clutch (removed for clarity) on the threaded section of the shaft.
2. A pair of fibre and steel reduction gears. The mounting provides for adjustment relative to the motor shaft.
3. Number 3 shaft carries two large drive gears, the carriage shift clutch and drive gear, and two small shift reversing gears.
4. A fibre gear which drives three carriage clearing clutches on the keyed shaft.
5. Number 5 gear is the final drive to the setting clutch. It is mounted on the setting shaft in the bottom of the machine, and driven from the second gear on the number 3 shaft.
6. A pair of steel and fibre intermediate gears.
7. The final drive to the main clutch and actuator unit.
The motor, number 3 shaft, and the main clutch rotate clockwise when viewed from the outer right-hand side of the machine. The setting line and the clearing clutches rotate anti-clockwise.
 The main clutch components.
 The bottom row shows the main clutch drive gear and splines, the driving pawls, and the driven plate. The top row shows the bushings and retainers, the pawl springs, and the locking cam.
The drive pawls are spring-loaded so that their inward-facing teeth engage with the splines on the hub of the drive gear. The clutch is normally held disengaged by a release dog which drops into one of the notches in the outside of the driven plate. This forces the tail of the drive pawl inwards, raising its inner end clear of the splines. The tail of each pawl presses and slides against the head of the other, so that the two pawls always move in and out together.
There are two notches in the driven plate, so the clutch will advance half a turn at each operation.
 The main clutch installed.
 This view shows the main clutch installed with its shaft and bushing on the right-hand side plate.
The main clutch release dog A is pivoted on shaft B and held upwards by the spring at its left-hand (rear) end. The forward end of the release dog rests on a small but very important "roller latch" C (centre right).
The release dog is flicked downwards via a cam on the setting shaft at the end of the setting phase, and is caught and held by the roller latch as the clutch rotates. When the latch is released (by the control mechanism after the required number of cycles, or immediately for a single addition), the release dog rides on the outside of the driven plate until it drops into the notch, lifting the pawls and removing the drive. A roller on spring-loaded arm D presses inwards on the locking cam E and wedges the driven plate firmly into its home position.
All of the driving clutches work on the same principle, although they differ in their internal details and their operating and locking mechanisms.
 The reverse clutch.
 Subtraction and division are accomplished by reversing the main drive to the actuator unit. The reversing mechanism, or "reverse clutch", is mounted inboard of the main clutch on the same shaft.
The central plate is driven directly by the main clutch. The surrounding 4-bar linkage can be rocked left or right to engage one or other of the dogs on the lower link with the gears on either side of the plate.
If the left-hand gear is engaged, the drive proceeds immediately to the large output gear and thence to the actuator unit. If the right-hand gear is selected, the drive proceeds via a large double idler assembly and a reversing idler to drive the left-hand gears in the opposite direction.
 The reverse clutch installed.
 This view shows the main and reverse clutches (front) and the double idler gear (centre) at the rear of the control unit. The reversing idler is hidden under the central support bracket. The gears behind the double idler provide another reversible drive mechanism, which operates the counter register whenever the main clutch rotates.
The reverse clutch dogs are operated by a rocking lever mounted below the clutch. The control unit selects addition or subtraction by positioning an interposer under one side or other of the rocking arm. During the setting cycle, a "reverse cam" on the setting shaft raises the interposer and pushes the arm and the clutch dogs into the required position.
 The setting line.
 The setting shaft is a double-keyed steel shaft 0.405" diameter and just over 10" long (the full width of the machine). It is driven from the No.3 shaft via a drive gear and half-turn clutch which are the same as those in the main clutch. The shaft carries eight single cams, six double or opposing cams, and about twenty spacers, shims, and other components. The complete assembly can be removed and replaced as a unit (after a certain amount of practice).
 The setting line installed.
 In this view the machine is standing on its back to show the underneath. The motor base plate is not yet installed. The setting line is in the centre, with the selector mechanism above and the selection locking bail below.
The setting line makes a full revolution, in two stages, for every machine cycle. The first stage is triggered by the operator pressing a function key. The setting clutch is released, and the shaft rotates half a turn to perform the setting phase. Just before it stops, it trips the main clutch release dog. The machine then performs addition cycles until the control unit releases the roller latch. As the main clutch release dog rises and stops the main clutch, it trips the setting clutch again to commence the second half-turn for the restore cycle.
 The motor assembly.
 The motor and electrical equipment form another self-contained module which is mounted on a base plate at the rear of the machine. The drive motor is a General Electric universal motor which is governed at 3000RPM. The power switch is at the left, and the suppression capacitor is under the motor. The governor resistor is wound on a ceramic tube and covered with vitreous enamel, and can get very hot after sustained use. It is mounted above the motor, on the inside of the rear frame plate.
In the interests of electrical safety, the original cloth and rubber wiring has been replaced with high-temperature plastic, and the custom 2-pin power connector has been replaced with a fixed lead and a secure earth connection. There are still exposed live terminals on the motor and the power switch. Extreme care must be taken if power is applied with the covers removed, as the machine does not meet modern safety standards. Speed of operation.
The motor speed of 3000RPM is reduced about 14:1 for the setting line and 6:1 for the main clutch. The setting cycle requires 6 turns of the motor shaft and takes 120 milliseconds (120mS). Each half-turn of the main clutch takes only 3 turns of the motor (60mS), and the restore cycle takes about 7 turns (140mS). The setting cycle appears shorter than the restore because the main clutch starts slightly before the setting cycle has finished.
A complete addition operation (set, add, restore) takes 120 + 60 + 140 = 320mS, while a multiplication by 9 takes 120 + (9x60) + 140 = 800mS. The repeated additions during multiplication and division proceed at a peak rate of about one thousand additions per minute, or seventeen cycles per second.
Marchant Figurematic - The Multiplier
The Marchant Figurematic does not have a separate multiplier storage register, but performs the multiplication "on the fly" as each digit is entered on a separate keyboard at the far right of the machine.
The first factor is set on the main keyboard, then the digits of the second factor are entered one at a time on the multiplier keyboard. After each keypress the machine makes the required number of additions, and moves the carriage one place to the left.
The multiplier digits are entered in left-to-right or "as written" order, starting with the most significant. The process must begin with the carriage a sufficient distance to the right, rather than (the more usual) fully to the left. The "Clear/Return" key and tabulator are used to set the starting position.
The "count-back" mechanism which controls the number of additions is in two parts - a setting mechanism driven by the multiplier keyboard and the setting shaft, and a count-and-trip mechanism driven by the main clutch.
The multiplication cycle takes from 320mS for 1, up to 800mS for 9. Successive digits can be entered as soon as the setting cycle is complete (140mS), giving the impression of continuous operation.
 The multiplier keyboard.
 The multiplier keyboard is a single row of ten keys at the far right of the machine. The "sawtooth" link prevents adjacent keys being pressed down together. A sliding locking plate locks and releases the keyboard at appropriate times as the cycle progresses.
The keystems act as stops for a sliding link which sets the count-back mechanism, and also press down on a "parallel bar" linkage which controls the motor and interlocks. (Except for the Zero key, which simply initiates a carriage shift into the next column).
 Multiplier component overview.
 This view shows the main components of the multiplier mechanism.
Pressing any multiplier key (except zero) operates the parallel bar (bottom) and related linkages. This starts the motor and engages the setting clutch via a ratchet or "kick" mechanism on the outside of the No. 3 gear.
While the normal actuator setting process is taking place, a multiplier setting arm (not shown) pulls the sliding link forward until one of the tabs on its upper surface strikes against the lowered keystem. The long hook at the end of the sliding link pulls on the pin on the gear sector, rotating the count-back gear (centre) to the corresponding position.
The two-tooth return gear (centre right) is attached to the main clutch, and drives the sector backwards by one tooth for each addition cycle. When the sector returns to its home position it pushes on the trip linkage (top) to release the roller latch and stop the cycle.
There is extensive interlocking to prevent mis-operation, and a "single-cycle" mechanism to ensure that the multiplication will not be repeated if the key is held down.
 The multiplier setting linkage.
 This view shows the inner sub-assembly of the control unit with part of the multiplier linkage assembled on the nearer side. The parallel bar, sliding link, and gear sector are readily visible.
More multiplier control links, levers, and interlocks are assembled on the inside of the outer right-hand side plate, and then the two sides are brought together. Very little of the multiplier mechanism is visible when the machine is fully assembled.
 The count-back gear.
 The count-back gear is mounted on the outer right-hand side plate, just forward of the main clutch. (The half-round hole secures the end of the main clutch shaft).
The gear is driven backwards by the cam-and-tooth assembly on the right. The notched cam allows the detent to rise momentarily as the single tooth passes, rotating the mechanism by one position for each addition cycle.
The mechanism is driven "off the end" of the 10-tooth partial gear as it reaches its home position, and so has no effect when the main clutch rotates in subsequent calculations.
 The trip mechanism.
 This "underneath" view shows the trip mechanism assembled on the inside of the outer right-hand side plate.
The gear sector D pivots on shaft E, and is pulled forward (right) during the setting cycle by the pin on its right-hand side. The setting is held by the detent B. The cam A on the main clutch shaft raises the detent as the single tooth drives the count-back gear C one tooth per addition cycle.
As the sector is driven into its home position, its left-hand edge presses downwards on the tab F on the horizontal trip lever. This pulls upwards on the connecting link G, releasing the roller latch and stopping the main clutch. The machine then performs a restore cycle, shifts the carriage, and comes to rest.
Marchant Figurematic - The Carriage
The Figurematic carriage is built in two sections. The upper section contains the supporting framework and the counter register, while the lower section contains the main accumulator register.
The present machine has a 20-digit accumulator (the "main register" or "middle dial"), a 10-digit counter register (the "upper dial"), and a simple tabulator mechanism.
This page describes the layout and construction of the carriage. The registers and auxilliary mechanisms are described in the sections following.
 Overview.
 This view shows the completed carriage with the cover removed.
The assembly is about 15" long, 4" deep, 3-1/2"high, and weighs about 5 pounds. The main register alone contains well over one thousand manufactured parts.
 The carriage upper section.
 The top plate which forms the "backbone" of the carriage frame is a reinforced pressing of 0.045" steel. The heavy end plates which support the carriage mounting shafts are of 0.125" (1/8") steel.
The register mechanism is supported by a series of intermediate plates of 0.030" steel, which are held firmly in position by the top plate and the slotted locating strips and locking wires.
The locking wires and the mechanism pivot shafts are secured by two screwed retainer plates on the inside of each of the end plates. The mechanism can be disassembled without removing the top plate or the end plates.
 The carriage lower section.
 The lower section of the carriage is built from a similar set of intermediate plates attached to a rigid U-shaped channel at the rear. Additional stiffness is provided by slotted strips and the sensing finger guards at the front.
The register consists of 20 identical mechanisms in the central region, and two abbreviated mechanisms at either end.
 The sections assembled.
 In this view, the carriage has been assembled without the left-hand end plate so as to show the internal arrangements.
The upper and lower sections of the carriage are joined by a 1/16" rod A at the lower front of the frame plates. The lower section can swing downwards about the pivot A to engage the register with the actuator unit below.
B and C are the slotted strips which reinforce the upper section, while strips D and E are for the lower. (Strip D actually passes through the oval clearance slots in the upper plates. Rod F also passes through both sections to operate part of the lower register mechanism). G and H are the clearing shafts for the upper and lower registers.
The five fingers extending to the rear of the carriage are part of a basic tabulator mechanism for the Clear/Return function. Rotating the thumbwheel (top right) extends one or other of the fingers, which operates the shift terminating mechanism at the corresponding position as the carriage returns to the right.
 Carriage rear view.
 The upper section of the carriage is supported on a pair of 1/4" steel shafts through the holes in the upper and lower corners of the end plates. The lower section is normally held upwards and clear of the actuator by the springs at either end of the clearing shaft.
At the rear of the upper section are the drive gears and idlers for the counter register, and below these is the sawtooth rack for the carriage positioning mechanism. The fingers for the tabulator mechanism are visible at the far end.
The carriage shift and clearing operations are described further in the sections following.
 The carriage opened.
 Although the carriage appears totally impenetrable when fully assembled, it can quite readily be opened to give full access for routine lubrication or maintenance.
Marchant Figurematic - The Counter Register
The counter register or "upper dial" is in two parts. The register itself is mounted in the carriage at the top right-hand end, while the operating mechanism is mounted separately on an oscillating bar at the rear of the machine. The operating bar is driven from the main clutch through another reversing mechanism and a pair of eccentric shafts.
 The counter operating bar.
 The counter operating bar is mounted between the main frame plates at the top rear of the machine.
It carries a set of ten cascaded spring-loaded fingers which engage with the transfer gears at the rear of the carriage register.
 The counter drive mechanism.
 This view shows the operating bar and the register gears from the rear of the machine.
The counter operating bar pivots on sliding links at each end, and is driven by the pin and arm near the bottom left. The fingers follow a roughly triangular path during every addition cycle, starting and ending at a point aligned with the tips of the gear teeth. The operating fingers first move downwards and forwards to engage below the tooth, then up to advance the gear and register, then back and down to the starting position. The vertical motion ceases before the fingers disengage, so that there is no possibility of overrun. A light detent holds the numeral wheel in position after the finger retracts. The oscillating motion is completed in 60mS, equivalent to 17 operations per second.
The first finger always engages with the register dial in the units column. The others are controlled by the rollers and notches in the gear flanges (and the cascaded connecting links) so that they only operate when a carry is required.
 The operating bar drive mechanism.
 The operating bar is driven at both ends by a set of eccentric shafts and links. This front view shows the arrangement at the left-hand end.
The rectangular drive bar A from the right-hand end rotates eccentric B, which is offset from its pivot in the frame plate. The lower end of link C moves in a circular path, which is converted by a curved slot at the fixed pivot D into a roughly triangular path at pin E. The counter bar slides and tilts on the (adjustable) pin F.
The operating bar is returned positively to its home position by a flattened cam and detent mechanism behind the spring-loaded lever G. The detent is released when lever G is pressed downwards as the carriage goes into the dip.
Also visible on the left of this view, but unrelated to the counter mechanism, are the carriage support bearing H, the shift terminating lever I operated by the tabulator fingers, the carriage dip arm J which pulls the main register down into engagement with the actuator, and the carriage centraliser K which rises between the main register frame plates at the start of the setting cycle.
 The counter reversing gear.
 This view shows the alignment of the reversing gears and idlers at the top rear of the control unit.
The counter mechanism is driven from the leftmost gear on the rear shaft. The other two gears on this shaft are rotated in opposite directions by the double idler (centre) and the reversing idler (under the inner left-hand gear) whenever the main clutch rotates. An internal sliding pin engages with the slot in the hub of one or other of the contra-rotating gears, transfering the drive to the internal shaft and thence to the leftmost output gear.
The sliding pin is operated manually or automatically by the shaped arm attached to the right-hand side plate. The register can be set to count either forward or back (for complements) by a thumb tab at the right-hand side of the keyboard. The linkage allows the chosen direction to be reversed automatically if necessary during division.
 The counter clearing cams.
 Rotating the counter clearing shaft through about 30° lifts the numeral wheel detents and pulls the roller arms downwards. The rollers act on the cardiod-shaped cams attached to the numeral wheels, driving them back to their zero positions. Numerals 0 to 5 rotate backwards towards zero, while 6 to 9 rotate forwards.
Marchant Figurematic - The Main Register and Carry Mechanism
The main register, otherwise known as the "accumulator" or "middle dial", consists of 20 identical sections which "accumulate" the inputs from the actuator unit.
The carry mechanism differs from most others in that it operates continuously, rather than in discrete steps. If the units dial advances to 5, the tens dial will advance to 0.5 and the hundreds to 0.05. A "correction" mechanism temporarily hides these additional increments before the result is displayed.
The register mechanism uses two planetary or "epicyclic" gearsets in every column. One gearset adds the inputs from the actuator and the (partial) carries from the previous column, and the other subtracts the correction for display.
The register also includes a sensing mechanism which provides one of the inputs to the division trip comparator in the selector unit.
This page describes the components and the construction of the main register, and then explains the operation of the gearsets.
 Overview.
 This view of part of the assembled register shows something of the density and complexity, but (like most of the Marchant mechanism) it gives very few clues as to its operation.
The components are shown individually in the next illustration.
 The main register components.
 A. The idler gear, which receives the input from the actuator unit when the register is pulled down into engagement ("into the dip").
B. The main planetary gearset, driven by idler A and the input from the previous column.
C. The numeral wheel and snail cam. The numeral wheel is driven by gearset B, and drives the next column via the small central pinion.
D. The sensing arm. The roller near the centre of the arm rests on the snail cam, and rises proportional to the number displayed.
E. The sensing finger, operated by the pin on the end of D, which communicates the numeral wheel position to the division trip mechanism.
F. The backstop and latch, used only during the clearing of the register.
G. The clearing cam, double-keyed to the clearing shaft at the rear of the register.
H. The detent arm, which engages with the idler gear A. The detent is raised by the clearing cam G, or by the rod above the transfer gears on the actuator unit when the register is dipped.
I. The inter-stage gear and carrier, which also functions as the planet gear for the "correction" mechanism.
J. The correction quadrant, which rotates the inter-stage gear carrier to apply the correction to the display. The quadrant also provides the clearing function. The operation of the quadrant is controlled by the two tabs at the bottom which engage with the sensing arm Dand the detent arm H, and also by the "tail" at its upper left which engages with a fixed rod through the frame of the upper register.
 The register assembly.
 The left-hand column shows the clearing cam and detent arm assembled on the 1/4" clearing shaft at the rear of the register.
In the next column there are four components assembled on the 5/64" (0.078") intermediate shaft. The sensing arm and backstop are installed on the left, and the idler gear and correction quadrant on the right.
In the third column, the register gearsets have been installed on the 1/16" pivot shaft at the front. A temporary locking rod (under the zero) keeps the gears in position until all the columns have been assembled.
 Epicyclic or planetary gearing.
 An epicyclic or planetary gearset consists of one or more "planet" gears P, attached to some sort of frame or "carrier", which can revolve around a central "sun" gear S. The planets are surrounded by an "annulus" or "ring gear" R which has the gear teeth on its inner surface.
The planetary gearset can provide three fixed gear ratios if one or other of the three members is held stationary, or it can add or subtract inputs from any two members to drive the third.
Consider the planet carrier to be held stationary. If the sun gear rotates forward, the ring gear will rotate rearward in the ratio S/R (where S and R are the numbers of teeth on the sun gear and the ring gear). If the sun gear is held stationary and the planet carrier is rotated forward, the ring gear will rotate forward in the ratio (1 + S/R). If both sun and planets are driven independently, the movement of the ring gear will be the sum (or difference) of the individual contributions.
Similar ratios can be calculated if the ring gear is held stationary. The ratios and directions are not always intuitive, especially with more complex gearsets.
 The gear train.
 This exploded view shows the gear train components spread out along the shaft.
The small pinion on the right-hand numeral wheel forms the sun gear for the first planetary gearset. The inter-stage gear is the (single) planet, and the ring gear is attached to the main planetary gearset (centre).
The main gearset adds the inputs from the actuator (via the large-toothed input gear) and the previous column (via the ring gear) and sends the total via the double planet gears to the ring gear on the left-hand numeral wheel.
The locking wire (front) holds the numeral wheels, the central ring gear, and the two planet carriers in their home positions during assembly.
 Main register gearing.
 This diagram shows the technical details of the two planetary gearsets that are illustrated above.
A is the numeral wheel of the first (or any) column, which is fixed to sun gear B of 10 teeth. B drives through the inter-stage planet gear C-E (15 teeth) and its carrier D to the central ring gear G (40 teeth). (The planet gear is split into two parts to pass over the frame plate F, but functions as one). With the planet carrier stationary, there is a 4:1 (40:10) reduction between the numeral wheel A and the ring gear G.
Ring gear G is fixed to the second sun gear H of 16 teeth. H drives through the planets I (12 teeth) and carrier J to the second numeral wheel L (40 teeth). With the planet carrier stationary, there is a 5:2 (40:16) reduction between the central ring gear G and the left-hand numeral wheel L. The overall ratio between the two numeral wheels is thus (4:1 x 5:2), which is 20:2 or 10:1 as required.
The input from the actuator is applied (via the idler gear) to the drive gear K of 14 teeth, which is fixed to the second planet carrier J. Recall that the actuator transfer gear advances by one tooth for each digit position. Thus it is required that a 10-tooth advance of 14-tooth gear K should advance the numeral wheel L by one full revolution (ie, an increased rotation). With the sun gear H held stationary, the ratio between the planet carrier and the numeral wheel ring gear is (1 + 16/40), which is 56:40 or 14:10 as required.
The resultant motion of the left-hand numeral wheel L is thus the sum of these two movements, ie, one digit position per actuator tooth in the current column, plus one-tenth of the rotation of the previous numeral wheel.
 The "correction" mechanism.
 The correction mechanism uses the inter-stage gear and quadrant to temporarily subtract the increment due to the previous column before presenting the display. The correction is applied as the register rises at the end of the addition, and is removed at the start of the next operation.
This view shows how the quadrant engages with a positioning gear on the back of the planet carrier, allowing the carrier to be rotated through a quarter of a turn.
The "tail" on the rear of the quadrant normally sits above a fixed rod in the upper section of the register assembly. As the main register is pulled down "into the dip" to commence an addition, the tail is held up by the rod. The relative motion lifts all the tails (relative to the rest of the register), and rotates all of the planet carriers to the fully rearward (vertical) position. The addition then proceeds as described above, with the planet carriers stationary.
When the register rises, the tail of the quadrant falls, allowing the planet carrier to rotate forward. The gearing is such that a rotation of one-quarter of a turn on the planet carrier will reduce the next numeral wheel display by one digit. The motion is limited by a tab on the bottom of the quadrant, which lifts the sensing arm until its roller strikes against the snail cam. The correction is thus proportional to the previous digit position.
 Addition stage 1.
 This view shows the register displaying "0095" part-way through an addition cycle, before the register rises and applies the corrections. This state is never visible during normal operation.
The register is still dipped, and the inter-stage planets are all pulled back to their "home" positions with their carriers vertical (visible to the left of the uppermost numerals).
The units column stands at 5, as expected. The tens column has been advanced by 9 places by the actuator, plus a further 0.5 of a place carried in from the units column. The hundreds column has advanced to 0.95 of a place by the carry alone, and even the thousands column has moved by almost one-tenth (0.095) of a place.
 Addition stage 2.
 As the register rises, the quadrants allow the planet carriers to move forward until stopped by the sensing arm and snail cam. A 90° rotation of the carrier will reduce the next numeral display by one place.
The units digit stands at 5, so its sensing arm rises half way. (The tip of the sensing arm is visible to the left of numeral 4). The planet carrier rotates 45° (to the left of numeral 5), subtracting 0.5 of a place from the tens digit.
The tens digit now stands at 9, so its sensing arm lifts further (visible to the left of numeral 8). The planet carrier moves further forward (to the left of numeral 9) and corrects the hundreds display. The process continues across the register, temporarily storing the "excess" corrections in the positions of the inter-stage planet gears.
Addition stage 3.
If we now add another 5, the carriage first goes back into dip and restores the situation shown in Stage 1. The units digit advances from 5 to 0, the tens from 0.95 to 0, the hundreds from 0.095 of a place to numeral 1, and the thousands from 0.095 of a place to 0.1 of a place.
As the register rises, the units and tens digits already stand at 0, so no corrections are applied to the tens and hundreds. The hundreds digit stands at 1, and applies a correction of one-tenth of a place to the thousands. The end result is a display of 0100, as expected.
Ripple carry.
If 1 is subtracted from a cleared register, the display must change to all-nines. The subtraction proceeds as normal, with the actuator driving the units digit back one place to 9, and the inter-stage gearing driving the tens backwards by 0.1 of a place.
As the register rises, most of the numeral wheels and snail cams still stand at 0 and prevent the sensing arms from rising. The units digit stands at 9, and so begins to subtract a correction of 0.9 of a place from the tens digit. In moving the tens back from 0 to 9, the high point of the snail cam moves out from under the sensing roller. The roller immediately rises, allowing the correction quadrant to move back and the planet carrier to move fully forwards, reducing the next digit by one place from 0 to 9. The process repeats as a ripple carry across the whole register, with the energy being provided by the correction quadrant springs.
If 1 is added to all-nines, the result must return to all-zeros. As the carriage dips, the correction quadrants pull the planet carriers back to their home position and restore the register to the state in the first paragraph. (The energy is provided by the carriage pull-down mechanism working against the quadrant springs). Adding 1 then returns the two right-hand digits to zero, so no corrections are needed as the register rises.
 Clearing the register.
 This view from the rear of the register shows the components involved in the clearing operation.
Prior to clearing, the register is in a state similar to "Addition Stage 2" above, with the inter-stage planet gears some distance forward of their home positions.
As the clearing shaft (bottom) rotates about 15° it raises the idler gear detent (lower centre) and pushes the backstop (centre) forward against the central ring gear. As it moves another 15°, a lug on the bottom of the detent arm raises the rear of the correction quadrant, pulling the inter-stage gears back towards their home position.
The planet gear will initially tend to pull the central ring gear rearwards as well, but this movement is blocked by the backstop as soon as the ring gear reaches its home position.
With the ring gear held stationary, the 4:1 reduction ratio now operates in reverse, spinning the previous numeral wheel rapidly backwards. As the displayed numeral reaches 0, the tab between numerals 2 and 3 strikes the horizontal section of the backstop and is caught by the spring-loaded latch. Clearing of each column depends to some extent on its neighbours, and the whole operation relies on speed and inertia to throw the numeral wheels back under the latches.
As the clearing shaft is released, the quadrant and planet gear will be held in their home positions by the sensing arm resting against the high (zero) point of the snail cam. Finally, the backstop is released, and the detent arm re-engages to lock the input gear.
Marchant Figurematic - The Carriage Shift Mechanism
The carriage is shifted sideways by a toothed rack attached to the rear of the upper frame. The rack engages with a driving disc at the right-hand rear of the machine. The disc is driven from the number 3 shaft in the drive train via a dog clutch and reversing gear.
The carriage shift can be initiated manually via the control keys, or automatically during multiplication and division. There is extensive interlocking to prevent mis-operation.
 The carriage positioning rack.
 This view shows the carriage positioning rack at the right-hand rear of the machine. The driving disc is just visible behind the vertical frame plate. The small sloping tab on the outer edge of the first (and last) tooth operates the shift terminating mechanism at the end of the travel.
The rack is not rigidly attached to the carriage, but is hinged from the upper frame spacer shaft. It is normally held flat against the driving disc by the stiff spring visible at the near end. The rack is profiled to give a constant linear velocity, so that the carriage will move in a smooth and continuous manner as it returns to its starting position. Buffer springs at each end of the rack absorb the impact of rapid movement.
 The driving disc.
 The shifter disc has three drive rollers, and rotates one-third of a turn to move the carriage by one position (5/8") in either direction. When the carriage reaches the end of its travel, the chamfered edge of the active roller comes to rest against the sloping tab at the end of the rack. If a further shift is initiated, the roller will lift the rack and pass harmlessly underneath.
The carriage is not locked in position when at rest, but has a certain amount of movement due to the buffer springs and the free play in the drive train. Final positioning is not done until the start of the setting cyle, when the carriage centraliser (the broad arrowhead at the left-hand end of the actuator unit) rises between the frame plates of the main register to align the carriage and hold it in position.
The two "ears" above the shifter disc are part of the shift terminating mechanism (described below).
 The drive mechanism.
 The shifter disc is driven via a 3:2 bevel gearset from a half-turn shaft extending horizontally from the lower rear of the control unit.
The far end of the horizontal shaft is driven from the number 3 shaft in the drive train via a dog clutch and a reversing mechanism, partly visible through the cut-out in the frame plates. The cam and detent roller hold the drive shaft in the two rest positions when the clutch is disengaged. The supporting bracket attaches to the motor base plate.
During automatic division, a two-lobe cam on the horizontal shaft (hidden) signals the completion of the carriage shift and re-starts the subtraction process in the new column.
 The shift clutch linkage.
 The shift clutch linkage is located along the left-hand side of the control unit.
The lever arm at the right (front) is attached to a shaft operated by the manual shift keys. The lower horizontal link has a notch at its rear end, which engages with a shelf on the vertical shift control arm (centre). Several interlocks can press down on the horizontal link to disconnect it from the central lever and disable the manual control.
At the left of this view are the shift clutch operating arm, the clutch assembly with its driving gear (hidden) and reversing gears, and the clutch release dog.
The upper horizontal link swings the shift clutch operating arm fore and aft. The two short arms at its lower left operate a sliding collar which selects one or other of the reversing gears. The longer slotted arm operates the clutch release dog, which engages the clutch and starts the motor when the arm moves in either direction. A spring at the bottom of the release dog normally holds the operating pin in the centre of the "V" slot, with the dog preventing the clutch from turning. A non-return detent (not shown) drops into a small notch at the top of the clutch disc to hold it in position against the dog at the end of the cycle.
A mechanism driven from the carriage dip arm also operates on the central shift control lever to initiate automatic left shifts when the carriage rises during multiplication and division. This mechanism is disabled during normal addition cycles, or by the "Non-Shift" key in multiplication.
The shift terminating mechanism.
The shift terminating mechanism has two functions: to stop a manual shift when the carriage reaches the end of its travel, and to terminate the automatic right shifts initiated by the "Clear/Return" key.
When the carriage reaches the end of its travel, the small tab on the end of the positioning rack (first picture above) will sit just under the ear on the terminating lever above the shifter disc (second picture). If a further manual shift is requested (or the key is held down), the disc will rotate, the rollers will raise the rack and pass underneath, and the tab on the rack will raise the terminating lever. The terminating lever disconnects the lower horizontal link from the vertical shift control lever, disabling the manual request and allowing the clutch dog to spring back to its neutral or off position when the shift cycle is completed. The linkage resets when the manual shift key is released.
When the "Clear/Return" key is pressed, a mechanism at the rear of the control unit initiates and latches a manual right shift, as if the operator held down the key. The shift terminating lever is extended via a shaft to the left-hand side of the machine, and when this is raised by the tabulator finger it terminates the shift and releases the latch.
Marchant Figurematic - The Register Clearing Mechanism
Clearing the upper and lower registers is accomplished by rotating the respective carriage support shafts through an angle of about 30°.
The motion is generated by a pair of cams and clutches at the rear of the control unit. The clutches are controlled by a linkage from the clearing keys at the front of the machine.
There is also a "Clear/Return" function which clears both registers and returns the carriage to the right, and an automatic counter clear function at the start of a division.
 The clearing cams and clutches.
 The clearing cams and clutches are mounted on the No.4 shaft at the rear of the control unit. The outer end of the shaft has an eccentric bearing to adjust the clearance on the fibre drive gear.
The two cams at the bottom right operate the clearing linkages via the two roller-equipped lever arms (top right).
The third cam (next to the drive gear) operates the Clear/Return function via a linkage which releases both the clearing cams and initiates a carriage shift.
The clutches are controlled by a linkage which starts the motor, releases the clutch pawls, and then disengages, allowing the cams and clutches to make only a single revolution.
The three dog clutches rely on a deliberate friction load from an internal wave washer to hold them in their rest positions against the release dogs at the end of their cycle. The friction load is present at all times, and helps to bring the gear train to a stop whenever the motor is switched off.
 The clearing links.
 This view shows the links which connect the two operating arms from the control unit to the carriage support shafts.
The bushings which rotate the shafts are attached to the brass support bushings in the frame plate. They are built up from seven layers of pressed steel so as to distribute the turning force along the double keyway. The counter mechanism is relatively light, but clearing the main register requires a force of about ten pounds on the horizontal connecting link.
 The carriage clearing arms.
 The rear carriage support shaft has a simple lever arrangement at the right-hand to transfer the rotation to the counter register clearing shaft.
The main register clearing arms are much larger to cope with the higher loads. The front support shaft has a double arm and roller at each end of the carriage, which transfers the rotation to the main register clearing shaft. The linkage allows for the vertical movement of the register as it is pulled down into the dip.
 The clearing clutch operating linkage.
 The clutch operating linkage can be installed as a complete sub-assembly after the control unit has been attached to the rest of the machine. The shaft is held in place by two retainer plates attached to the frame side plates.
The forward-pointing yoked arms on the left (in this rear view) connect to the clearing keys at the front of the control unit via three long links and levers on the outer right-hand side. They operate the three clutch release dogs on the lower vertical arms.
The yoked lever on the right of this assembly engages with a pin on the right-hand carriage pull-down lever, and relays the carriage position through the cross-shaft to a series of interlocks in the control unit.
The rightmost lever arm initiates the carriage return function via a long link to the shift mechanism at the front of the control unit.
 The clutch linkage installed.
 This view shows the clutch operating linkage and the carriage dip interlocks installed on the right-hand rear corner of the machine.
Marchant Figurematic - The Division Control Mechanism
In most mechanical calculators, division proceeds by repeated subtraction until an overdraft occurs. The mechanism then reverses and corrects the overdraft before shifting the carriage and re-starting the subtractions in the next column.
The Marchant calculator aims to improve the process of division by eliminating the wasted (and often noisy) machine cycles that are associated with overdraft and correction.
The division mechanism contains an analog magnitude comparator which compares the most significant digits of the keyboard with the current contents of the main register, in order to predict whether an overdraft is likely on the next cycle. In most cases the subtractions can be terminated before the overdraft actually occurs.
The comparator uses a set of sensing levers which can be raised to a height proportional to the keyboard column setting. The levers rise against the fingers which sense the contents of the main register via the positions of snail cams on the numeral wheels. If the keyboard setting is greater than the register contents, the sensing levers operate a trip mechanism which releases the roller latch and terminates the subtraction cycles. The machine then raises and shifts the carriage and re-starts the division in the next column. The process ends when the carriage reaches its leftmost position, or when the operator presses the Stop key.
This page describes the construction and principles of operation of the comparator and the division trip mechanism. The division sequencing functions and interlocks in the control unit will not be described in detail.
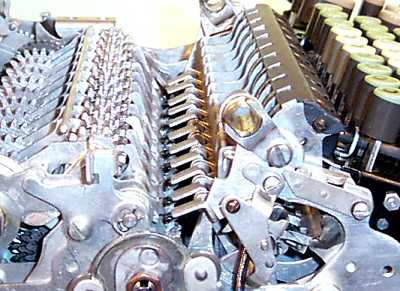 The division sensing levers.
 This view from the left-hand side shows the division sensing levers located in the gap between the selector and actuator units. Note that there are eleven sensing levers - ten are mounted in the selector columns, and one is mounted on a bracket dowelled to the outside of the left-hand frame plate.
During normal operations the sensing levers are disabled by forcing them downwards into the position shown. This keeps them well clear of the sensing finger guards so that the carriage can move freely. The levers are raised or enabled during division in order to read the contents of the main register via the sensing fingers and snail cams.
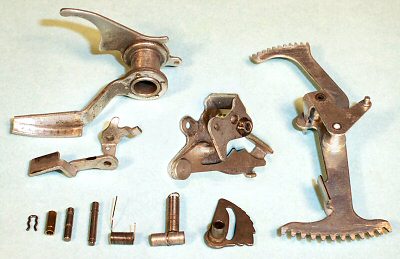 The division trip components.
 This view shows the components of the division trip mechanism in each column of the selector unit. Their functions are described in more detail in the sections following.
The sensing lever carrier is in the centre, with the lever itself at the centre left.
The keyboard input is obtained from the vertical sector arm in the selector unit (right), via the arm and pin on its right-hand side. The pin raises the small division quadrant (bottom centre), which in turn raises the carrier and sensing lever.
The sensing levers can be enabled or disabled by the double control arm assembly at the top left.
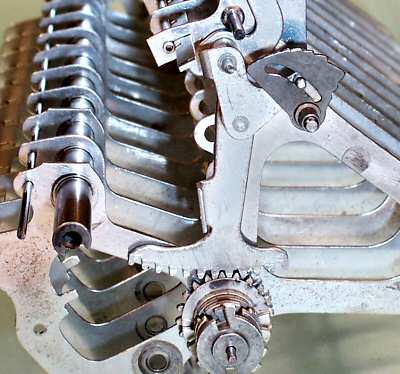 The division quadrant.
 This view from the right-hand side of the selector unit shows the quadrant mounted on its pivot shaft, just behind the keyboard attachment point on the selector arm. The sensing lever carrier rests on the stepped surface of the quadrant, immediately above the pivot.
With the keyboard at zero, the lower end of the selector arm is fully forward (to the left) and the quadrant slot is horizontal.
As the selector arm moves rearward from 0 to 9, the quadrant rises towards vertical. When the sensing lever assembly is enabled, the discrete steps on the upper surface of the quadrant will raise the sensing lever in proportion to the keyboard setting.
 The sensing lever and carrier.
 This underneath view shows the details of the sensing lever and carrier. The whole assembly is only about 2" long.
The carrier A is attached to the selector plates by short pivot pins at B and C. Sensing lever D is attached to the carrier by the pivot pin E, and is spring-loaded upwards until the tab F is stopped by the carrier frame. The tripping point G on the front of the sensing lever interacts with the rearward fingers on the division gate (described below).
Pin H rests on the division quadrant and sets the height of the carrier and the sensing lever. Pin H is not mounted directly on the carrier, but is attached via balance lever I and pivot J. A light spring pulls the rear of the carrier downwards, so that when H rests on the quadrant, the forward end of lever I will be lifted up against the inside of flange L at the front of the carrier. The control arm acts on the outside of flange L to raise or lower the whole assembly.
The purpose of the notch at K will be described later. For the moment, assume that lever I remains hard against the flange L so that pin H remains fixed relative to the carrier.
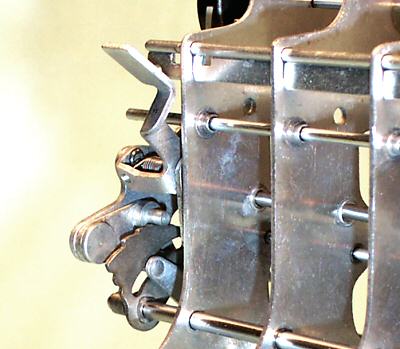 The sensing lever and quadrant.
 This view from the left-hand rear shows the sensing lever in its raised or enabled position.
The keyboard column is set to 3. The short arm on the vertical selection lever has raised the quadrant through a corresponding distance, so that carrier support pin H is resting on the fourth step (counting from zero).
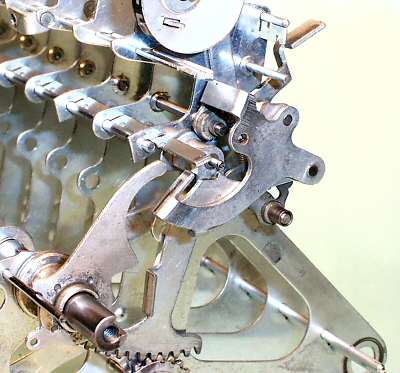 The sensing lever and the control arm.
 This view shows the same situation from the front right-hand side. The body of the carrier is more-or-less horizontal, with the flange L at about 45°. Lever I is visible just behind the flange, with notch K just below the selection lever pivot.
The sensing lever control arms are mounted on a keyed shaft towards the front of the selector unit, and are spring-loaded upwards. The shaft is operated by a cam and follower on the left-hand end of the setting line, and a latch mechanism on the right-hand end of the selector unit.
Each control arm assembly has two rearward-facing arms. The right-hand arm engages with flange L to enable or disable the carrier. The left-hand arm (hidden) provides an interlock with the next decade (described further below).
Note the 1/16" rod located just above the arm of the sensing lever, which is described in the next section.
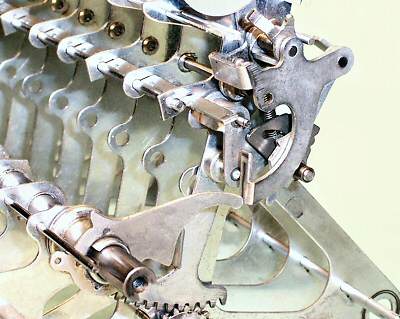 The sensing lever disabled.
 The sensing levers are normally held disabled by rotating the control arm shaft clockwise through about 45°. The arm presses down on the flange L, rotating the sensing lever carrier almost to vertical.
As the front of the carrier is pushed downwards, the sensing lever pivot point E is lifted above the rod noted in the previous view. The rod toggles the sensing lever downwards via an over-centre action, leaving the inner end of the lever now pointing skywards. Pin H is lifted well clear of the quadrant, so that the selector arm can move freely for the next keyboard operation.
The control arm shaft is held in the disabled position by a latch at the right-hand end of the selector unit (not shown), and is released by the control unit only when required during division. The control arm shaft has a broad keyway which moves the arms together on the downward stroke, but allows them to move independently after the shaft returns.
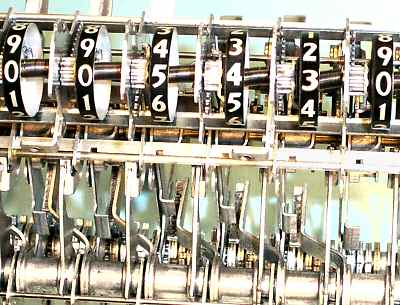 The control arm interlocks.
 The control arms are interlocked in such a way that the sensing lever in a column can not rise unless all the keyboard columns to its left are set to zero.
This view from the top front shows the mechanism partially assembled with the keyboard dial set (arbitrarily) to 5430. The vertical selection sector arms for these digits have moved rearwards in proportion, as can be seen from the positions of the rectangular tabs on their lower sections. The columns to the left of the most significant digit are all at zero, with their selection arms fully forward.
When the control unit releases the control lever shaft, the double control arms will attempt to rise. If the column is at zero, the vertical selection arm will be fully forward, and the left-hand arm of the control lever assembly will be able to rise behind the rectangular tab. The right-hand arm will release the sensing lever carrier in the column to its right, which will rise and enable the sensing mechanism. If the column is not at zero, the tab on the selection arm will have moved rearward, and will block the curved flange on the side of the control arm. The control arms will be unable to rise, and the sensing lever will remain disabled.
The end result is that sensing only takes place in and to the left of the keyboard column containing the most significant digit of the divisor. The sensing lever in this column will rise proportional to the numeric value, those in the zero columns to the left will rise to the zero level, and those to the right will remain disabled. (The sensing levers are just visible at the top of the picture). The control arms are cascaded so that the process is not affected by intermediate zeros.
 The sensing levers enabled.
 This view from the left-hand side shows typical positions of the sensing levers in the enabled state.
The lever in the left-most non-zero column has risen to a height proportional to the keyboard setting. The three levers to its left (closest) have risen only to the zero position, while those to the right remain disabled. (The leftmost carrier rises against a fixed stop at the zero position, as there is no corresponding keyboard setting mechanism).
The flattened shelves on the rear ends of the sensing levers rise against the fingers operated by the snail cams in the register dials. If the keyboard setting is less than the register contents, the levers will rise freely to their intended heights. If equal or greater, the register fingers will press down on the sensing levers, lifting the tripping points at the fronts.
 The division gate.
 The division gate interacts with the tripping points to sense the result of the comparison, and trips the roller latch if the value remaining in the register is less than the keyboard setting.
The gate is a rigid toothed bar which extends the full width of the selector unit. It is normally hidden under the rear keyboard support bar (removed for clarity), just below the keyboard check dials. The gate is supported on two arms which are pivoted from the main frame plates, and is able to swing a short distance fore and aft. The rearward teeth on the bar engage with the tripping points at the forward ends of the division sensing levers. The teeth on the gate are graduated in length so that only one is active at a time, starting with the leftmost.
The gate is moved forward by a cam at the left-hand end of the setting line, and is normally held clear of the sensing levers by a latch at the right-hand side of the selector unit.
At the start of a division cycle, the control unit raises the sensing levers, and then allows the division gate to spring rearward. In the leftmost columns, the keyboard and register will generally both be at zero (ie, equal), the tripping points will be raised, and the division gate fingers will pass underneath. If the value in the active keyboard column exceeds the corresponding register column, this tripping point also will be raised, and the gate will continue rearward. The columns to the right are all disabled, so the gate continues fully rearward and trips the roller latch (via a linkage at the right-hand end) before the subtractions can commence.
If the value in the active keyboard column is less than that in the register, the tripping point will block the rearward movement of the gate and allow the subtractions to begin. As the register contents are reduced by subtraction, the register finger will start to press down on the sensing lever, raising the tripping point when the values become equal. The gate then continues rearward and terminates the cycle.
As the division progresses, remainders in the accumulator may be shifted to the left of the controlling order, requiring comparisons in two columns. Further columns may be active if the factors are not correctly aligned at the start. In all cases, the principle of operation is the same.
 The division gate trip point.
 This close-up view shows how the horizontal and vertical edges of the division trip lever and the division gate extension intersect along the centreline of the carrier pivot, so that the tripping point will not be affected as the carrier is raised and lowered by rotation.
The carrier pivots can not be made as a continuous rod, but have to be broken into small sections which are fitted and retained individually.
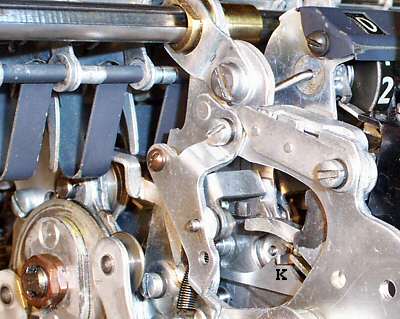 The trip mechanism assembled.
 This view from the front left-hand side shows as much of the trip mechanism as is visible when the machine is assembled. A division is in progress, with the sensing levers raised but the division gate not yet released. The leftmost sensing lever has risen between the guards until stopped by the downwards finger on the carriage. (The fingers normally hang free until lifted by the sensing levers).
With the keyboard and the carriage both at zero, the trip point at the forward end of the sensing lever has been raised just above the tooth on the division gate. When the gate is released it will move rearward until it strikes the sensing lever in the active column, and when this trips the subtraction cycles will be terminated.
The "tens" sensing.
The description to this stage has been simplified by ignoring the complications of the Marchant carry mechanism.
Recall that the dials in the main register do not progress in whole-number steps, but contain incremental carries from the previous columns while an addition is in progress. If the register stands at (say) 25, the most significant dial (and its snail cam and sensing finger) will be at a position corresponding to 2.5, not integer 2. Likewise, the "tens" decade to the left of the most significant dial will contain 0.25, not zero. To make the comparison accurate, the positions of the keyboard sensing levers must also be modified (ie, raised further) to include one-tenth of the contents of the previous columns. This is achieved via notch K in the balance lever (see illustration above).
The small arm which sits above notch K extends leftwards from the hub of the vertical selection lever in the previous column. As the selection lever moves rearward from 0 to 9, the cross-arm presses downwards on notch K and the balance lever I. The support pin on lever I is resting on the division quadrant and can not move downwards, so the rear of the carrier has to rise. The lever lengths are set so as to add the necessary 10% increment.
The primary comparison thus takes place in the "tens" column to the left of the most significant keyboard digit, and always involves fractional keyboard values in the range 0 to 1. The steps on the division quadrant and the geometry of the carriage sensing fingers are arranged to give greater sensitivity at the lower end of the range.
It is still possible that the comparator's prediction may sometimes be incorrect, due to differences in the third place, or inaccuracies in the adjustment of the mechanism. The control unit logic will deal correctly with an overdraft if it does happen occur.
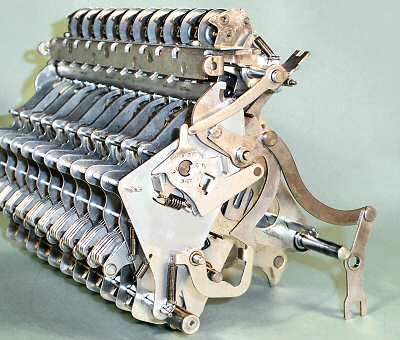 The division trip linkage.
 The linkage at the right-hand side of the selector unit interacts with the control unit to latch and release the sensing lever control arms and the division gate at the appropriate times.
When the divsion gate is tripped by the sensing mechanism, the yoked lever at the bottom right releases the roller latch in the control unit to terminate the subtraction cycles.
The notched lever at the top right is a safety interlock which engages with the carriage frame plates, to ensure that the carriage can not be moved while the sensing levers are raised.
Also visible in this view is the heavy bar which supports the rear end of the keyboard modules, mounted just below the check dials. The bar is attached to several of the selector frame plates, and to the main frame plates via the tabs at either side.
|
|
| ||||||||
| ||||||||||
| ||||||||||
| ||||||||||
| ||||||||||
 | ||||||||||

