XXX . 0 PROCESS ROLL REAL -- TO - ---- OUT +

Why even bother about film?
Previously I used to work on my scanned negatives in Photoshop. However, even with specialized scanning software like Silverfast it is quite painful process. Using Photoshop as additional step has many problems:
- Either you are working on huge files or lose lots of quality and resolution on save.
- Even 16 bit output images from the scanning software are low dynamic range.
- 16 bit uncompressed TIFF files output from scanning software are insanely big in size.
- Batch processing is relatively slow and hard to control.
- If you don’t keep your data in huge and slow to load PSD files and adjustment layers, you are going to lose information on save.
- Photoshop is much more complex and powerful tool, not very convenient for a quick photo collection edit. That’s why Adobe created Lightroom.

No scanner? No problem!
Previously I used a scanner on many of my all time favourite film photos.At the end of the post (not to make it too long) there are some examples of ones scanned using excellent (for the price and its size) Epson V700. I developed B&W photos myself, color one was developed at a pharmacy lab for ~$2 a roll.
They are one of my favourite photos of all time. All taken using relatively compact Mamiya 6. Such a high quality is possible with medium format film only though – don’t expect such results from a small frame 35mm camera.
However, I foolishly left my scanner in Poland and wasn’t able to use anymore (I’m afraid that such fragile equipment can get broken during shipping without proper packaging). Buying a new one is not super-cheap. Therefore I started to experiment with using a DSLR or camera in general for getting decent looking positive digital representation of negatives. I confirm that it is definitely possible even without buying expensive macro lens – I hope to write a bit more about the reproduction process later when it improves. For now I wanted to describe the non-destructive process I came up with in Lightroom using a small trick with curves.
The Lightroom workflow
Ok, so you take a photo of your negative using some slide copying adapter. You get results looking like this: Far from perfect, isn’t it? The fact that it was a TriX 400 roll rated at ASA 1250 and developed using Diafine doesn’t help – it is push developer, quite grainy and not very high detail with specific contrast that cannot be fixed using Adams Zone System and development times. It was also taken using a 35mm rangefinder (cheapest Voigtlander Bessa R3A), so when taking the photo you can’t be sure of proper crop, orientation or sharpness.
But enough excuses – it’s imperfect, but we can try to work around many of those problems in our digital “lightroom”.
Ok, so let’s go and fix that!
Before starting, I just wanted to make it clear – all I’ll describe is relevant only if you use RAW files and have a camera with dynamic range that is good enough – any DSLR or mirrorless bought within last 5-6 years will be fine.
1. Rough and approximate crop
 The first step I recommend for convenience of even evaluating your film negatives is doing some simple cropping and maybe rotating the shot. It not only helps you judge photo and decide if you want to continue “developing” it (could have been a completely missed shot), but also will help the histogram used for further parts of development.
2. Adjusting white balance and removing saturation and noise reduction
 In the next step I propose to adjust white balance (just use pipette and pick any gray point) and completely remove saturation from your photo if working with black and white. Every film has some color cast (depends on the film and developer – can be purple, brown etc). Also since you (should) take it using small ISO like 100, you can safely remove any extra digital noise reduction that unfortunately is on by default in Lightroom – that’s what I did here as well. Notice that in my example color almost didn’t change at all – the camera was smart enough to auto adjust its WB automatically to the film color.
3. Magic! Inverting the negative
 Ok, this is the most tricky part and a feature that Lightroom is lacking – a simple “invert”. In Photoshop it is one of basic menu options, there is even a keyboard shortcut, here you have to… use the curves. Simply grab your white point and turn it to 0, and do the opposite with the black point – put it to 1. Simple (though UI sometimes can get stuck, so adjust those points slowly) and works great! Finally you can see something on this photo. You can also see that this digital “scan” is far from perfect, as the film was not completely flat – blurriness on the edges.
  But in the era of desired low-fi and instagram maybe it is an advantage?
4. (Optional) Pre-adjusting the exposure and contrast
 This step can be optional – depends on the contrast of your developed film. In my case I decided to move them a bit to make it easier later on further operations on the curves – otherwise you might have to do precise sub-pixel changes with the curves which due to UI imprecision can be inconvenient. I also cropped a bit extra to make the histogram even better and not fooled by the fully lit or dark borders.
5. Adjusting white point
 Now having the histogram more equalized and useful, you can set your white point using curves. Obviously your histogram is now reversed – this can be confusing at first, but after working on a first scan you can quickly get used to it. The guidelines here are the same like with regular image processing or photography – tweak your slider looking for the points of your scene you want to be white (with B&W one can be more radical on this step) using the histogram as a helper.
Why I’m not using Lightroom “general” controls like blacks, whites etc.? Because their behavior is reversed and very confusing. They also do some extra magic and have non-linear response, so it’s easier to work with curves. Though if you can find optimal workflow using those controls – let me know in comments!
6. Adjusting the black point
 Next step is simple and similar – you proceed in the same way to find your black point and darkest parts of your photo.
At this point your photo may look too contrasty, too dark or too bright – but don’t worry, we are going to fix it in the next step. Also since all editing in Lightroom is non-destructive, it is going to have still the same quality.
7. Adjusting gamma curve / general brightness
 In this step you add another control point to your curve and by dragging it, create smooth, gamma response. In this step look mainly at your midtones – medium grays – and general ambiance of the photo.
You can make your photo brighter or darker – it all depends. In this case I wanted slightly brighter one.
It can start to lack extra “punch” and the response can become too flat – we will fix it in the next point.
8. Adding extra contrast in specific tonal parts
 By adding extra point and “toe” to your curve, you can boost the contrast in specific parts. I wanted this photo to be aggressive (I like how black and white chest pieces work well in B&W), so I added quite intensive one – now looking at it I think I might have over done it, but this whole post is instructional.
Fun-fact for photographers who are not working in the games industry or are not technical artists or graphics programmers – such S-shaped curve is often called in games an “filmic tonemapping” curve, from analog photo or movie film/tape.
9. Final crop and rotation
 I probably should have done it earlier, but I added extra cropping and straightened the photo. I added some extra sharpening / unsharp mask to compensate for not perfectly sharp both original photo and the scan of the film.
10. Results after saving to the hard drive
 This is how it looks after a resizing save from Lightroom to disk – not too bad comparing to the starting point, right?
The best advantage of Lightroom – you can extremely easy copy those non-destructive settings (or even create a preset!) and apply it
to other photos on your scan! I spent on those 2 extra shots no longer than 3 minutes each.
Very convenient and easily controllable batch processing.

Conclusions
I hope I have shown that non-destructive workflow of processing scans of negatives in Lightroom can be fast, easy, productive and you can batch-process many photos. This is amazing tool and I’m sure other better photographers will get even better results!And I promise to write more about my scanning rig assembled for around $100 (assuming you already have a camera) and post some more scans from better quality, lower ASA films or medium format shots.
Bonus
As I promised, some photos that I took couple years ago using Mamiya 6. All scanned and processed manually (color one developed at cheap pharmacy photo lab). Medium format 6×6 composition – another reason to start using film.


Reliably color correcting your scanned film negatives is an exercise in frustration. Not anymore! I've created a set of Photoshop actions that completely automates the process and will get your scanned images looking great with minimal effort and while preserving maximum image quality.

You can use any scanning software you like, as long as you save your scans as positive images in 48 bit mode (16 bit per channel) with all edits and scanning enhancement options turned off. The only other software you need is Photoshop.
Update April 19 2016: I tweaked the actions a bit because I received complaints that the resulting shadows were too grainy. I also included an action for black and white scans.
Download the Photoshop actions here. If you don't know how to install Photoshop actions, Google how to do it whether you're on OSX or Windows.
With your positive scanned image open in Photoshop, you need to crop out any frame borders before running the action. I also recommend you clone out any dust or scratches first, too, because anything pure white will throw it off. Google how to run Photoshop actions if you aren't familiar with them.
All of the edits done by the actions are non-destructive, so you can tweak or undo changes as you desire.
If you found this useful, consider buying anything on Amazon using my referral link. This will give me a small commission on your purchase, with no extra cost to you.
How it works
First you start with your image that's been scanned as a positive. You need to crop out the frame borders and clone out any dust or scratches first. It should look something like this.

When that's done, we're left with a mostly color corrected image, but it lacks contrast and there might still be a faint color cast that remains.


XX . 0 End of an era: Last roll of Kodachrome film developed as digital revolution
But now Kodachrome, the first commercially successful colour film, has become history itself after it was developed for the last time yesterday.
Dwayne's Photo, a family-run business in Parsons, Kansas, was the last place in the world where the 75-year-old Kodak product could be developed.
The die was cast after Kodak announced in June last year that it would stop making the chemicals needed to develop Kodachrome in a round of cost-cutting after the company reported a £84million loss.


Final hurrah: Wearing commemorative T-shirts, Dwayne's Photos employees Val Addis (left) and Tricia Stone (right) process the final rolls of Kodachrome. The processor is due to be sold for scrap

Kodak announced in June last year that it would stop making the chemicals needed to develop Kodachrome as part of a round of cost-cutting
But it pledged to supply Dwayne's Photo in Kansas with the chemicals until the end of 2010.The shop's machine was shut down for the last time yesterday but only after fans of the film had travelled there from cross the world to get theirs developed.

Capturing the times: The Kodachrome's treatment of colour gave photographs an individual depth and contrast
Veteran photographer Steve McCurry, best known for his 1985 portrait of an Afghan girl that made the cover of National Geographic Magazine, had a roll of film shot in New York City and India developed.
Before running out of chemicals, Dwayne's Photos was still processing 700 rolls of film a day.
Its employees took to wearing T-shirts with the epitaph: 'The best slide and movie film in history is now officially retired. Kodachrome: 1935 - 2010'.
The last roll to be processed was an image taken by Dwayne Steinle, the shop's owner. The machine is due to be converted into scrap.
Grant Steinle, who manages Dwayne's Photo, said: 'The real difference between Kodachrome and all the other colour films is that the dyes that make up the image you see in the film, in Kodachrome, don't get incorporated into the film until it is actually developed.
'It's a really sad day, it was an important part of our business and Kodachrome was an important part of the history of all of photography.
'Lots of really iconic images of the 20th century were captured on Kodachrome.'
But as the world turns increasingly digital, Kodachrome sales have plummeted and the camera giant made the decision to axe the first commercially successful colour film last year after a remarkable 74 years.
Although it had become iconic, Kodak took the decision to stop production.
A spokesman said: 'For all its magic, Kodachrome is a complex film to manufacture and an even more complex film to process.'

Iconic: Kodachrome film became an essential part of 20th century culture, even having a 1973 Paul Simon single named after it (scroll down to listen)
In 1963, Abraham Zapruder used Kodachrome to film President Kennedy’s assassination in Dallas.
The film was even immortalised in the 1973 song Kodachrome by Paul Simon. The lyrics read: ‘They give us those nice bright colours. They give us the greens of summers. Makes you think all the world’s a sunny day.’
Many professional photographers feel this richness is missing from modern digital images.
Kodak were the only company producing the chemicals.

. The influential picture was taken on Kodachrome stock
'It just reproduces colours in a way that most other films never did, and it lasts forever,' he said.
'But just straight out the camera it doesn't have that density and dynamic ranges as the Kodachrome does just naturally.'
XXX . V Photographic film
The emulsion will gradually darken if left exposed to light, but the process is too slow and incomplete to be of any practical use. Instead, a very short exposure to the image formed by a camera lens is used to produce only a very slight chemical change, proportional to the amount of light absorbed by each crystal. This creates an invisible latent image in the emulsion, which can be chemically developed into a visible photograph. In addition to visible light, all films are sensitive to ultraviolet, X-rays and high-energy particles. Unmodified silver halide crystals are sensitive only to the blue part of the visible spectrum, producing unnatural-looking renditions of some colored subjects. This problem was overcome with the discovery that certain dyes, called sensitizing dyes, when adsorbed onto the silver halide crystals made them respond to other colors as well. First orthochromatic (sensitive to blue and green) and finally panchromatic (sensitive to all visible colors) films were developed. Panchromatic film renders all colors in shades of gray approximately matching their subjective brightness. By similar techniques special-purpose films can be made sensitive to the infrared (IR) region of the spectrum.[2]
In black-and-white photographic film there is usually one layer of silver halide crystals. When the exposed silver halide grains are developed, the silver halide crystals are converted to metallic silver, which blocks light and appears as the black part of the film negative. Color film has at least three sensitive layers, incorporating different combinations of sensitizing dyes. Typically the blue-sensitive layer is on top, followed by a yellow filter layer to stop any remaining blue light from affecting the layers below. Next come a green-and-blue sensitive layer, and a red-and-blue sensitive layer, which record the green and red images respectively. During development, the exposed silver halide crystals are converted to metallic silver, just as with black-and-white film. But in a color film, the by-products of the development reaction simultaneously combine with chemicals known as color couplers that are included either in the film itself or in the developer solution to form colored dyes. Because the by-products are created in direct proportion to the amount of exposure and development, the dye clouds formed are also in proportion to the exposure and development. Following development, the silver is converted back to silver halide crystals in the bleach step. It is removed from the film during the process of fixing the image on the film with a solution of ammonium thiosulfate or sodium thiosulfate (hypo or fixer).[3] Fixing leaves behind only the formed color dyes, which combine to make up the colored visible image. Later color films, like Kodacolor II, have as many as 12 emulsion layers,with upwards of 20 different chemicals in each layer.

Undeveloped 35 mm, ISO 125/22°, black and white negative film
The earliest practical photographic process, the daguerreotype, introduced in 1839, did not use film. The light-sensitive chemicals were formed on the surface of a silver-plated copper sheet. The calotype process produced paper negatives.[6] Beginning in the 1850s, thin glass plates coated with photographic emulsion became the standard material for use in the camera. Although fragile and relatively heavy, the glass used for photographic plates was of better optical quality than early transparent plastics and was, at first, less expensive. Glass plates continued to be used long after the introduction of film, and were used for astrophotography[7] and electron micrography until the early 2000s, when they were supplanted by digital recording methods. Ilford continues to manufacture glass plates for special scientific applications.[8]
The first flexible photographic roll film was sold by George Eastman in 1885, but this original "film" was actually a coating on a paper base. As part of the processing, the image-bearing layer was stripped from the paper and attached to a sheet of hardened clear gelatin. The first transparent plastic roll film followed in 1889. It was made from highly flammable nitrocellulose ("celluloid"), now usually called "nitrate film".Although cellulose acetate or "safety film" had been introduced by Kodak in 1908, at first it found only a few special applications as an alternative to the hazardous nitrate film, which had the advantages of being considerably tougher, slightly more transparent, and cheaper. The changeover was completed for X-ray films in 1933, but although safety film was always used for 16 mm and 8 mm home movies, nitrate film remained standard for theatrical 35 mm films until it was finally discontinued in 1951.
Hurter and Driffield began pioneering work on the light sensitivity of photographic emulsions in 1876. Their work enabled the first quantitative measure of film speed to be devised. They developed H&D curves, which are specific for each film and paper. These curves plot the photographic density against the log of the exposure, to determine sensitivity or speed of the emulsion and enabling correct exposure.
Spectral sensitivity
Early photographic plates and films were usefully sensitive only to blue, violet and ultraviolet light. As a result, the relative tonal values in a scene registered roughly as they would appear if viewed through a piece of deep blue glass. Blue skies with interesting cloud formations photographed as a white blank. Any detail visible in masses of green foliage was due mainly to the colorless surface gloss. Bright yellows and reds appeared nearly black. Most skin tones came out unnaturally dark, and uneven or freckled complexions were exaggerated. Photographers sometimes compensated by adding in skies from separate negatives that had been exposed and processed to optimize the visibility of the clouds, by manually retouching their negatives to adjust problematic tonal values, and by heavily powdering the faces of their portrait sitters.
In 1873, Hermann Wilhelm Vogel discovered that the spectral sensitivity could be extended to green and yellow light by adding very small quantities of certain dyes to the emulsion. The instability of early sensitizing dyes and their tendency to rapidly cause fogging initially confined their use to the laboratory, but in 1883 the first commercially dye-sensitized plates appeared on the market. These early products, described as isochromatic or orthochromatic depending on the manufacturer, made possible a more accurate rendering of colored subject matter into a black-and-white image. Because they were still disproportionately sensitive to blue, the use of a yellow filter and a consequently longer exposure time were required to take full advantage of their extended sensitivity.
In 1894, the Lumière Brothers introduced their Lumière Panchromatic plate, which was made sensitive, although very unequally, to all colors including red. New and improved sensitizing dyes were developed, and in 1902 the much more evenly color-sensitive Perchromo panchromatic plate was being sold by the German manufacturer Perutz. The commercial availability of highly panchromatic black-and-white emulsions also accelerated the progress of practical color photography, which requires good sensitivity to all the colors of the spectrum for the red, green and blue channels of color information to all be captured with reasonable exposure times.
However, all of these were glass-based plate products. Panchromatic emulsions on a film base were not commercially available until the 1910s and did not come into general use until much later. Many photographers who did their own darkroom work preferred to go without the seeming luxury of sensitivity to red—a rare color in nature and uncommon even in man-made objects—rather than be forced to abandon the traditional red darkroom safelight and process their exposed film in complete darkness. Kodak's popular Verichrome black-and-white snapshot film, introduced in 1931, remained a red-insensitive orthochromatic product until 1956, when it was replaced by Verichrome Pan. Amateur darkroom enthusiasts then had to handle the undeveloped film by the sense of touch alone.
Color
Experiments with color photography began almost as early as photography itself, but the three-color principle underlying all practical processes was not set forth until 1855, not demonstrated until 1861, and not generally accepted as "real" color photography until it had become an undeniable commercial reality in the early 20th century. Although color photographs of good quality were being made by the 1890s, they required special equipment, long exposures, complex printing or display procedures and highly specialized skills, so they were then exceedingly rare.
The first practical and commercially successful color "film" was the Lumière Autochrome, a glass plate product introduced in 1907. It was expensive and not sensitive enough for hand-held "snapshot" use. Film-based versions were introduced in the early 1930s and the sensitivity was later improved. These were "mosaic screen" additive color products, which used a simple layer of black-and-white emulsion in combination with a layer of microscopically small color filter elements. The resulting transparencies or "slides" were very dark because the color filter mosaic layer absorbed most of the light passing through. The last films of this type were discontinued in the 1950s, but Polachrome "instant" slide film, introduced in 1983, temporarily revived the technology.
"Color film" in the modern sense of a subtractive color product with a multi-layered emulsion was born with the introduction of Kodachrome for home movies in 1935 and as lengths of 35 mm film for still cameras in 1936.[15] During the next several decades, color remained much more expensive than black-and-white and required much more light, factors which combined to delay its widespread adoption. Decreasing cost and increasing sensitivity gradually overcame these impediments. By the 1970s color film predominated in the consumer market, while the use of black-and-white film was increasingly confined to photojournalism and fine art photography.
Effect on lens and equipment design
Photographic lenses and equipment are designed around the film to be used. Although the earliest photographic materials were sensitive only to the blue-violet end of the spectrum, partially color-corrected achromatic lenses were normally used, so that when the photographer brought the visually brightest yellow rays to a sharp focus, the visually dimmest but photographically most active violet rays would be correctly focused, too. The introduction of orthochromatic emulsions required the whole range of colors from yellow to blue to be brought to an adequate focus. Most plates and films described as orthochromatic or isochromatic were practically insensitive to red, so the correct focus of red light was unimportant; a red window could be used to view the frame numbers on the paper backing of roll film, as any red light which leaked around the backing would not fog the film; and red lighting could be used in darkrooms. With the introduction of panchromatic film the whole visible spectrum needed to be brought to an acceptably sharp focus. In all cases a color cast in the lens glass or faint colored reflections in the image were of no consequence as they would merely change the contrast a little. This was no longer acceptable when using color film. More highly corrected lenses for newer emulsions could be used with older emulsion types, but the converse was not true.
The progression of lens design for later emulsions is of practical importance when considering the use of old lenses, still often used on large-format equipment; a lens designed for orthochromatic film may have visible defects with a color emulsion; a lens for panchromatic film will be better but not as good as later designs.
The filters used were different for the different film types.
Film basics
There are several types of photographic film, including:
- Print film, when developed, yields transparent negatives with the light and dark areas and colors (if color film is used) inverted to their respective complementary colors. This type of film is designed to be printed onto photographic paper, usually by means of an enlarger but in some cases by contact printing. The paper is then itself developed. The second inversion that results restores light, shade and color to their normal appearance. Color negatives incorporate an orange color correction mask that compensates for unwanted dye absorptions and improves color accuracy in the prints. Although color processing is more complex and temperature-sensitive than black-and-white processing, the wide availability of commercial color processing and scarcity of service for black-and-white prompted the design of some black-and-white films which are processed in exactly the same way as standard color film.
- Color reversal film produces positive transparencies, also known as diapositives. Transparencies can be reviewed with the aid of a magnifying loupe and a lightbox. If mounted in small metal, plastic or cardboard frames for use in a slide projector or slide viewer they are commonly called slides. Reversal film is often marketed as "slide film". Large-format color reversal sheet film is used by some professional photographers, typically to originate very-high-resolution imagery for digital scanning into color separations for mass photomechanical reproduction. Photographic prints can be produced from reversal film transparencies, but positive-to-positive print materials for doing this directly (e.g. Ektachrome paper, Cibachrome/Ilfochrome) have all been discontinued, so that it now requires the use of an internegative to convert the positive transparency image into a negative transparency, which is then printed as a positive print.
- Black-and-white reversal film exists but is very uncommon. Conventional black-and-white negative film can be reversal-processed to produce black-and-white slides, as by dr5 Chrome.[17] Although kits of chemicals for black-and-white reversal processing may no longer be available to amateur darkroom enthusiasts, an acid bleaching solution, the only unusual component which is essential, is easily prepared from scratch. Black-and-white transparencies may also be produced by printing negatives onto special positive print film, still available from some specialty photographic supply dealers.
In order to produce a usable image, the film needs to be exposed properly. The amount of exposure variation that a given film can tolerate while still producing an acceptable level of quality is called its exposure latitude. Color print film generally has greater exposure latitude than other types of film. Additionally, because print film must be printed to be viewed, after-the-fact corrections for imperfect exposure are possible during the printing process.
 Plot of image density (D) vs. log exposure (H), yields a characteristic S-curve (H&D curve) for each type of film to determine its sensitivity. Changing the emulsion properties or the processing parameters will move the curve to the left or right. Changing the exposure will move along the curve, helping to determine what exposure is needed for a given film. Note the non-linear response at the far left ("toe") and right ("shoulder") of the curve.[19]
The concentration of dyes or silver halide crystals remaining on the film after development is referred to as optical density, or simply density; the optical density is proportional to the logarithm of the optical transmission coefficient of the developed film. A dark image on the negative is of higher density than a more transparent image.
Plot of image density (D) vs. log exposure (H), yields a characteristic S-curve (H&D curve) for each type of film to determine its sensitivity. Changing the emulsion properties or the processing parameters will move the curve to the left or right. Changing the exposure will move along the curve, helping to determine what exposure is needed for a given film. Note the non-linear response at the far left ("toe") and right ("shoulder") of the curve.[19]
The concentration of dyes or silver halide crystals remaining on the film after development is referred to as optical density, or simply density; the optical density is proportional to the logarithm of the optical transmission coefficient of the developed film. A dark image on the negative is of higher density than a more transparent image.
Most films are affected by the physics of silver grain activation (which sets a minimum amount of light required to expose a single grain) and by the statistics of random grain activation by photons. The film requires a minimum amount of light before it begins to expose, and then responds by progressive darkening over a wide dynamic range of exposure until all of the grains are exposed and the film achieves (after development) its maximum optical density.
Over the active dynamic range of most films, the density of the developed film is proportional to the logarithm of the total amount of light to which the film was exposed, so the transmission coefficient of the developed film is proportional to a power of the reciprocal of the brightness of the original exposure. The plot of the density of the film image against the log of the exposure is known as an H&D curve.[14] This effect is due to the statistics of grain activation: as the film becomes progressively more exposed, each incident photon is less likely to impact a still-unexposed grain, yielding the logarithmic behavior. A simple, idealized statistical model yields the equation density = 1 - ( 1 - k) light, where light is proportional to the number of photons hitting a unit area of film, k is the probability of a single photon striking a grain (based on the size of the grains and how closely spaced they are), and density is the proportion of grains that have been hit by at least one photon. The relationship between density and log exposure is linear for photographic films except at the extreme ranges of maximum exposure (D-max) and minimum exposure (D-min) on an H&D curve, so the curve is characteristically S-shaped (as opposed to digital camera sensors which have a linear response through the effective exposure range.[20] The sensitivity (i.e., the ISO speed) of a film can be affected by changing the length or temperature of development, which would move the H&D curve to the left or right (see figure).[21][22]
If parts of the image are exposed heavily enough to approach the maximum density possible for a print film, then they will begin losing the ability to show tonal variations in the final print. Usually those areas will be considered overexposed and will appear as featureless white on the print. Some subject matter is tolerant of very heavy exposure; for example sources of brilliant light such as a light bulb or the sun generally appear best as a featureless white on the print.
Likewise, if part of an image receives less than the beginning threshold level of exposure, which depends upon the film's sensitivity to light—or speed—the film there will have no appreciable image density, and will appear on the print as a featureless black. Some photographers use their knowledge of these limits to determine the optimum exposure for a photograph; for one example, see the Zone System. Most automatic cameras instead try to achieve a particular average density.


Plot of image density (D) vs. log exposure (H), yields a characteristic S-curve (H&D curve) for each type of film to determine its sensitivity. Changing the emulsion properties or the processing parameters will move the curve to the left or right. Changing the exposure will move along the curve, helping to determine what exposure is needed for a given film. Note the non-linear response at the far left ("toe") and right ("shoulder") of the curve.[19]
Film speed
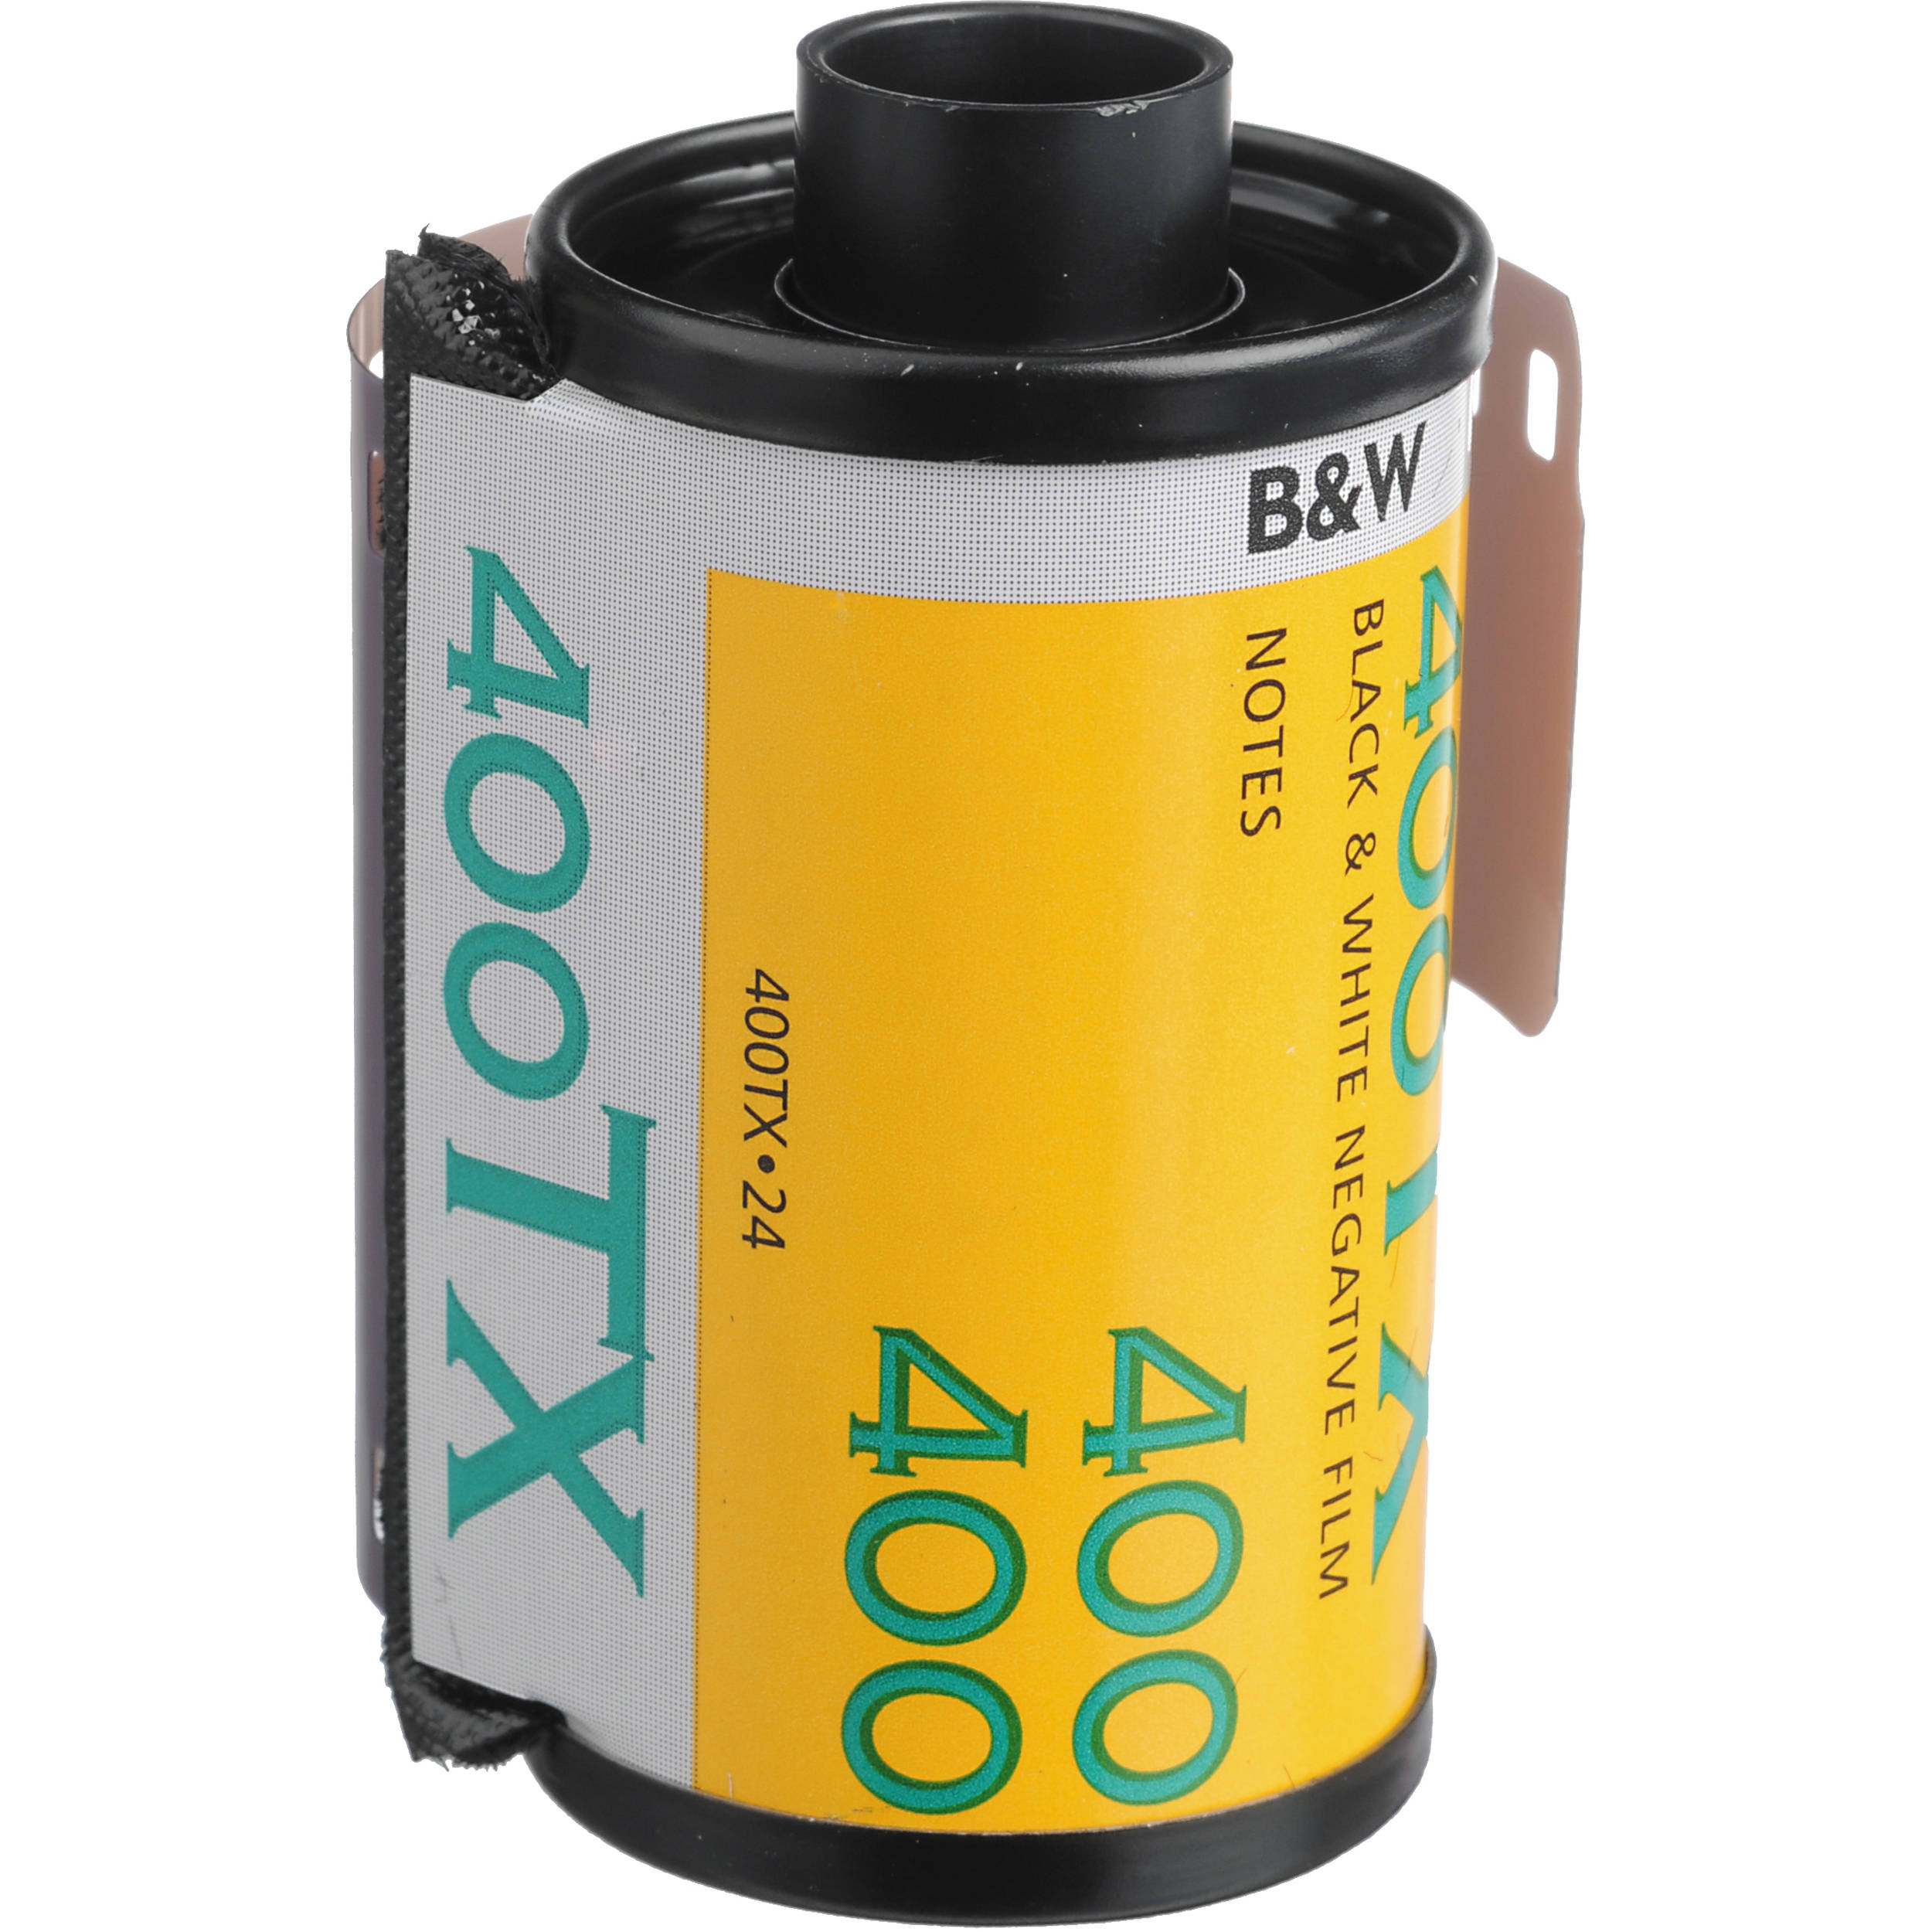
Film speed describes a film's threshold sensitivity to light. The international standard for rating film speed is the ISO scale which combines both the ASA speed and the DIN speed in the format ASA/DIN. Using ISO convention film with an ASA speed of 400 would be labeled 400/27°.[23] A fourth naming standard is GOST, developed by the Russian standards authority. See the film speed article for a table of conversions between ASA, DIN, and GOST film speeds.
Common film speeds include ISO 25, 50, 64, 100, 160, 200, 400, 800, 1600, 3200, and 6400. Consumer print films are usually in the ISO 100 to ISO 800 range. Some films, like Kodak's Technical Pan,[24] are not ISO rated and therefore careful examination of the film's properties must be made by the photographer before exposure and development. ISO 25 film is very "slow", as it requires much more exposure to produce a usable image than "fast" ISO 800 film. Films of ISO 800 and greater are thus better suited to low-light situations and action shots (where the short exposure time limits the total light received). The benefit of slower film is that it usually has finer grain and better color rendition than fast film. Professional photographers of static subjects such as portraits or landscapes usually seek these qualities, and therefore require a tripod to stabilize the camera for a longer exposure. Photographing subjects such as rapidly moving sports or in low-light conditions, a professional will choose a faster film.
A film with a particular ISO rating can be push-processed, or "pushed", to behave like a film with a higher ISO, by developing for a longer amount of time or at a higher temperature than usual.[25]:160 More rarely, a film can be "pulled" to behave like a "slower" film. Pushing generally coarsens grain and increases contrast, reducing dynamic range, to the detriment of overall quality. Nevertheless, it can be a useful tradeoff in difficult shooting environments, if the alternative is no usable shot at all.

Special films
Instant photography, as popularized by Polaroid, uses a special type of camera and film that automates and integrates development, without the need of further equipment or chemicals. This process is carried out immediately after exposure, as opposed to regular film, which is developed afterwards and requires additional chemicals. See instant film.
Films can be made to record non-visible ultraviolet (UV) and infrared (IR) radiation. These films generally require special equipment; for example, most photographic lenses are made of glass and will therefore filter out most ultraviolet light. Instead, expensive lenses made of quartz must be used. Infrared films may be shot in standard cameras using an infrared band- or long-pass filter, although the infrared focal point must be compensated for.
Exposure and focusing are difficult when using UV or IR film with a camera and lens designed for visible light. The ISO standard for film speed only applies to visible light, so visual-spectrum light meters are nearly useless. Film manufacturers can supply suggested equivalent film speeds under different conditions, and recommend heavy bracketing (e.g., with a certain filter, assume ISO 25 under daylight and ISO 64 under tungsten lighting). This allows a light meter to be used to estimate an exposure. The focal point for IR is slightly farther away from the camera than visible light, and UV slightly closer; this must be compensated for when focusing. Apochromatic lenses are sometimes recommended due to their improved focusing across the spectrum.
Film optimized for sensing X-ray radiation is commonly used for medical imaging by placing the subject between the film and a source of X-rays, without a lens, as if a translucent object were imaged by being placed between a light source and standard film. Unlike other types of film, X-ray film has a sensitive emulsion on both sides of the carrier material. This reduces the X-ray exposure for an acceptable image – a desirable feature in medical radiography. The film is usually placed in contact with a thin layer of lead which also enhances its sensitivity.
Film optimized for sensing X-rays and for gamma rays is sometimes used for radiation dosimetry and personal monitoring.
Film has a number of disadvantages as a scientific detector: it is difficult to calibrate for photometry, it is not re-usable, it requires careful handling (including temperature and humidity control) for best calibration, and the film must physically be returned to the laboratory and processed. Against this, photographic film can be made with a higher spatial resolution than any other type of imaging detector, and, because of its logarithmic response to light, has a wider dynamic range than most digital detectors. For example, Agfa 10E56 holographic film has a resolution of over 4,000 lines/mm—equivalent to a pixel size of 0.125 micrometers—and an active dynamic range of over five orders of magnitude in brightness, compared to typical scientific CCDs that might have pixels of about 10 micrometers and a dynamic range of 3–4 orders of magnitude
Special films are used for the long exposures required by astrophotography.
Decline
Film remained the dominant form of photography until the early 21st century, when advances in digital photography drew consumers to digital formats. The first consumer electronic camera, the Sony Mavica was released in 1981, the first digital camera, the Fuji DS-X released in 1989,[27] coupled with advances in software such as Adobe Photoshop which was released in 1989, improvements in consumer level digital color printers and increasingly widespread computers in households during the late 20th century facilitated uptake of digital photography by consumers. Although modern photography is dominated by digital users, film continues to be used by enthusiasts. Film remains the preference of some photographers because of its distinctive "look".
Renewed interest in recent years
Despite the fact that digital cameras are currently by far the most commonly used photographic tool, and that the selection of available photographic films is much smaller than it once was, sales of photographic film have been on a steady upward trend, and companies such as Kodak, which declared bankrupcy in early 2012, among other companies have noticed this upward trend, the president of Kodak Alaris' film, paper and photo chemical's division Dennis Olbrich has stated that sales of their photographic films have been growing over the past 3 or 4 years, UK-based Ilford have also confirmed this trend, and have conducted extensive research on this subject matter, their research showed that 60% of current film users had only started using film in the past five years, and that 30% of current film users were under 35 years old. [30]
In 2013 Ferrania, a Italy based film manufacturer which ceased production of photographic films between the years 2009 and 2010, was aquired by the new Film Ferrania S.R.L taking over the old company's manufacturing faacilities, and re-employed some workers who had been laid off 3 years earlier when the company stopped production of film. In November of the same year, the company started a crowdfunding campaign with the goal of raising $250,000 to buy tooling and machines from the old factory, with the intention of putting some of the films that had been discontinued back into production, the campaign succeded and in October of 2014 was ended with over $320,000 being raised.
In February 2017, Film Ferrania unveiled their "P30" 80 ASA, Panchromatic black and white film, in 35mm format.
Kodak announced on January 5th, 2017, that Ektachrome, one of Kodak's most well known transparency films that was discontinued between 2012 and 2013, would be reformulated and manufactured once again, in 35mm still and Super 8 motion picture film formats.
Japan-based Fujifilm's instant film "Instax" cameras and paper have also proven to be very successful, and have replaced traditional photographic films as Fujifilm's main film products, while they continue to offer traditional photographic films in various formats and types.
DX codes
DX Encoding (Digital indeX), or DX coding was initially developed by Kodak in the 1980s, and eventually adapted by all camera and film manufacturers.[33] It provides information on both the film cassette and on the film regarding the type of film, number of exposures, speed (ISO/ASA rating) of the film. It consists of three types of identification. First is a barcode near the film opening of the cassette, identifying the manufacturer, film type and processing method (see image below left). This is used by photofinishing equipment during film processing. The second part is a barcode on the edge of the film (see image below right), used also during processing, which indicates the image film type, manufacturer, frame number and synchronizes the position of the frame. The third part of DX coding, known as the DX Camera Auto Sensing (CAS) code, consists of a series of 12 metal contacts on the film cassette, which beginning with cameras manufactured after 1985 could detect the type of film, number of exposures and ISO of the film, and use that information to automatically adjust the camera settings for the speed of the film.


Common sizes of film
Source:
| Film Designation | Film width (mm) | Image size (mm) | Number of images | Comments |
|---|---|---|---|---|
| 110 | 16 | 13 × 17 | 12/20 | Single perforations, cartridge loaded |
| APS/IX240 | 24 | 17 × 30 | 15/25/40 | e.g., Kodak "Advantix", different aspect ratios possible, data recorded on magnetic strip, processed film remains in cartridge |
| 126 | 35 | 26 × 26 | 12 or 20 | Single perforations, cartridge loaded, e.g., Kodak Instamatic camera |
| 135 | 35 | 24 × 36 (1.0 x 1.5 in.) | 12–36 | Double perforations, cassette loaded, "35 mm film" |
| 120 | 62 | 45 × 60 | 16 or 15 | Unperforated, rolled in backing paper. For medium format photography |
| 60 × 60 | 12 | |||
| 60 × 70 | 10 | |||
| 60 × 90 | 8 | |||
| 220 | 62 | 45 × 60 | 32 or 31 | Same as 120, but rolled with no backing paper, allowing for double the number of images. Unperforated film with leader and trailer. |
| 60 × 60 | 24 | |||
| 60 × 70 | 20 | |||
| 60 × 90 | 16 | |||
| Sheet film | 2 ¼ x 3 ¼ to 20 x 24 in. | 1 | Individual sheets of film, notched in corner for identification, for large format photography | |
| Disc film | 10 × 8 mm | 15 | ||
| Motion picture films | 8 mm, 16 mm, 35 mm and 70 mm | Double perforations, cassette loaded |
Companies
In production
- ADOX - Made in Germany
- Agfa-Gevaert - Made in Belgium
- Bergger - Made in France
- Lucky - Made in China
- Cinestill - Kodak motion picture film modified for C-41 processing
- Dai Nippon Printing - Made in Japan
- FILM Ferrania - Made in Italy
- Foma Bohemia Ltd - Made in Czech Republic
- Fujifilm - Made in Japan
- Indu - Made in India
- Ilford - Made in England
- Kodak - Made in U.S.A
- Mitsubishi Imaging - Made in Japan
- ORWO - Made in East Germany
- Polaroid Originals - Made in The Netherlands
- Shanghai - Made in China
- Tasma - Made in Russia
Discontinued
- 3M (Minnesota Mining and Manufacturing Company) - Made in U.S., private label films for many chain stores and photofinishing firms; also sold by 3M themselves under the trade name Dynachrome
- AgfaPhoto - Branded products formerly produced by other manufacturers under licence
- Ansco - Made in U.S.; in later years known as GAF
- AzoPan - Black and white film, Made in Romania
- AzoColor - Color film, Made in Romania
- DuPont (also DuPont-Pathé) - Made in U.S.
- Efke - Made in Croatia (ceased production in 2012)[37]
- Ferrania (which became Imation and sold the Solaris brand) - Made in Italy
- Forte - Made in Hungary
- Konica Minolta - Made in Japan
- Maco - Made in Germany
- Perutz - Made in West Germany
- Polaroid Corporation - Made in USA, Mexico, Scotland and Netherlands
- Seagull - Made in China
- Svema - Made in Ukraine
- VALCA - Made in Spain
- Foton - Made in Poland
Image gallery
-
 9.5mm film
-
 Mycro 17.5mm film
-
 Kodak Agfa 16mm film
-
 120 film
-
 35mm film

9.5mm film

Mycro 17.5mm film

Kodak Agfa 16mm film

120 film

35mm film
Oversampled binary image sensor
An oversampled binary image sensor is a new image sensor that is reminiscent of traditional photographic film. Each pixel in the sensor has a binary response, giving only a one-bit quantized measurement of the local light intensity. The response function of the image sensor is non-linear and similar to a logarithmic function, which makes the sensor suitable for high dynamic range imaging
The oversampled binary image sensor is reminiscent of photographic film. Each pixel in the sensor has a binary response, giving only a one-bit quantized measurement of the local light intensity. At the start of the exposure period, all pixels are set to 0. A pixel is then set to 1 if the number of photons reaching it during the exposure is at least equal to a given threshold q. One way to build such binary sensors is to modify standard memory chip technology, where each memory bit cell is designed to be sensitive to visible light.[4] With current CMOS technology, the level of integration of such systems can exceed 109~1010 (i.e., 1 giga to 10 giga) pixels per chip. In this case, the corresponding pixel sizes (around 50~nm [5]) are far below the diffraction limit of light, and thus the image sensor is oversampling the optical resolution of the light field. Intuitively, one can exploit this spatial redundancy to compensate for the information loss due to one-bit quantizations, as is classic in oversampling delta-sigma conversions.
Building a binary sensor that emulates the photographic film process was first envisioned by Fossum,[7] who coined the name digital film sensor (now referred to as a quanta image sensor[8]). The original motivation was mainly out of technical necessity. The miniaturization of camera systems calls for the continuous shrinking of pixel sizes. At a certain point, however, the limited full-well capacity (i.e., the maximum photon-electrons a pixel can hold) of small pixels becomes a bottleneck, yielding very low signal-to-noise ratios (SNRs) and poor dynamic ranges. In contrast, a binary sensor whose pixels only need to detect a few photon-electrons around a small threshold q has much less requirement for full-well capacities, allowing pixel sizes to shrink further.
Imaging model
The lens

Fig.1 The imaging model. The simplified architecture of a diffraction-limited imaging system. Incident light field passes through an optical lens, which acts like a linear system with a diffraction-limited point spread function (PSF). The result is a smoothed light field , which is subsequently captured by the image sensor.


The sensor

Fig.2 The model of the binary image sensor. The pixels (shown as "buckets") collect photons, the numbers of which are compared against a quantization threshold q. In the figure, we illustrate the case when q = 2. The pixel outputs are binary: (i.e., white pixels) if there are at least two photons received by the pixel; otherwise, (i.e., gray pixels).


As a photosensitive device, each pixel in the image sensor converts photons to electrical signals, whose amplitude is proportional to the number of photons impinging on that pixel. In a conventional sensor design, the analog electrical signals are then quantized by an A/D converter into 8 to 14 bits (usually the more bits the better). But in the binary sensor, the quantizer is 1 bit. In Fig.2, is the quantized output of the th pixel. Since the photon counts are drawn from random variables, so are the binary sensor output .

Spatial and temporal oversampling
If it is allowed to have temporal oversampling, i.e.,taking multiple consecutive and independent frames without changing the total exposure time , the performance of the binary sensor is equivalent to the sensor with same number of spatial oversampling under certain condition. It means that people can make trade off between spatial oversampling and temporal oversampling. This is quite important, since technology usually gives limitation on the size of the pixels and the exposure time.
Advantages over traditional sensors
Due to the limited full-well capacity of conventional image pixel, the pixel will saturate when the light intensity is too strong. This is the reason that the dynamic range of the pixel is low. For the oversampled binary image sensor, the dynamic range is not defined for a single pixel, but a group of pixels, which makes the dynamic range high.Reconstruction

XXX . V0 Photographic methods of making PCBs
We will take each function and expand on it, so that you can, if you want to, use it in your PCB fabrication
The process outlined below is the result of years of messing up a lot of PCBs. Frustration and wasting money are great motivators for me. As a result I have honed my process down to the essentials that guarantee me that when I finish, at least 90% of the PCBs I make are in the excellent category, and that I have not spent a lot of money doing it. I get no satisfaction from working several hours, burning through some money and then coming out of the shop with a handful of ratty looking PCBs. So, if a step, like turning my artwork into litho film, will significantly improve the quality and yield, I will spend the extra time and effort to insure that I am happy with the fruits of my labor.
Even though I have used a lot of them, I am not a fan of pre-sensitized positive PCBs. I think they are too expensive and too inconsistent. Also, you cannot tell if the exposure was correct until you put it in the etchant. At that point, if the exposure was not correct, then the board is not reusable. I hate wasting money. I am sure that I have messed up enough pre-sensitized positive boards to pay for the laminator that I now use to apply negative resist film to PCB stock. At minimum, this topic should inspire a lively discussion.
Outline of my process (Details of all of the processes are in later posts)
I print 3 or 4 positives of the PCB image on laser transparency film. (My laser printer does not print very dark.) I then stack/align them together to increase the density of the black image. The following pictures are of a single transparency and of 4 transparencies aligned.
Single transparency
Four Transparencies aligned on top of one another
I then use Litho film to reverse the image and to increase the contrast. The benefits of using Litho film, as well as how to use it, are covered in a later post.
Once the artwork is ready, it is time to sensitize the PCB stock. I use negative acting dry film resist. This film is a photo sensitive emulsion sandwiched between two protective sheets of plastic. One side of the plastic is removed and a laminator is used to apply it to the PCB stock. Dry Film resist has proven itself to be more reliable and precise than pre-sensitized positive PCB stock, plus it is much much cheaper. Again, this is covered in detail, with a video, in a later post.
It is now time to expose the PCB. I use a contact print frame to hold everything together while exposing. I use a 5 watt UV LED (365nm) as my light source. Once exposed, the image is clearly visible on the PCB. This is a nice feature of dry film resist. If there is a problem, the board can be stripped and re-laminated in just a few minutes.
The second layer of plastic strips off easily and the board is developed in a solution of Sodium Carbonate and water.
Development complete
I etch my boards in Sodium Persulfate using an economy etcher. Using this etcher has greatly reduced my consumption of sodium persulfate. I can etch three times the number of boards for the same amount of sodium persulfate as compared to using an unheated tray. It is a lot faster also.
The finished board (on a light box)
While the above process might seem a bit advanced for a home hobbyist, it works very well and is very reliable. If you are making more than one board, then it works even better. Good artwork is the key to success regardless of the photo resist you are using. You may not be interested in going through all of the above steps, but I am certain that you will find something of value in this thread that will improve the success rate, and or reduce the cost, of your PCB process.
XXX . V00 Review of the Lomography Smartphone Film Scanner
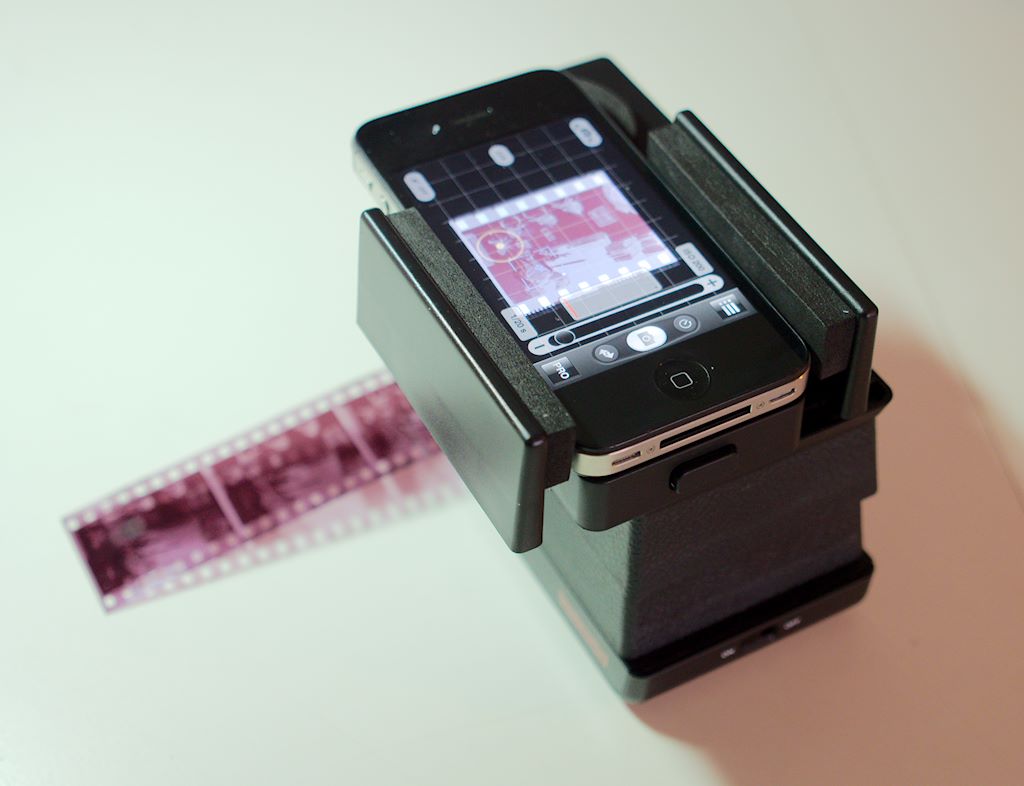
I just received my Lomography Smartphone Film Scanner (Lomo) and have had fun testing it. I have my unit now because I participated in the Kickstarter funding. Retail units will be available very soon online.
The Lomo enables you to connect a smartphone, in my case an iPhone 4S, and scan 35mm film strips. The internal light is powered by 2 AA batteries. Operation is simple. Feed the film into the unit using a knurled knob, turn on the light, mount your phone, and take a picture of the illuminated image.
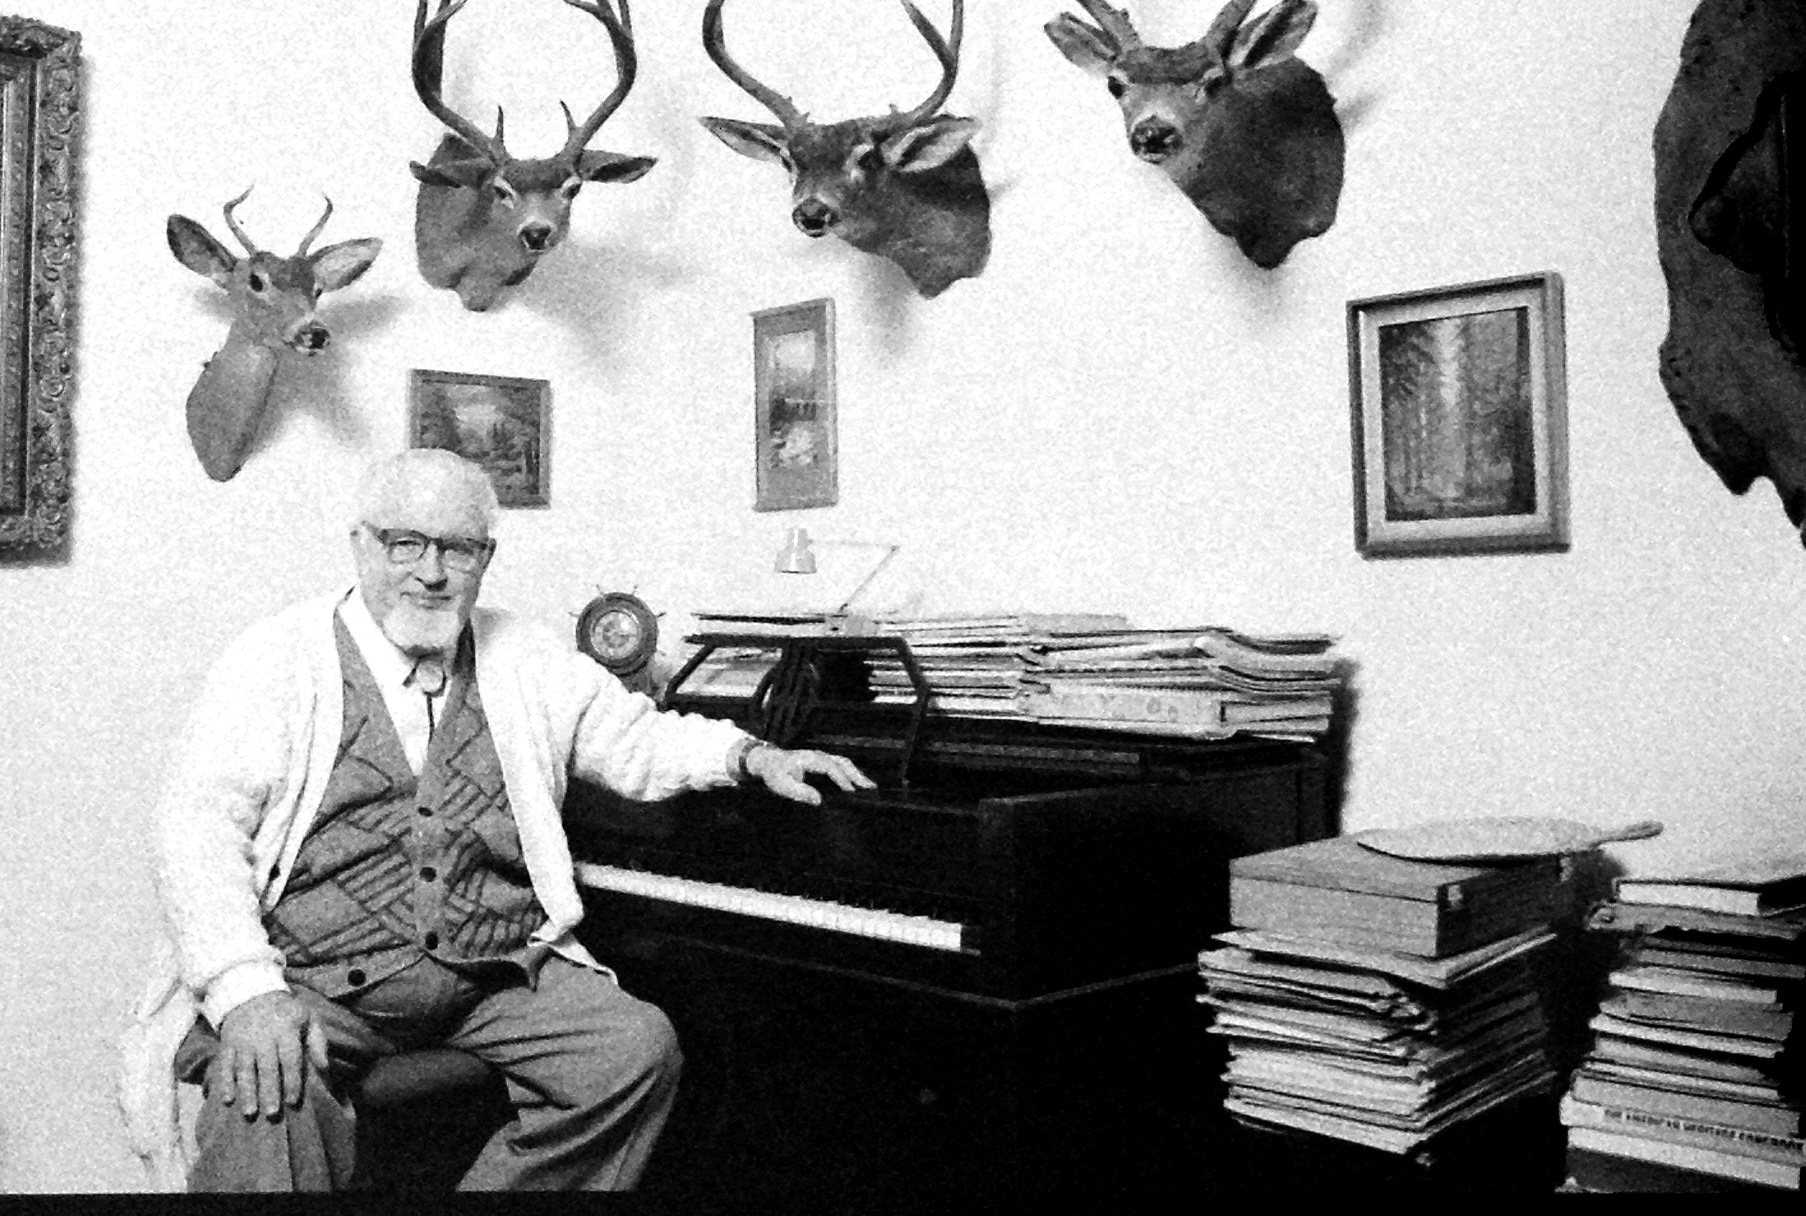 Retired Dr. "Wild Bill" Ellison photographed in his study in 1991 using a Contax SLR and Ilford XP2 film.
 You can use any photo app to take the picture. I prefer using ProCamera because of the controls it provides. Once I captured the image, I used Photoshop Express to invert the picture to make it a positive (Effects > Invert). After a bit of image adjustment, I'm ready to share my photo with the world.
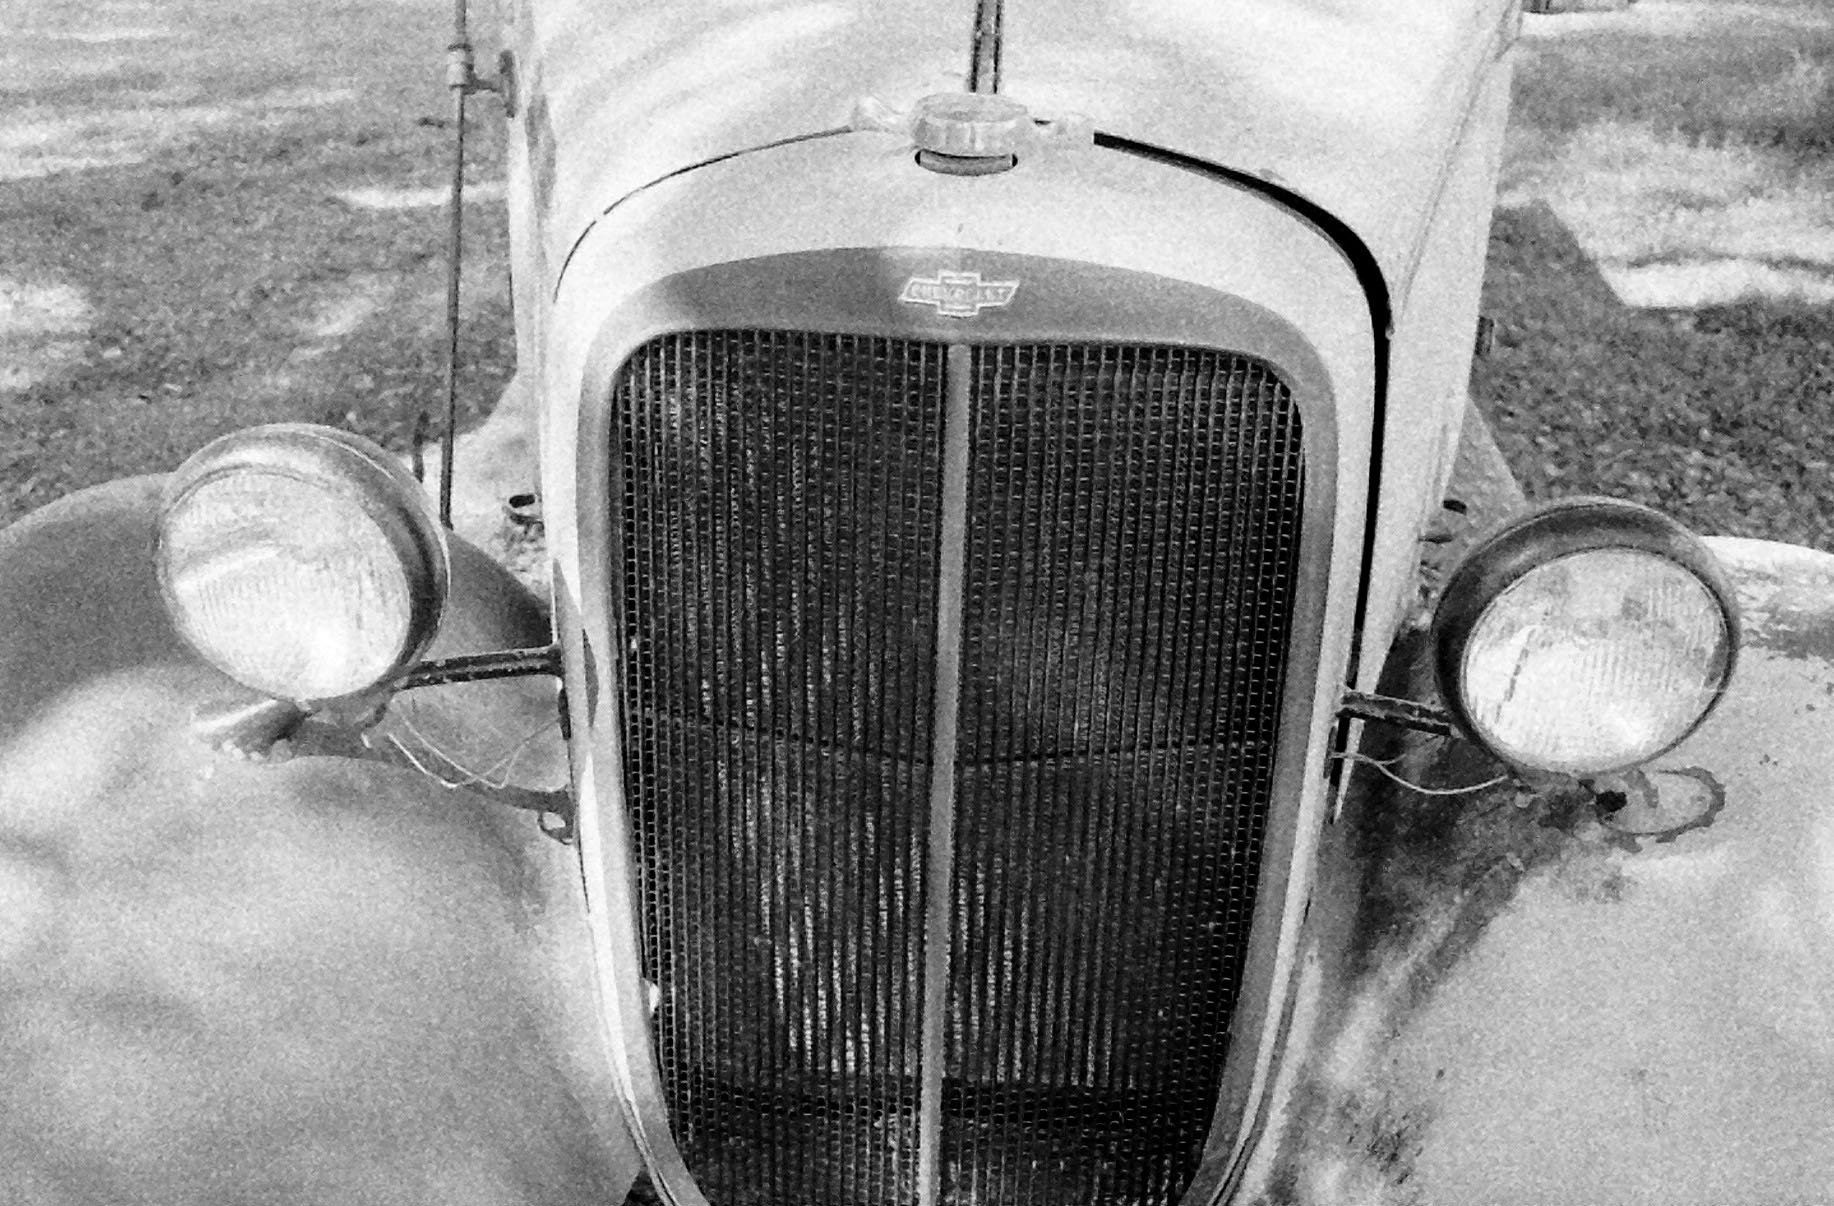 Front grill of a 1935 Chevy truck photographed in 1993 with an Yashica FX2000 and a Zeiss 35mm f/2.8 lens using Ilford HP5 Plus film.
 The good points for the Lomo include:
- Low cost (around $65) and very compact. Fits easily in your daypack.
- Easy to use with quick results.
- Free iOS and Android scanning apps soon to be released.
- Great way to share your film archives or current projects on Facebook, Twitter, Flickr, and other sites accessible from your mobile phone.
XXX . V000 Mass Effect Andromeda reviews: the early verdicts are in, and they’re pretty mixed

Bioware is back. The developer known for its complex and profound worlds muddied its reputation in 2012 with the controversially rubbish ending of the original Mass Effect trilogy – so gamers’ hopes are riding on the story of the new Mass Effect: Andromeda being loads better. The new story sees humanity – and other alien species – sending people to colonise the titular Andromeda galaxy, before things start to go awry. The RPG is just a week away, and Xbox One players can play the first 10 hours from Thursday (March 16) via EA Access – but gaming websites have had access to preview material, and early reviews have already begun to roll in. So… is it any good?
IGN
IGN‘s quite vague on the subject: “Andromeda presents a strong, dedicated focus on customization, creatively expanding on some of the series’ staple RPG elements.”
Rock, Paper Shotgun hate it. This is just one of their many complaints: “Side quests feel like something from a 2004 Korean MMO. Just complete nothingness, running from map icon to map icon, scanning objects with your scanner when told to, and then AI companion SAM letting you know that, yup, the source of the defects has been found/animal has been captured/toddler reunited with rabid tiger, despite your actually doing nothing relevant to the tissue-thin narrative.”
XXX . V000 Dealing with historic or badly processed negatives in ColorPerfect's ColorNeg mode
The various film types included in ColorPerfect's ColorNeg mode or in the original ColorNeg plug-in cover a large number of color negative films that have been available on the market in recent years. All of these film types are intended for negatives that have been developed according to standard conditions. Since version 1.02 the original ColorNeg plug-in featured a completely revised FilmData slider. This tool was a breakthrough for characterizing negatives from other sources. Such sources may be negatives on older types of film, negatives on altogether unknown material or the occasional roll of film that has either been developed under special conditions for a certain reason or for which something went inexplicably wrong during processing.
In ColorPerfect the FilmData slider has been improved further and has become the FilmType/SubType/FilmGamma calibration system. This system is similar but not identical to the original FilmData slider discussed in parts of this page. The first two example negative conversions shown have been made with ColorNeg but images of the same or even superior image quality could also have been made with ColorPerfect. The same principles apply so we left these original sections of this page largely unchanged.
An extreme example from the early 1970s processed with ColorNeg
The following example illustrates the possibilities as well as the boundaries of working with such material in ColorNeg using a rather extreme negative. Below this paragraph you see a linear scan of a negative from the early 1970s. At the time fast negative films had a nominal speed of ASA 64 and negatives on such material tended to be thin and hard to work with. One option to work with an at the time extraordinarily high speed of ASA 400 instead was to underexpose the slide film Kodak High-Speed Ektachrome about 1.5 exposure values and to cross process the film afterwards to produce negatives. The example shown below is an available light shot of a scene lit by incandescent lights. Kodak High-Speed Ektachrome was intended for daylight and since it is a slide film it does not show the otherwise common orange mask.
As we have shown for negatives on current film types Photoshop's Image > Adjust > Invert command is not suited to convert color negatives at all. An attempted negative conversion using this route will retain extreme color distortions even after the resulting overall color cast has been removed so that there is pure white in the image. These color problems are due to wrong calculations in Invert and can't be corrected once they are in place.
With ColorNeg it is possible to convert even such extreme negatives into positives of acceptable quality. Of course modern films would yield a higher image quality by comparison. Nevertheless please note the detailed reproduction of color in the resulting image and the absence of any color cast. ColorNeg utilizes the full detail stored within the negative. Due to the high control in ColorNeg and the further image editing options in Photoshop the resulting image will outperform any traditional color print made from the same negative.

Instructions for working with the FilmData slider in the original ColorNeg plug-in
To characterize a given negative of an unknown film type please select the FilmData slider. Then click on any gray area in the image. In most cases light grays will give the best results when working with the FilmData slider. In the example one of the dancers wears a gray costume that can be used as a reference. Another option that works well in the example is using the white shirts of the men in the chorus instead.
The initial color balancing by click is a requirement. Afterwards use the slider to find the position that will yield the most natural color in all areas of the image. Be sure to hover over the full range of the slider at least once as the optimum in color can appear anywhere on the entire slider. For this example the optimum was located around film type 350. As soon as you are convinced that you have found the best setting for your negative you may test it by clicking on several gray spots in the image which differ in lightness. There should no longer occur any large color shifts. Smaller color shifts are to be expected though as the areas clicked upon are unlikely to be precisely neutral. Most will have some minimal amount of one color or another.
The film type number displayed after characterizing one negative of a series can be tried on subsequent negatives of the same film to establish whether a good characterization has been found. If so the film type number can be written down and used on other negatives on the same type of film that have been processed in the same way. In addition to this the user film list will be selected on activation of the FilmData function. You can also always save your settings there under the current or a new name as shown in ColorNeg's manual. After characterizing the material you should check whether the highlight setting needs to be adjusted.
Another example: A 1974 test negative on Kodak Ektacolor S processed with ColorNeg

Due to the positive feedback we received about this example page I have decided to add another case for you to look at. If you would like to do so please click here first to preload the image files used for this second example. Since many of you might not yet be familiar with ColorNeg itself I will also briefly hint at some important details not specifically related to the FilmData slider.
To the right you see a linear scan of a 35 year old test negative. Such a linear scan almost always looks very dark in Photoshop and that is absolutely fine as it contains all detail captured during scanning nonetheless. ColorNeg will handle encoding the result to the required tone reproduction curve for your chosen color space after you specify that Gamma C. To learn how to create linear scans with your scanner hardware visit our extensive scanning tutorials. The kind of linear data shown is what your scanner reads and its being so dark is merely a matter of interpretation of the data by Photoshop.
Let's look at another version of the same negative that has been gamma encoded and color balanced to illustrate that all the detail needed is in the linear scan. Creating such an image is neither required nor permissible when processing negatives with ColorNeg. All of that is done automatically. ColorPerfect's ColorNeg mode does allow working with gamma encoded scans but you should only use that feature if there is no other way for your scanner. Where that applies is documented in the scanning tutorials. Using advanced hardware features we could also use the lighting or exposure controls on some scanner models to remove the orange mask during scanning. The resulting linear scan will be processed by ColorNeg equally well as the still orange masked one shown first. Only if you use certain older scanners such unmasked input will perform noticeably better.
To get started let's again look at what Photoshop's Image > Adjust > Invert command would do even to the well prepared negative we looked at between the two linear scans. As expected the image produced this way with Photoshop alone will retain the large uncorrectable color distortions we saw before.
There is no data for the negative's film Ektacolor S built into ColorNeg and we have to use the FilmData slider again as detailed above to characterize our image. The film type I found here is not included in ColorNeg because a single image like the one at hand simply is not representative. We can't assess that this film type determined with the FilmData slider will yield good results for a majority of images on the same film without looking at more negatives on the same material. Still we are able to quickly find a characterization that seems to suit the single negative at hand.
ColorNeg allows different regions of a negative to be treated differently during the inversion by making use of a feathered selection set up in Photoshop by the way. We could for example use that advanced technique to make the detail of the fur stand out a bit more by adjusting the fur's lightness separate from the rest of the image.
Every now and then I get asked about the color of an example - especially about the skin tones' color. It is almost impossible to get precisely the same color rendition one gets in Photoshop to show on a web page. If you find that the image still has a color cast be assured that ColorNeg's color compensation (CC) filter system is perfectly suited to get any color balance you feel is right.
If you started out with a linear scan and have characterized the film type suitably any color casts in such an image will be manageable. To illustrate that let me show you six more versions of the final image we looked at. Each has been adjusted by a CC filter of a strength of 2 from the final image. The result is a subtle but visible change in color balance. In ColorNeg you can apply CC adjustments as subtle as +/- 0.1.
These are the CC adjusted images: Click on the following links to make our final image more Red, more Cyan, more Green, more Magenta, more Blue or more Yellow. These adjustments can also be thought of in the reversed terms of less Cyan, less Red, less Magenta, less Green, less Yellow and less Blue which is easier for many of us when trying to remove color casts. In ColorNeg you can therefore simply enter relative CC adjustments for all six primaries with -2Y and +2B having the same effect. Please always use our final image as a reference since all color changes denoted here are relative to that version of the positive image. In ColorNeg any combination of CC filters can be used and you will soon find the ideal filter pack.
A third example: A 1981 color negative on ORWO Color negative film from the GDR
Only recently I was given a box of old monochrome negative films from one side of the family. There also were around fifty color slides in that box among which I found a handful of color negatives in orange slide mounts. We could date one of those negatives precisely to 1981 because of the event depicted.
About 30 years ago doesn't seem to be such a long time for a color photo. The photo we are going to look at however was taken in the German Democratic Republic (East Germany) where monochrome imaging was predominant in the amateur market much longer than it was in Western Europe. That fact makes this the earliest color negative image from that part of the family I am aware of. None of the film types built into ColorPerfect fit this negative so I figured it might make an interesting addition to this page. Please click here first to preload the image files used for this third example.
Below is a linear scan of the negative. The orange mask has mostly been removed by use of suitable analog gain settings during scanning. Although we have already seen that this is fruitless let's completely remove the orange mask, gamma encode the linear scan and let's try to convert it using Photoshop's invert command. As expected that doesn't work. ColorPerfect can be used to create a superior inversion of the negative and to process that into a pleasing positive image.

After trying a couple of the built in film characterizations in ColorPerfect's ColorNeg mode we notice that none of them work for the negative at hand. What indicates that is the fact that color balancing by gray click on the white blouse fails. Clicking on a darker portion of that blouse will result in a large color shift accompanied by noticeable changes in luminance. Effects like that are typical for an ill characterization of the input.
ColorPerfect's FilmType slider can be used to find a reasonable characterization for negatives like this one. To do so we gray click a medium bright portion of the blouse or maybe the surface of the road outside of the garden. Then we run the FilmType slider through its entire range once. We are looking for the setting that produces an image with the most natural appearance. After identifying what seems to be the best point we switch to SubType mode and fine tune our characterization. It can be helpful to temporarily set the saturation control to a higher value while doing this as this will emphasize the changes in color. Switching back and forth between FilmType and SubType modes to further tune the characterization is recommended. Resetting the saturation control to 100 we have a positive image to start working on.
We could invert the negative in a manner that preserves the entire detail in the highlights of the white blouse. The overall appearance of the image is too dark for a sunlit scene however. The details of why that is are described in our article on preserving highlights in negative conversions. To remedy that we can remove some more black from our image. Some portions of the highlights would blow which we can countermand by turning ColorPerfect's highlight compression on to a degree that suits our needs. Next we can remove some white from the image which can also be thought of as removing fog or haze from a scene. As we don't want blotted out shadows we'll also turn on shadow compression in the process. As final steps we can apply a minor zone curve in ColorPerfect and set the saturation level to a degree that fits our wishes. Comparing the basic inversion we started with to this final image produced with the various adjustments ColorPerfect provides also is a nice demonstration of what ColorPerfect allows you to do when working on positive images that have color integrity.
If you don't agree with the final image presented here you could easily have made different choices in editing the initial positive image leading to an image more to your preference. Also note that this example was created as a first try on an unknown film type. It is very likely that the characterization determined could be improved while working with further images on the same type of film. If you found this page informative I'd appreciate it if you'd use the interactive features of this web page which are located directly above the main text to tell your friends and fellow photographers about it.
Creating perfect photos from your slide and negative scans with ColorPerfect: Creating linear scans
Suitable scans are the key to producing color integrity with ColorPerfect. The following tutorials will show you how to scan using different hard- and software. We have created these tutorials to aid you in getting started with processing your slide scans in ColorPerfect's ColorPos mode and your negative scans in ColorPerfect's ColorNeg mode. The instructions also apply to our previous generation of plug-ins ColorPos and ColorNeg.What do I have to look out for when scanning slides and negatives for processing with ColorPerfect?
To harness the full potential of our Photoshop plug-ins it is important to create imagery that is as untouched as possible (RAW Data). This might require some involvement at first but will soon become easy. It is of the utmost importance that you do heed the following guidelines. The image file resulting from a scan must be in RGB mode, must have a color depth of 16 bit per channel (48 bit RGB) and should ideally be linear. The term linear refers to the image's gamma encoding. A linear image has a gamma value of 1.0 which means no adjustment has been applied to the data. Scans of this nature are comparable to a digital camera's RAW files. They contain the unaltered equivalent to the intensities of light read in by a scanner's CCD.
Our previous plug-in ColorNeg could exclusively work with images like that. To process slide and negative scans in ColorPerfect's ColorPos and ColorNeg modes linear input is still recommended. In ColorPos mode gamma encoded input is generally acceptable, too. The new ColorNeg mode now also features settings that allow processing gamma encoded negative scans. This is important to some users because it is impossible to create linear scans with certain scanner software.
The steps required to create suitable scans vary depending on the scanner software you are using. Creating linear scans is very straight forward with some software while with other software accomplishing suitable scans can be more tricky. Please be aware that learning how to create such scans is the single most important step to successfully harnessing ColorPerfect's and/or ColorNeg's powers.What scanner is suitable to scan slides and negatives and which settings should be used?
Scanners that feature an analog/digital converter with a precision of 14 bit per channel and whose scanner software is able to write image files with 16 bit per channel are generally suitable to create negative scans. For scanning slides and black and white negative film devices with 12 bit precision can suffice. To create color negative scans with such devices special techniques are required. Some scanner software does not have an explicit option to create linear scans. Still such scans can often be created by setting the gamma value to 1.0 and turning off anything that is said to "enhance" color in any way. This can usually be set up one way or another using the software's options. The default value for the Gamma setting would be 2.2 or 1.8 adjust that to 1.0.
The automatic removal of dust and scratches, e.g. digital ICE as well as any hardware based exposure or analog gain settings can usually be used without any problems.
Since you don't want some inferior automatism of the scanner software to invert your negatives but rather want to use ColorPerfect later on the negative usually needs to be scanned in a mode intended for slides or positive images. Some scanner software has a special mode for negatives that does not invert the data but saves it to disk without any processing. Such modes can also be suitable.
Your objective always is to retain the negative as such. That is so that you see the photo in negative form when you open the image in Photoshop. It might or might not have the same color cast as the original negative depending on the scan's settings but it will usually look very dark. That is normal and of no consequence. This look is brought about by a misinterpretation of the input data by Photoshop which is part of the workflow. ColorPerfect will rectify this. Open the image in Photoshop, assign a suitable color profile and set up ColorNeg mode's Gamma C setting accordingly. Even though ColorPerfect's ColorNeg mode was primarily developed to process color Negatives it is also ideally suited for black and white ones.
Detailed instructions for different types of scanner software
This section of our web site contains a growing number of detailed tutorials on how to create linear scans using various scanners and their software. We hope to further expand this section in the near future but require your assistance in doing so. If you posses any suitable scanner that uses a software or driver not featured here or use an English version of a software whose screenshots on these pages are in German I'd like to ask you for your help. In case of an already featured software simply make screenshots of the parts of the UI shown in the respective tutorial and e-mail them to info(at)ColorPerfect.de.
If you use different hardware with software that is not yet featured here it would be great if you could help in determining a suitable workflow. You can either do so on your own and report your findings afterwards or you may contact me to get assistance in figuring out what to do. I would greatly appreciate it if the result would be a series of screenshots on which I could base another tutorial for this section. Of course credit for your help will be given unless you prefer otherwise.
The currently featured products merely reflect what hardware and software is available to us or to users who have volunteered to help in creating these instructions. Other hardware and software certainly also is suitable. This list of tutorials is incomplete and does not imply any featured products to be solely or specially suited for creating linear scans.
What Is Slide Film: An Introduction To Color Reversal & E-6

Ahhh slide film… a once completely standard medium has now become quite illusive - like personal space on an airplane or a pair of heels to fit my size 10 feet in France. (Seriously you would not believe how small French women’s feet are!) Contrary to popular belief, your grandfather’s preferred medium has not disappeared once and for all, and is in fact alive and well. As of 2015 Fuji is the only original major manufacturer of slide film which continues to produce it today, but you can also get it from Lomography, Rollei and some other independent companies.
Let’s start with the basics: what is slide film? In simple terms, it’s the opposite of color negative film. Instead of a negative, it makes a positive. This is why it is also called color reversal film. When you develop it, you see a tiny photo - no print needed. Think of it as bizarro world color film, or opposite day color film if you prefer. If you were born before 1990 there is a very high chance you were forced to watch old slideshows of your parents’ vacations from the 1960s. In fact, the term “slideshow” comes from the ancient practice of subjecting one’s friends and family to sit in the dark and stare at images projected on a wall for hours while they drone on and on and on about that camping trip to the Grand Canyon that one time. When you make a slideshow presentation on your computer, the icons resemble the plastic mounting used on actual slides.

{Vintage color slides on Kodak Ektachrome, from ISSF’s private collection}
You may have heard the term “E-6” in relation to slide film. E-6 refers to the developing process for slide film (as opposed to color which uses C-41.) E-6 processing is not that different from traditional black and white processing in theory; it consists of 6 baths which include developer, stop and fixer. However that’s about where the similarities end, as other steps in the process include a color developer bath, bleach bath and even an anti-fungal agent. Some tutorials are out there for home-developing E-6, but personally I wouldn’t recommend it unless you have a fully equipped professional darkroom at your disposal – considering formaldehyde is essential to the bleach bath, best left in the hands of professionals. For more on the chemical composition of slide film itself, check out How Film Works.

{Star Dune by Zach Boumeester, shot on FujiChrome Velvia 50}
Slide film has a one-and-a-half stop range. If you happen to be familiar with the principles of exposure, then you know that’s not a lot room for error. If you aren’t familiar with these principles, let me tell you: THAT IS NOT A LOT OF ROOM FOR ERROR. I’ll explain:
- Black and white film has a 5 stop range, meaning you can be underexposed or overexposed by up to five stops and still have detail in the highlight or shadow areas. Don’t speak photographer? Translation: The correct exposure for your photo was at F/8 for your ISO and shutter speed, but you shot at F/16 - and your photo will still be okay.
- Color film has a 3 stop range, meaning you’ll still have detail even if you’re off by up to three stops.
Which brings us back to slide film, and it’s very very low stop range of 1 ½. (Side note: I have seen articles online which state that slide film has a 3 stop range, color film a 5 stop range and B&W film an 8 stop range. This basically contradicts everything I ever learned in any darkroom class ever… and I have to assume these people are scanning and not printing in a darkroom. Scanning and tweaking in Photoshop probably will get more out of lost highlights and shadows, but I would not approach shooting with these larger stop ranges in mind.) When shooting slide film, correct exposure is essential - hence the reason it’s often referred to as “professional” film. If you feel comfortable enough with your exposure skills, there are some great benefits to shooting slide film.

{The Golden Gate Bridge by Matt Nuzzaco, shot on 4x5 FujiChrome Velvia 100F}
Advantages of Shooting Slide Film
- You see what you actually shot. This is a BIG ONE. Whenever you scan or print from negatives, there is always the interpretation of the scanner/printer (I’m talking about humans here not machines) and how he/she thinks the print should be exposed. When you make a contact sheet in the darkroom, you can make it lighter or darker according to what you want and what you need. When you develop a roll of slide film, you see exactly how you exposed your film - zero change due to processing and printing.
- Crisp, bright colors and higher contrast range. This is probably the largest broad appeal of shooting slide film, considering all of the Photoshop actions out there designed to mimic its effects. When exposed correctly, slide film produces beautiful colors, with extra brightness and pop or ridiculously accurate skin tones depending on the brand of film.
- Very long archival life with little effort. Slides often come in a little plastic box which you can just tuck away without having to sleeve… even if you chuck them in a cigar box like someone I know and leave them in the basement for 40 years they’ll still probably be okay. Prints on the other hand, need acid-free sleeves if you don’t want them to fade and deteriorate.
- No need to order prints to see your final images. So at least that saves on what you spent on the slide film.
- Cross processing is fun and can create some cool results if you’re looking to experiment.
Before you run out and spend all your money on a brick of Fuji Velvia (actually that’s not a bad idea) let me just stop you one second - there are also quite a few serious downsides to shooting slide film:
Disadvantages of Shooting Slide Film:
- Exposure must be on point. If you push the limits in low-light situations, shoot fast-paced street photography in varying conditions, or tend to use automatic settings slide film is not for you. When it goes wrong it goes very wrong and there’s a good chance your roll will be mostly blacks or mostly whites if you don’t know what you’re doing.
- It’s expensive! Slide film is not cheap - mostly because people are using it less and less. Kodak doesn’t even make slide film anymore - and they were frontrunners of the original process!
- It’s highly specialized. Most slide films are good for one specific thing and that’s it. This is not a 100% rule, but for example the previously aforementioned Fuji Velvia is excellent for landscapes. It can also be a recipe for super weird and orange skin tones.
- Making prints is difficult and expensive. Yes, not needing to make prints is technically an advantage, but if you do want to print from a slide, you’ll have to procure some color reversal paper - and good luck with that considering I’ve never held a box in my hands ever. That doesn’t mean you can’t find it (Fujichrome Paper Type 35 still exists), it just means making prints from slides was never a particularly common practice and it’ll cost you some $$$$.

{Marie Meyer in 2006 by me, shot on FujiChrome Provia 100F}
Tips for Shooting with Slide Film:
- Avoid low light. If you’re not working with artificial lights that you can adjust to fit your needs, stay away from low-light situations with slide film in the beginning - it’s a recipe for disaster, and totally black photos. If you’re trying it out for the first time, shoot in broad daylight to give yourself options.
- Bracket. What is bracketing? It’s basically taking extra pictures at different exposures because you love a shot so much you just don’t want to risk it. Meter the scene, shoot it at the correct exposure, then shoot one stop up and one stop down. There, you just bracketed.
- Use reflectors and diffusors to control light and shadow. If you have the space and time (and possibly an assistant or very nice friend to help you out) using reflectors and diffusers can seriously increase the information in your shadows and help you control blown out highlights. Not a great option for street photography, but a life-saver for portraits.

XXX . V0000 Simulating Film Effects with Curves
Simulating Film Effects with Curves
I know I'm not exactly inventing the wheel here, but I have been treading one moderately well-trodden path recently: attempting to recreate the look of a few types of film I know and like. The method I chose was the simplest possible: attempting to create a set of Photoshop curves I could use to give photos these looks with a minimum of fuss. I don't even pretend to aim for accuracy. It wouldn't really help much in any case, since the photos on which I want to use them come from a variety of cameras and converters, and therefore no single method would be applicable to all of them. I haven't done any side-by-side comparison shots of film versus digital, although I have compared my results against some scans I've made previously -- and nope, they're not exact matches, nor, I think, will they ever be. But they do go at least a part of the way towards recreating the feel I used to create by my choice of film stock.
Emma Vaaen. Canon EF 50/1.8 on EOS-5D. Straight conversion with Raw Shooter Premium. To me, this has the "Provia feel" straight out of the box. Sometimes it goes like that...
One of the more important creative choices a photographer had the pleasure of making back in film days was choosing what kind of film to shoot. Slow, saturated, contrasty slide film gives a completely different feel to a picture than fast, grainy, high-latitude color negative film. Different brands and makes of slide give their own flavor to pictures: Provia rendering scenes in a cool, low-key, translucent way, Kodachrome in a rich, deep, colorful way, and Velvia in a completely over-the-top almost cartoonish way. When the choice was well made, the result just looked so wonderfully right that it would almost make a grown man weep... and when the choice was wrong, it could mean not getting the picture at all, or jumping through any number of hoops to getting something remotely acceptable out of the exposed frame.

Tyre Cat. Canon FD 50/1.4 SSC on Fujichrome Provia 100F.
Those of us who transitioned to digital no longer have much choice in capture medium. We're pretty much stuck with whatever happens to sit inside our cameras, and our choice of camera is to a great degree dictated by its picture-taking characteristics than its imaging characteristics. Some of us have slow, big, high-resolution cameras for big prints and fast, smaller, lower-resolution cameras for situational shooting, with perhaps a few tiny cameras for take-anywhere shooting, but very few have dedicated portrait cameras, landscape cameras, sports cameras, nighttime cameras, architecture cameras, black-and-white cameras, street cameras, photojournalism cameras, like they used to have dedicated films for each of these missions, and more. Instead, the creative choice of film stock has moved to the digital darkroom. Digital capture can give us a starting point that's more or less neutral and lends itself to being massaged into any of the looks and feels associated with these types of photography. The only trouble is getting there, especially in a repeatable or consistent way.

Autumn reflections. Rollei AF-M 35 on Kodak Portra 400NC.
The theory
Films respond to light rather the same way as eyes. The more light you hit them with, the bigger the reaction. However, the response is not linear: they're more sensitive to light differences near the middle of their sensitivity range than at the edges. This response can be plotted as a curve. Contrastier films have steeper curves than films with more latitude: Fujichrome Velvia is contrasty, while Kodak Portra is low-contrast. Color films react slightly differently to the component colors that give us full color, which gives them their characteristic color response. For example, Fujichrome Velvia is known for its deep, rich, emerald greens (but pretty funky skin tones), while Fujichrome Provia is known for emphasizing blues in an otherwise pretty neutral rendition.
First Snow. Rollei AF-M 35 on Kodak Portra 400NC.
Photoshop's curves work the same way: it is possible to adjust tonal and color response by modifying tone curves, for example in an adjustment layer. Theoretically, if you know what your starting point is, and the latitude of your starting point is at least equal to the latitude of your desired endpoint, it should be possible to replicate the tone curves of any type of film simply by applying the right curves to an image. It wouldn't even be too difficult to do this; all you'd need to do is shoot a color chart under controlled lighting with your different types of film and your digital camera at its neutral settings, and then use the eyedroppers in the curve tool to nail down the curves so they exactly recreate the color and tonal response of the films. Indeed, this is the approach a few quite high-quality commercial packages appear to have taken: I gave Alien Skin Exposure a try, for example, and it appears to work quite well. It just wasn't exactly what I was looking for.

Chauri herders in Helambu region, Nepal. Vivitar 35-105/3.5 on Kodachrome 64.
The only real trouble with this approach is that it makes some pretty big assumptions -- that your digital originals are always shot at the same settings, and that your film reference shot accurately represents the experience you get from viewing real-life film images. At least in my case, neither holds true: I use and have used a variety of digital cameras with different imaging characteristics, and my experiences of the film images have been affected by a great many things, from the slide projector and screen I used to look at slides, the choices made at the lab (or by myself) to create prints, or, lately, the processing I've done on film scans in the digital darkroom. Most of these are entirely subjective. Therefore, this is more a matter of emotion than science . That's why I set out to create the film curves with little more than a smattering of ideas on how films are supposed to behave -- and a vague idea in my head about what kind of look I was after.

Doug with an ember in his mouth. Canon EF 35/2.0 on EOS-10D, straight conversion from RAW with Raw Shooter Premium and Color Engine. You will see variants of this picture later in the article...
Cross-Process
Gross effects are usually simpler to fake than subtle ones, simply because there's more margin for error. Therefore, my first excursion into simulating film effects with curves was into everybody's favorite 1980's trope, cross-processing E-6 slide film in a C-41 neg process. I also started with it because there was most help to be found on the Net -- complete recipes, even.
Pirate and children. Sigma EX 12-24/4.5-5.6 on EOS-10D. Straight conversion from Raw Shooter Premium, followed by applying "cross-process" curve and a touch of yellow photo filter effect.
Cross-processing basically dramatically increases contrast and makes the colors go all wonky, generally a mix of yellowish and bluish tones. So, what I did was flatten out contrast in the blue channel, cheerfully blow out the red channel, and apply a pretty steep S-curve to the green channel. I tweaked it for a few hours, watching the colors respond to the changes, and got a lot further in getting a feel for how the technique works.

Doug hit with the cross-process curve.
Velviaesque
Next, I tried something else -- a film stock I've never actually liked that much, because for most things both the color and the contrast are too over-the-top for my taste: Velviaesque. Velvia is known for its incredibly rich emerald greens and overall high saturation and contrast. I wanted to recreate this without giving the picture an overall green tint, and keeping skin tones at least marginally believable (even though they never were a forte of Velvia). After a quite a bit of experimentation and some feedback from people on DPReview, I ended up with a pretty steep S-curve in all channels, steepest in the blue and shallowest in the red, with blue leading especially in the shadow range. The apparent strength of the effect depends a lot on your source picture -- if it's a low-contrast, drab-looking picture, the effect is almost subtle, whereas if it starts out colorful or saturated, it's pretty wildly over the top. I find I get quite good control over the effect simply by using it in an adjustment layer and adjusting opacity; if I want even more of it, I duplicate the adjustment layer and adjust opacity on that.
Joanna with cat. Minolta Dimage 7i, with Velviaesque curve applied.
Proviaesque
Once I had got Velviaesque down, I went for something more subtle, and therefore more difficult: I tried to recreate the look of my favorite slide film, Fujichrome Provia. I associate the Provia look with a hard-to-describe cool and translucent quality, rich high mid-tones, and rich yet not overcooked blues.
Yet Somebody Loves Me. Canon EF 35/2.0 with EOS-5D. Straight conversion (more or less) from Raw Shooter Premium, with Proviaesque curve applied.
After some experimentation, I ended up with something I quite liked and that appeared to work nicely on a variety of photos I hit it with. It involved a very mild S curve in the red channel, a slightly stronger and slightly pulled-up one in green, and a moderate one with fairly contrasty midtones in the blue channel. The overall effect could be described as "clarifying" -- a slightly cooler, visibly contrastier look with emphasized blues. You probably won't notice anything strange if you see a photo with it applied -- but the difference is actually quite pronounced if you see the original next to it.

Doug enhanced with the Proviaesque curve.
Portraesque
My final attempt was to recreate the look of color negative film. I named this one Portraesque, after my favorite type of film for this sort of thing, Kodak Portra NC400. I wanted a gentler roll-off in the highlights, a bit more contrast in the shadows, and an overall slightly warmer tone: something to make skin tones just a little bit nicer than nature.
Posterestaurant 10. Rollei AF-M 35 on Kodak Portra 400NC.
I ended up with a red channel pulled up just a hair in the highlights, a green channel with a very mild S-curve in it, a blue channel with a mild inverted S-curve, and the RGB curve pulled down a bit in the toe and pulled up in the high midtones. The overall effect is an increase in contrast, a brightening of the high midtones, and a slightly warmer look. It looks best on people pictures.

Doug looking all negative.
Black and white films
To recreate the look and feel of black and white films on digital, you have to consider two separate questions: spectral response and tone curve. Fortunately, wiser heads than mine have pondered the former, and come up with a quite a few simple recipes that do the former. For example, set the R, G, and B channels to the following values with the Monochrome box checked to emulate these films:| Agfa 200X | 18,41,41 |
|---|---|
| Agfapan 25 | 25,39,36 |
| Agfapan 100 | 21,40,39 |
| Agfapan 400 | 20,41,39 |
| Ilford Delta 100 | 21,42,37 |
| Ilford Delta 400 | 22,42,36 |
| Ilford Delta 400 Pro & 3200 | 31,36,33 |
| Ilford FP4 | 28,41,31 |
| Ilford HP5 | 23,37,40 |
| Ilford Pan F | 33,36,31 |
| Ilford SFX | 36,31,33 |
| Ilford XP2 Super | 21,42,37 |
| Kodak Tmax 100 | 24,37,39 |
| Kodak Tmax 400 | 27,36,37 |
| Kodak Tri-X | 25,35,40 |

Carousel. Canon EF 50/1.8 on EOS-5D. I did a quite a lot of work to get to this rendition. Simulating a film may have had some role in the process, but very little really. It's like that with most of my B/W photos.
At this point, I would love to tell you that I've discovered the RGB curve that accurately represents the tonal response of each of these films. I could do that, but I'd be lying. In actual fact, I still use more or less the techniques I describe in my Digital Black and White article to handle tonality -- or, not infrequently, apply the channel mixer on top of one of the above-described color film effects. Printing from black and white always was all about darkroom magic anyway; there really is no single "right" tone curve out there to simulate.
Film grain and its uses
I describe a simple technique for applying film grain in my article on Digital Black and White. All you have to do is apply a layer of scanned film grain onto your image in Overlay mode. I still haven't discovered a better way to simulate film grain in digital processing; however, I have tweaked the technique slightly. The film grain layers I use nowadays have been adjusted to average out at 50% gray, which means they will not affect the tonality of the underlying image. I also use a few different versions for different uses; coarser for a grainy high-ISO look, and superfine for on-screen display only.See below for samples of the grain fields I use nowadays. Feel free to download and do whatever you like with them.

Pastoral in Black and White. Minolta Dimage 7i, with Tri-X recipe applied in the channel mixer, and hit with a coarse grain field. I thought it made the distance look more interesting.
Adding grain to an image may seem like an affectation more than a serious photo processing tool. It can be that, although it is an affectation that can work quite well with the right kind of picture. However, grain also has some "legitimate" uses -- that is, situations in which adding grain will improve the overall look of the picture whether you actually like a grainy look or not.
The first such situation is using grain as a dither. When you do tone curve manipulations, smooth gradients such as the sky tend to develop posterization -- visible banding in the gradient from light to dark. An effective way to combat posterization is to add noise to the gradient you're manipulating. Grain is just a special kind of noise -- it's just somewhat more attractive than random or Gaussian noise you can add with Photoshop filters. So, if you have a banding problem, you might want to drop in a grain field in Overlay mode, and see if it makes things any better.

Faces. Sony DSC-V3 at ISO800, pushed a stop in post-processing and hit with the Portraesque curve, grain used to mask digital noise.
The second such situation is masking digital noise. Grain may be noise, but it's a nicer kind of noise than the chromatic stuff you get off a digital sensor. Simply overlaying a grain field on a high-ISO digital photo will usually make it look better. If you do the following procedure to reduce chromatic (color) noise on the picture first, the results are even better -- I get quite usable ISO800-1600 photos from my point-and-shoots this way, and have experimentally gone up to ISO12800 with my digital SLR:
- Duplicate background layer.
- Apply Smart Blur to the top layer, radius 25, threshold 25 (adjust these so that noise gets completely smoothed out, but outlines are preserved, more or less).
- Set blend mode to Color on the top layer.


Grain fields, normalized to average out at 50% gray, at four different degrees of coarseness. To make your own, just clone enough of the grain field to cover your photo. I've saved the big grain fields in their own files to save time.
Why Bother?
As I've been messing with these techniques, I've also had to deal with some nagging thoughts about the point of the whole exercise. I find myself liking the results of these experiments a quite a lot, yet it goes against a principle I've sometimes even stated -- that is, that every picture should be considered on its own merits, irrespective of the way it was taken, and processing should respect the integrity of the photographic process. What I've been doing here gets rather close to fakery -- trying to make something (a digital capture) appear to be something it isn't (a film frame). I don't feel entirely comfortable doing this kind of thing, even if does not violate even the very strict ethical rules that apply to journalistic photography.
Long way from the Volga. Canon EF 50/1.8 on EOS-5D. The neg-like look of the Portraesque curve whispers "documentary photography." At least it does that to me.
In the end, our appreciations and perceptions have been formed by the pictures we have seen. Certain types of visual cues have become associated with certain types of pictures. Perhaps there is nothing genuinely nicer about film-like curves or film grain and it's all a matter of what we're used to seeing. Yet these cues, and our reactions to them, remain. These cues are a part of photographic language as well. We may use this language honestly or dishonestly. It all depends on the image.

Saturday Morning. Canon EF 50/1.8 on EOS-5D, straight conversion from RSP, with "Portraesque" curve applied.
==== MA THE ROLL FILM REALITY FROM NEGATIVE UNTIL POSITIVE MATIC ====
Tidak ada komentar:
Posting Komentar